
Savory Cheesy Taco Sticks Recipe: Crispy Fiesta Bites
Craving a mouthwatering cheesy taco sticks snack that combines crispy textures with bold flavors?
Cheese lovers will adore this simple yet spectacular finger food perfect for game nights or casual gatherings.
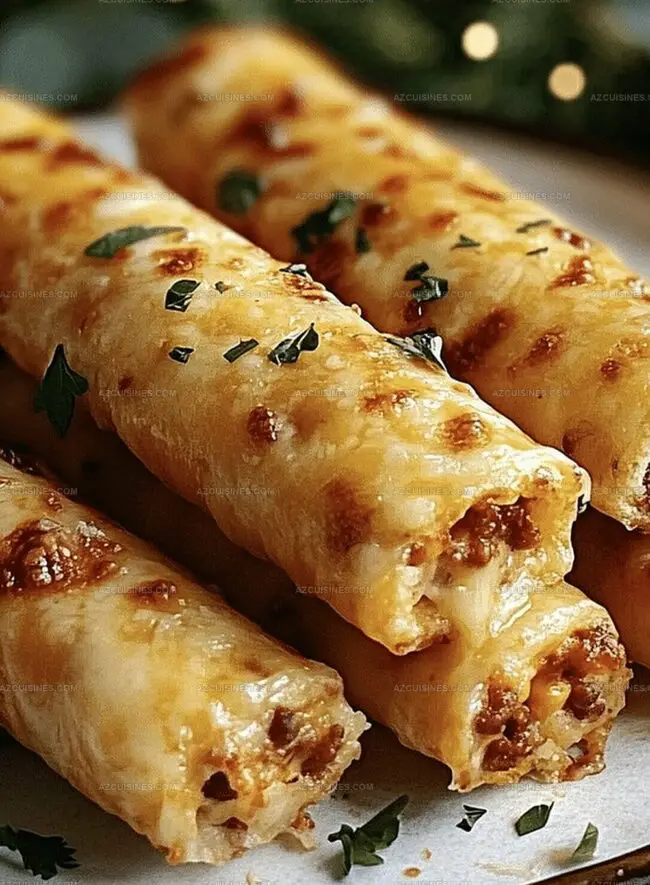
Wrapped in golden pastry, these delectable bites pack a punch of zesty Mexican-inspired seasonings.
Melted cheese oozes from inside each crisp stick, creating an irresistible treat you cannot resist.
Kids and adults alike will devour these handheld delights faster than you can plate them.
Surprisingly easy to prepare, these taco sticks require minimal ingredients and deliver maximum satisfaction.
Just wait until you see how quickly they disappear from the serving platter!
What Makes Cheesy Taco Sticks So Addictive
Ingredients to Craft Cheesy Taco Sticks
For the Meat Base:For the Dough:For the Cheese and Dairy:For the Flavor Enhancers:For the Finishing Touches:How to Make Cheesy Taco Sticks with Ease

Step 1: Warm Up the Oven
Fire up your oven to a toasty 375°F. Line a baking sheet with parchment paper for super easy cleanup and zero sticking drama.
Step 2: Brown the Beef
Sizzle ground beef in a skillet over medium-high heat. Break it into tiny crumbles until no pink remains, cooking for about 7-8 minutes.
Step 3: Spice Up the Meat
Drain any extra fat from the beef. Stir in taco seasoning, letting those spicy flavors dance through the meat for 2-3 minutes.
Step 4: Prepare the Dough Canvas
Roll out pizza dough or crescent roll dough on a clean surface. Stretch it into a smooth rectangular shape with even thickness.
Step 5: Creamy Foundation
Spread a luxurious layer of sour cream across the dough. Leave a small border around the edges to prevent any sneaky leaks.
Step 6: Beef Layer Magic
Distribute the seasoned beef evenly over the sour cream. Make sure every inch gets some meaty goodness.
Step 7: Cheese and Toppings Explosion
Sprinkle your toppings with enthusiasm:Step 8: Roll It Up
Carefully roll the dough into a tight log. Pinch the edges to seal in all those delicious fillings.
Step 9: Slice and Dice
Cut the log into 1-inch thick segments, creating perfect little taco sticks.
Step 10: Baking Preparation
Arrange the taco sticks on the baking sheet. Give them some breathing room for even cooking.
Step 11: Final Flavor Boost
Brush the tops with olive oil. Sprinkle extra:Step 12: Bake to Perfection
Slide the baking sheet into the oven. Bake for 12-15 minutes until the dough turns golden and the cheese melts completely.
Step 13: Cool and Serve
Let the taco sticks rest for 3-4 minutes. This helps the filling set and prevents mouth-burning mishaps. Enjoy your crispy, cheesy, flavor-packed snack!
Handy Tips for Cheesy Taco Sticks
Flavor Swaps for Cheesy Taco Sticks
What Goes Great with Cheesy Taco Sticks
Storage Guide for Cheesy Taco Sticks
Cheesy Taco Sticks – Your Questions Answered
Yes, ground turkey is an excellent lean alternative. Simply follow the same cooking method and seasoning process for a healthier version of the taco sticks.
No, you only need basic kitchen tools like a skillet, baking sheet, parchment paper, and a knife for slicing. Most home cooks already have these items.
Absolutely! Kids love these handheld taco sticks. They’re easy to eat, have familiar flavors, and can be customized with mild seasonings to suit children’s tastes.
Print
Cheesy Taco Sticks Recipe
- Total Time: 35 minutes
- Yield: 4 1x
Description
Crispy cheesy taco sticks blend Mexican-inspired flavors with irresistible handheld comfort. Melted cheese, seasoned ground beef, and zesty spices create a crowd-pleasing snack you’ll crave again and again.
Ingredients
Main Ingredients:
- 2 cups ground beef
- 1 packet taco seasoning
- 2 cups shredded cheddar cheese
- 1 package pizza dough or crescent roll dough
Binding/Filling Ingredients:
- 1/4 cup sour cream
- 2 tbsp chopped green onions
- 1/4 cup salsa
Garnish/Topping Ingredients:
- 1 tbsp olive oil
- 1 tsp dried parsley
- 1/4 cup additional shredded cheese for topping
Instructions
- Preheat the oven to 375°F and line a baking sheet with parchment paper to ensure easy cleanup and prevent sticking.
- In a skillet, brown the ground beef over medium-high heat, breaking it into small crumbles until no pink remains, approximately 7-8 minutes.
- Drain any excess fat from the beef and stir in the taco seasoning, coating the meat thoroughly and allowing the spices to meld for 2-3 minutes.
- Roll out the pizza dough or crescent roll dough on a clean surface, creating a rectangular shape with even thickness.
- Spread sour cream across the dough’s surface, leaving a small border around the edges to prevent leakage during baking.
- Distribute the seasoned ground beef evenly over the sour cream layer, ensuring consistent coverage.
- Sprinkle shredded cheddar cheese across the beef, followed by a layer of chopped green onions and salsa.
- Carefully roll the dough into a tight log, sealing the edges by pinching them together to contain the filling.
- Slice the log into 1-inch thick segments, creating individual taco sticks.
- Arrange the taco sticks on the prepared baking sheet, leaving space between each piece for even cooking.
- Brush the tops with olive oil and sprinkle additional shredded cheese and dried parsley for enhanced flavor and visual appeal.
- Bake in the preheated oven for 12-15 minutes, or until the dough turns golden brown and the cheese melts completely.
- Remove from the oven and let cool for 3-4 minutes before serving to allow the filling to set and prevent burning.
Notes
- Customize the meat by using ground turkey or plant-based crumbles for a lighter, healthier alternative that still packs incredible flavor.
- Prevent soggy bottoms by patting ground beef dry before seasoning and ensure minimal liquid remains in the skillet during cooking.
- Experiment with cheese varieties like pepper jack, monterey jack, or a mexican cheese blend to add exciting depth and complexity to the taco sticks.
- Maximize flavor by adding a sprinkle of smoked paprika or chipotle powder into the taco seasoning for an extra kick of smoky heat.
- Prep Time: 20 minutes
- Cook Time: 15 minutes
- Category: Snacks, Appetizer
- Method: Baking
- Cuisine: Mexican
Nutrition
- Serving Size: 4
- Calories: 450
- Sugar: 2g
- Sodium: 800mg
- Fat: 25g
- Saturated Fat: 10g
- Unsaturated Fat: 12g
- Trans Fat: 0g
- Carbohydrates: 35g
- Fiber: 1g
- Protein: 22g
- Cholesterol: 70mg
Truc Tran (Kris)
Senior Food Editor
Expertise
Home Cooking, Meal Planning, Recipe Development, Baking and Pastry, Food Editor, Cooking-video Maker, Vietnamese Food Evaluation Expert
Education
Truc Tran (Kris), an experienced food writer and editor, is great at exploring and describing global cuisines, from simple street food to fancy dining. In her writing, she skillfully mixes different flavors, cooking methods, and culinary traditions, showing the unique character of various cultures through their food and drinks. On azcuisines.com, Kris highlights her knowledge, especially in Asian cuisine and worldwide traditional dishes.