
Cozy Cherry Berry Skillet Crisp Recipe: Sweet Summer Magic
Sweet summer memories dance through this cherry berry skillet crisp that brings incredible warmth to your kitchen.
Ripe fruit bursts with intense flavor, promising a delightful dessert experience.
Juicy cherries and mixed berries create a vibrant palette of colors and textures.
Skilled bakers know how simple ingredients can become magical when combined thoughtfully.
Cast iron skillets help develop a perfect golden-brown crust that crackles with each spoonful.
Rustic charm meets elegant dessert in this straightforward recipe perfect for casual gatherings.
Prepare to savor every delicious bite of this irresistible skillet treat.
Why Buttery Cherry Berry Skillet Crisp Is A Dream Dessert
What’s Inside Cherry Berry Skillet Crisp
Fruits:Fruit Enhancers:Crisp Topping:How To Make Buttery Cherry Berry Skillet Crisp
Step 1: Warm Up the Oven
Fire up your oven to a toasty 375°F and lightly grease a 10-inch cast-iron skillet with a gentle swipe of oil or butter.
Step 2: Prepare Fruit Fusion
In a large mixing bowl, tumble together:Gently toss until every fruit piece gets a delicious, even coating.
Step 3: Spread the Fruity Base
Pour the vibrant fruit mixture into the prepared skillet, creating an even, colorful layer that promises deliciousness.
Step 4: Mix the Crispy Topping
In a separate bowl, combine:Step 5: Create Crumbly Magic
Drop in cold cubed butter and use your fingertips to work the butter into the dry ingredients. Keep mixing until the mixture looks like rustic, coarse breadcrumbs.
Step 6: Crown the Fruit
Sprinkle the crumbly topping generously over the fruit, making sure every inch gets covered with the crispy goodness.
Step 7: Bake to Perfection
Slide the skillet into the preheated oven and bake for 35-40 minutes. Watch for a golden-brown topping and bubbling fruit edges signaling it’s ready.
Step 8: Cool and Set
Pull the skillet out and let the crisp rest for 15 minutes. This helps the filling set and prevents potential tongue burns.
Step 9: Serve and Enjoy
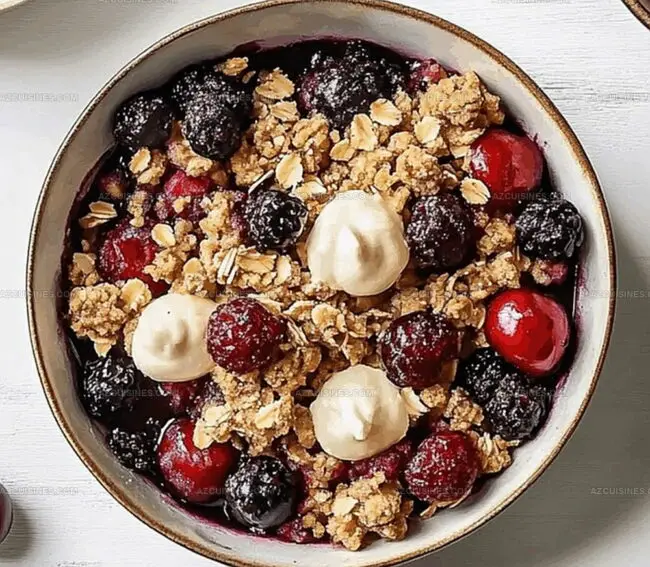
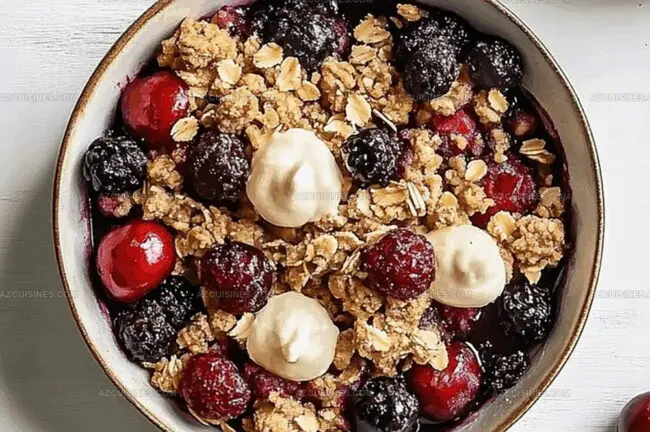
Dish out warm servings, optionally crowned with a scoop of vanilla ice cream or a dollop of whipped cream for pure dessert bliss.
Simple Tips For Cherry Berry Skillet Crisp
Different Ways To Enjoy Cherry Berry Skillet Crisp
What Goes Well With Cherry Berry Skillet Crisp
How To Store Cherry Berry Skillet Crisp With Ease
FAQs For Cherry Berry Skillet Crisp Lovers
Yes, you can use frozen cherries and mixed berries. Just thaw and drain excess liquid before mixing with other ingredients to prevent a watery filling.
The topping should look like coarse, crumbly breadcrumbs with small butter pieces visible. When squeezed gently, it should slightly hold together.
While a cast-iron skillet provides excellent heat distribution, you can substitute with a similar-sized baking dish or oven-safe pan. Just ensure it has comparable depth and width.
Absolutely! You can prepare the fruit mixture and crisp topping separately, refrigerate, and assemble just before baking.
Print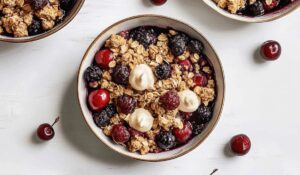
Cherry Berry Skillet Crisp Recipe
- Total Time: 50-55 minutes
- Yield: 8 1x
Description
Homemade cherry berry skillet crisp delivers sweet summer magic straight from grandma’s kitchen. Warm spices and golden crumble invite passionate bakers to savor each delightful, rustic bite.
Ingredients
Fruits:
- 2 cups cherries, pitted
- 1 cup mixed berries (strawberries, blueberries, raspberries)
- 1/4 cup lemon juice
Crisp Topping:
- 1 cup all-purpose flour
- 3/4 cup rolled oats
- 1/2 cup brown sugar
- 1/2 cup unsalted butter, cold and cubed
- 1 tsp ground cinnamon
- 1/4 tsp salt
Finishing Ingredients:
- 2 tbsp granulated sugar
- 1 tsp vanilla extract
- 2 tbsp cornstarch
Instructions
- Preheat the oven to 375°F and prepare a 10-inch cast-iron skillet by lightly greasing its surface.
- Combine cherries, mixed berries, lemon juice, granulated sugar, vanilla extract, and cornstarch in a mixing bowl, gently tossing until fruits are evenly coated.
- Transfer the fruit mixture into the prepared skillet, spreading it in an even layer.
- Create the crisp topping by mixing flour, rolled oats, brown sugar, cinnamon, and salt in a separate bowl.
- Add cold cubed butter to the dry ingredients, using fingertips to work the butter into the mixture until it resembles coarse, crumbly breadcrumbs.
- Sprinkle the crisp topping evenly over the fruit mixture, ensuring complete coverage.
- Place the skillet in the preheated oven and bake for 35-40 minutes, or until the topping turns golden brown and the fruit filling bubbles around the edges.
- Remove from the oven and allow the crisp to cool for 15 minutes, which helps the filling set and prevents burning.
- Serve warm, optionally topped with vanilla ice cream or whipped cream for an extra indulgent dessert experience.
Notes
- Opt for seasonal, ripe cherries and mixed berries to enhance the natural sweetness and depth of flavor in the crisp.
- Use cold butter and work quickly when making the topping to achieve a perfectly crumbly, flaky texture that doesn’t become dense.
- Consider substituting gluten-free flour and certified gluten-free oats for those with gluten sensitivities, maintaining the crisp’s delightful crunch.
- Allow the crisp to rest after baking, which helps thicken the fruit filling and prevents burning, creating a more cohesive and appealing dessert.
- Prep Time: 15 minutes
- Cook Time: 35-40 minutes
- Category: Desserts, Snacks
- Method: Baking
- Cuisine: American
Nutrition
- Serving Size: 8
- Calories: 250
- Sugar: 16 g
- Sodium: 95 mg
- Fat: 12 g
- Saturated Fat: 7 g
- Unsaturated Fat: 4 g
- Trans Fat: 0 g
- Carbohydrates: 36 g
- Fiber: 3 g
- Protein: 3 g
- Cholesterol: 30 mg
Truc Tran (Kris)
Senior Food Editor
Expertise
Home Cooking, Meal Planning, Recipe Development, Baking and Pastry, Food Editor, Cooking-video Maker, Vietnamese Food Evaluation Expert
Education
Truc Tran (Kris), an experienced food writer and editor, is great at exploring and describing global cuisines, from simple street food to fancy dining. In her writing, she skillfully mixes different flavors, cooking methods, and culinary traditions, showing the unique character of various cultures through their food and drinks. On azcuisines.com, Kris highlights her knowledge, especially in Asian cuisine and worldwide traditional dishes.