
The Sweetest Cherry Cheesecake Cups Recipe for Any Occasion
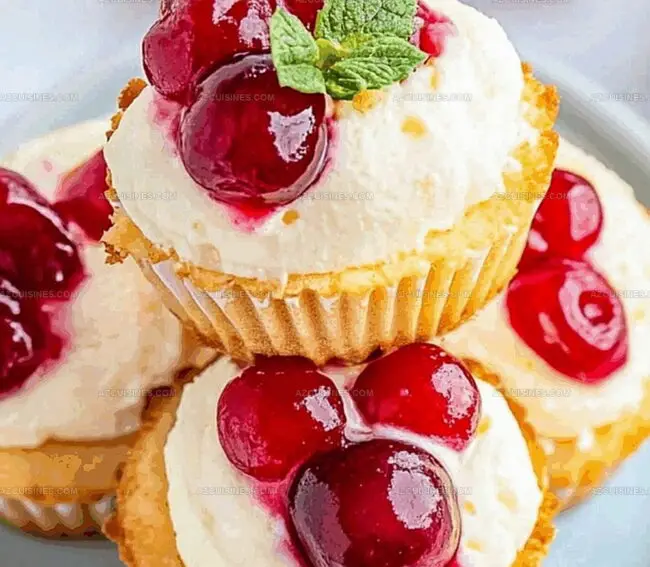
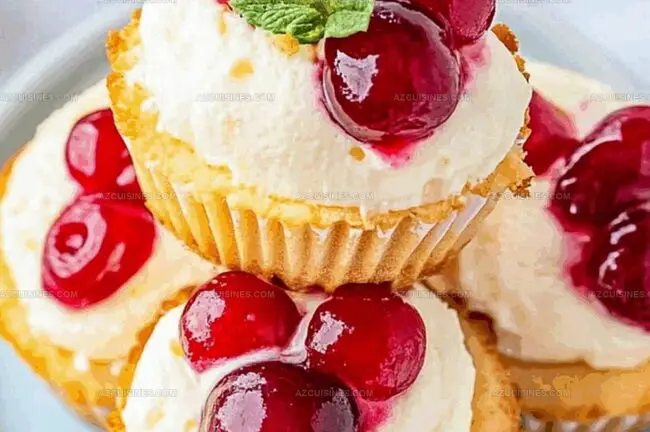
Creamy cherry cheesecake cups blend decadent flavors into bite-sized delights that promise pure indulgence.
Miniature desserts pack intense taste without overwhelming your sweet tooth.
Soft cream cheese mingles with tart cherries, creating a perfect balance of richness.
Delicate graham cracker crusts provide a satisfying crunch beneath silky smooth filling.
Each small cup delivers an elegant dessert experience you can easily prepare at home.
Minimal ingredients and simple steps make these treats ideal for spontaneous gatherings or quiet weekend treats.
Savor every spoonful and watch these little cups disappear in moments.
Why Cherry Cheesecake Cups Are So Fun And Simple
What’s Inside Cherry Cheesecake Cups
Crust Base:Cheesecake Filling:Cherry Topping:Steps To Make Cherry Cheesecake Cups Easily
Step 1: Create Crunchy Graham Base
Grab a muffin tin and line it with paper cups. Mix graham cracker crumbs with melted butter until it resembles wet sand. Press this mixture firmly into the bottom of each liner, creating a solid foundation for your cheesecake bites.
Step 2: Whip Creamy Cheesecake Filling
In a large bowl, beat cream cheese until it becomes smooth and velvety. Add ingredients in this order:Blend until the mixture looks silky and free of any lumps.
Step 3: Incorporate Eggs and Flavor
Crack eggs into the cream cheese mixture one at a time, mixing thoroughly after each addition. Gently fold in:Stir carefully to keep the batter light and airy.
Step 4: Fill and Bake
Pour the cheesecake batter into prepared crusts, filling each cup about three-quarters full. Slide the muffin tin into an oven preheated to 325°F. Bake for 18-22 minutes until centers are almost set but still have a gentle jiggle.
Step 5: Cool and Set
Remove cheesecake bites from the oven and let them cool at room temperature for 30 minutes. Transfer to the refrigerator and chill for at least 2 hours to firm up completely.
Step 6: Create Luscious Cherry Topping
In a small saucepan, warm cherry preserves with fresh cherries until the mixture thickens slightly. Let it cool just enough to remain warm but not hot.
Step 7: Garnish and Serve
Spoon the warm cherry topping generously over each chilled cheesecake bite. Serve immediately and watch everyone’s eyes light up with delight!
Helpful Notes For Cherry Cheesecake Cups
Tasty Variations Of Cherry Cheesecake Cups
Perfect Pairings With Cherry Cheesecake Cups
How To Store Cherry Cheesecake Cups Right
Cherry Cheesecake Cups FAQ You’ll Want To Read
The crust is made by melting butter and mixing it with graham cracker crumbs, then pressing firmly into each liner to create a compact, sturdy base that provides a delicious, crunchy foundation for the creamy cheesecake.
Beat the cream cheese until completely smooth and creamy, eliminating any lumps. Gradually add other ingredients like sugar and cream, stirring thoroughly to create a silky, uniform batter without overmixing.
Adding eggs individually and mixing thoroughly after each addition helps maintain a consistent batter structure, preventing lumps and ensuring a smooth, even texture throughout the cheesecake cups.
Print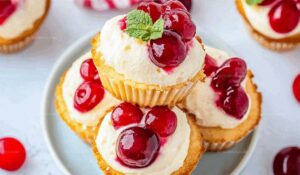
Cherry Cheesecake Cups Recipe
- Total Time: 2 hours 52 minutes
- Yield: 8 1x
Description
Delightful Cherry Cheesecake Cups bring creamy indulgence and sweet-tart charm to dessert lovers seeking a perfect handheld treat. Silky cream cheese nestles beneath luscious cherry topping, promising a blissful moment of pure culinary joy you won’t want to miss.
Ingredients
Dairy:
- 16 oz cream cheese
- 1/2 cup sour cream
- 1/4 cup heavy cream
Fruits and Sweet Ingredients:
- 2 cups fresh cherries
- 1/2 cup cherry preserves
- 3/4 cup granulated sugar
- 1 tsp vanilla extract
Dry and Base Ingredients:
- 1 1/2 cups graham cracker crumbs
- 4 tbsp unsalted butter
- 2 large eggs
- 2 tbsp all-purpose flour
- 1 pinch salt
Instructions
- Preheat the oven to 325°F and line a muffin tin with paper liners, ensuring even spacing for uniform cheesecake cups.
- Melt butter and combine with graham cracker crumbs, pressing the mixture firmly into the bottom of each liner to create a compact, sturdy base.
- Beat cream cheese in a large mixing bowl until smooth and creamy, eliminating any potential lumps for a silky texture.
- Gradually incorporate sugar, sour cream, and heavy cream into the cream cheese mixture, stirring until completely integrated and uniformly blended.
- Add eggs one at a time, mixing thoroughly after each addition to maintain a consistent batter structure.
- Fold in flour, vanilla extract, and salt, gently stirring to distribute ingredients evenly without overmixing.
- Pour cheesecake batter into prepared graham cracker crusts, filling each cup approximately 3/4 full.
- Bake for 18-22 minutes, or until centers are almost set but still slightly jiggly when gently shaken.
- Remove from oven and allow cheesecake cups to cool completely at room temperature for about 30 minutes.
- While cooling, prepare cherry topping by gently heating cherry preserves and fresh cherries in a small saucepan until slightly thickened.
- Once cooled, refrigerate cheesecake cups for at least 2 hours to set completely.
- Before serving, generously spoon warm cherry topping over each chilled cheesecake cup.
Notes
- Check cream cheese temperature to ensure smooth blending without lumps at room temperature for about 30 minutes before starting.
- Press graham cracker crust firmly and evenly to create a stable base that prevents crumbling when biting into the cheesecake cup.
- Use a water bath technique to prevent cracking by placing the muffin tin in a larger pan filled with hot water during baking for more even heat distribution.
- Substitute graham crackers with gluten-free alternatives like almond flour or crushed gluten-free cookies for those with dietary restrictions, maintaining the same crumbly texture.
- Prep Time: 30 minutes
- Cook Time: 22 minutes
- Category: Desserts, Snacks
- Method: Baking
- Cuisine: American
Nutrition
- Serving Size: 8
- Calories: 335
- Sugar: 27 g
- Sodium: 145 mg
- Fat: 20 g
- Saturated Fat: 10 g
- Unsaturated Fat: 8 g
- Trans Fat: 0 g
- Carbohydrates: 30 g
- Fiber: 1 g
- Protein: 4 g
- Cholesterol: 70 mg
Truc Tran (Kris)
Senior Food Editor
Expertise
Home Cooking, Meal Planning, Recipe Development, Baking and Pastry, Food Editor, Cooking-video Maker, Vietnamese Food Evaluation Expert
Education
Truc Tran (Kris), an experienced food writer and editor, is great at exploring and describing global cuisines, from simple street food to fancy dining. In her writing, she skillfully mixes different flavors, cooking methods, and culinary traditions, showing the unique character of various cultures through their food and drinks. On azcuisines.com, Kris highlights her knowledge, especially in Asian cuisine and worldwide traditional dishes.