Homemade Cherry Pie Bars Recipe: Irresistibly Sweet & Tangy Treats
Sweet summer memories flood back when I crafted these delectable cherry pie bars that promise pure delight.
Memories of grandma’s kitchen sparked this recipe’s creation.
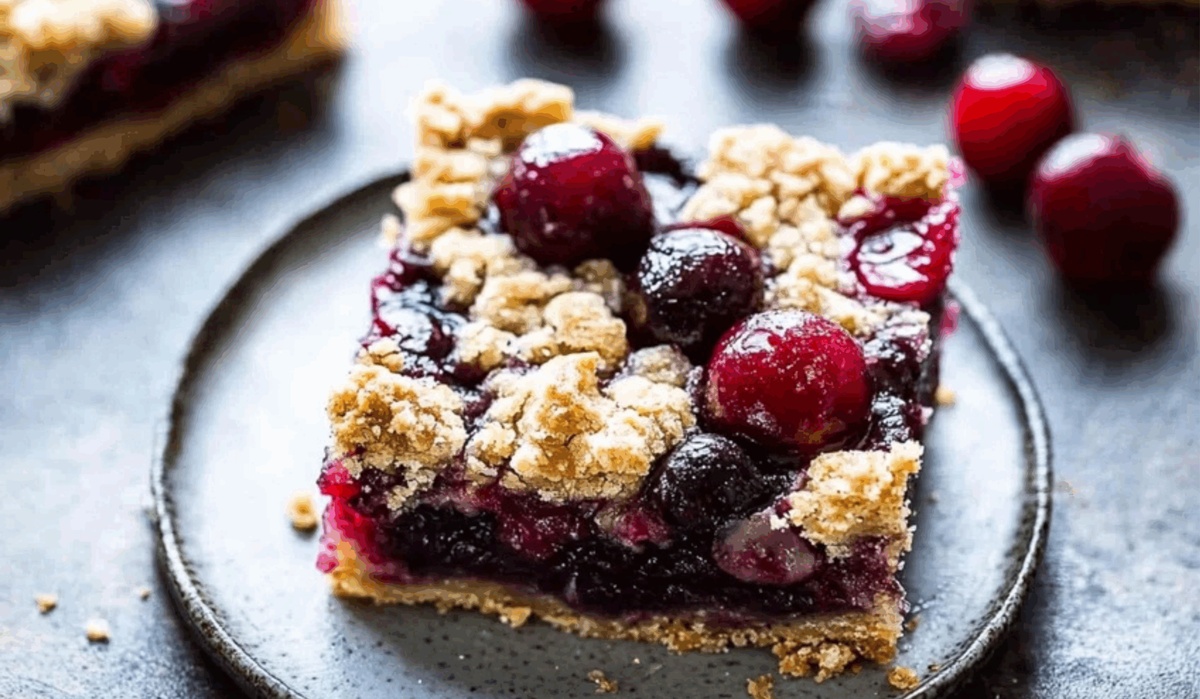
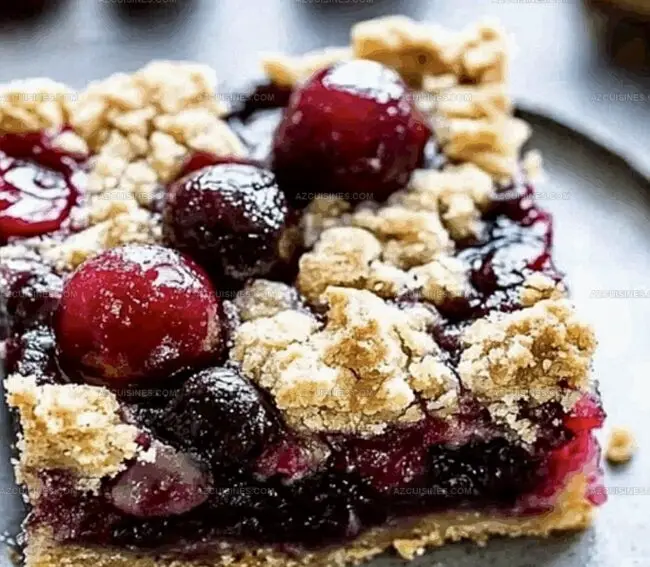
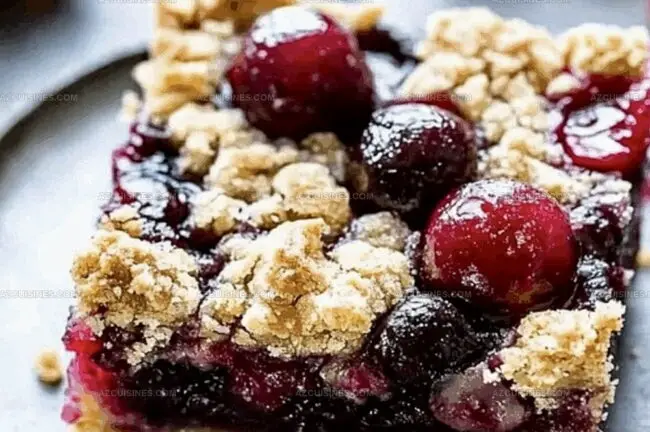
Bursting with juicy cherries and a buttery crumbly crust, these bars blend nostalgia with irresistible flavor.
Tart and sweet notes dance across your palate with each incredible bite.
Simple ingredients transform into a dessert that feels both rustic and elegant.
Soft, golden layers melt in your mouth, creating a symphony of textures.
You’ll want to savor every single crumb of this classic treat.
Sweet Reasons to Make Cherry Pie Bars
Cherry Pie Bar Ingredients You’ll Need
Crust Ingredients:Fruit Filling Ingredients:Crumble Topping Ingredients:How to Make Cherry Pie Bars from Scratch
Step 1: Prepare Baking Setup
Preheat the oven to 350°F. Line a 9×13-inch baking pan with parchment paper, ensuring extra paper hangs over the sides for easy removal later.
Step 2: Make Pie Crust Dough
Grab a mixing bowl and combine:Cut in cold butter using a pastry cutter until the mixture looks like rough, sandy crumbs. Add an egg and mix until the dough holds together smoothly.
Step 3: Form Crust Base
Press the dough evenly into the prepared baking pan. Use your fingers to create a compact, smooth bottom layer that covers the entire pan surface.
Step 4: Prepare Cherry Filling
Pit and halve fresh cherries. In a separate bowl, toss the cherries with:Ensure all cherries are thoroughly coated with the sweet mixture.
Step 5: Spread Cherry Layer
Distribute the cherry mixture uniformly across the prepared crust. Spread carefully to cover the entire surface evenly.
Step 6: Create Crumble Topping
In another bowl, blend:Mix until the ingredients form a loose, sandy texture that will become a delightful crumbly top.
Step 7: Add Crumble Topping
Sprinkle the crumble mixture generously over the cherry layer. Aim to cover most of the fruit with the sweet, crunchy topping.
Step 8: Bake to Golden Perfection
Slide the pan into the preheated oven. Bake for 45-50 minutes until the top turns a beautiful golden brown and the cherry filling bubbles around the edges.
Step 9: Cool and Rest
Remove the pan from the oven. Let the bars cool completely in the pan for about one hour, allowing the filling to set and flavors to meld.
Step 10: Serve and Enjoy
Lift the bars out using the parchment paper overhang. Dust with powdered sugar, slice into squares, and serve these delectable cherry pie bars to eager guests.
Tips to Nail Your Cherry Pie Bars
Variations to Make Cherry Pie Bars Your Own
Great Pairings for Cherry Pie Bars
The Best Way to Store Cherry Pie Bars
Cherry Pie Bar FAQ You’ll Want to Read
Yes, you can use frozen cherries. Thaw and drain them completely before mixing with sugar and other filling ingredients to prevent excess moisture.
Look for a golden brown crumble topping and bubbling cherry filling around the edges. The bars should be set but still slightly soft when touched.
Add a tiny bit more cold butter or a teaspoon of cold water to help the dough bind together more effectively during mixing.
Yes, pitting cherries ensures a smoother texture and prevents biting into hard cherry pits while enjoying the bars.
Print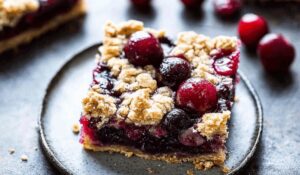
Cherry Pie Bars Recipe
- Total Time: 1 hour 30 minutes
- Yield: 12 1x
Description
Sweet cherry pie bars bring classic American dessert comfort to handheld perfection. Buttery crumble layers and rich fruit filling create an irresistible treat you’ll crave with morning coffee or evening relaxation.
Ingredients
Pie Crust:
- 2 cups all-purpose flour
- 1/2 cup granulated sugar
- 1/2 cup unsalted butter
- 1/4 tsp salt
- 1 large egg
Cherry Filling:
- 4 cups fresh cherries
- 1/2 cup granulated sugar
- 3 tbsp cornstarch
- 1 tbsp lemon juice
- 1/4 tsp almond extract
Topping:
- 1/2 cup all-purpose flour
- 1/4 cup brown sugar
- 1/4 cup unsalted butter
- 1/4 tsp ground cinnamon
- 2 tbsp powdered sugar (for dusting)
Instructions
- Preheat the oven to 350°F and line a 9×13-inch baking pan with parchment paper, allowing overhang for easy removal.
- Create the pie crust by combining flour, sugar, and salt in a mixing bowl, then cut in cold butter until the mixture resembles coarse crumbs.
- Mix in the egg until the dough comes together, then press evenly into the prepared baking pan, creating a smooth, compact base.
- Prepare the cherry filling by pitting and halving fresh cherries, then tossing with sugar, cornstarch, lemon juice, and almond extract until thoroughly coated.
- Spread the cherry mixture uniformly over the prepared crust, ensuring even distribution.
- For the crumble topping, blend flour, brown sugar, butter, and cinnamon in a separate bowl until it forms a loose, sandy texture.
- Sprinkle the crumble topping generously and evenly over the cherry layer, covering most of the fruit.
- Bake for 45-50 minutes, or until the top turns golden brown and the cherry filling bubbles around the edges.
- Remove from the oven and allow to cool completely in the pan for about 1 hour.
- Lift the bars out using parchment paper, dust with powdered sugar, and slice into squares before serving.
Notes
- Always use ripe, sweet cherries for the most intense flavor and natural sweetness in your bars.
- Consider pitting cherries ahead of time to prevent messy preparation and save cooking time.
- Chill the butter and egg before mixing to ensure a flakier, more tender crust that won’t become tough.
- Substitute frozen cherries if fresh aren’t available, but drain excess liquid to prevent soggy bars.
- Prep Time: 30 minutes
- Cook Time: 45-50 minutes
- Category: Desserts, Snacks
- Method: Baking
- Cuisine: American
Nutrition
- Serving Size: 12
- Calories: 260
- Sugar: 16 g
- Sodium: 70 mg
- Fat: 12 g
- Saturated Fat: 7 g
- Unsaturated Fat: 3 g
- Trans Fat: 0 g
- Carbohydrates: 36 g
- Fiber: 2 g
- Protein: 3 g
- Cholesterol: 30 mg
Truc Tran (Kris)
Senior Food Editor
Expertise
Home Cooking, Meal Planning, Recipe Development, Baking and Pastry, Food Editor, Cooking-video Maker, Vietnamese Food Evaluation Expert
Education
Truc Tran (Kris), an experienced food writer and editor, is great at exploring and describing global cuisines, from simple street food to fancy dining. In her writing, she skillfully mixes different flavors, cooking methods, and culinary traditions, showing the unique character of various cultures through their food and drinks. On azcuisines.com, Kris highlights her knowledge, especially in Asian cuisine and worldwide traditional dishes.