Magical Homemade Chocolate Hostess Recipe: Sweet Childhood Joy
Sweet chocolate lovers have met their match with this decadent hostess recipe that promises pure indulgence.
Creamy layers blend perfectly to create an irresistible dessert.
Homemade treats often surpass store-bought confections in richness and satisfaction.
Chocolate enthusiasts will appreciate the simple yet elegant approach to crafting this delightful experience.
Rich cocoa notes dance through each carefully prepared bite.
Minimal ingredients combine to produce maximum flavor and delightful texture.
You won’t believe how easy it is to recreate this classic favorite at home.
Why Chocolate Hostess Treats Bring Back Sweet Memories
What You’ll Need To Recreate Chocolate Hostess
Cake Base Ingredients:Wet Ingredients:Filling and Coating Ingredients:Whip Up Chocolate Hostess Goodness With Ease
Step 1: Warm Up the Oven
Crank the oven to a toasty 350°F. Grab a rectangular baking pan and line it completely with parchment paper, making sure every corner is covered for super easy cake removal.
Step 2: Mix Dry Ingredients
Grab a large mixing bowl and sift together:Blend these ingredients until they’re smooth and lump-free.
Step 3: Combine Wet Ingredients
In another bowl, whisk together sugar and wet ingredients until the mixture looks silky and totally combined.
Step 4: Create Chocolate Batter
Gently fold the dry ingredients into the wet mixture. Stir carefully to keep the batter light and fluffy – no heavy mixing allowed!
Step 5: Prepare for Baking
Pour the chocolatey batter into the prepared pan. Use a spatula to spread it evenly, making sure the thickness is consistent across the entire pan.
Step 6: Bake to Perfection
Pop the pan into the oven and bake for 25-30 minutes. Check doneness by inserting a toothpick – it should come out clean when the cake is ready.
Step 7: Cool Down
Let the cake chill on a wire rack for about an hour. Patience is key – make sure it reaches room temperature completely.
Step 8: Whip Up Cream Filling
Beat softened butter with powdered sugar and vanilla extract until it becomes light and fluffy.
Step 9: Create Marshmallow Cream
Fold marshmallow creme into the buttercream, mixing until you’ve got a dreamy, creamy filling.
Step 10: Slice and Prep
Cut the cooled cake into neat rectangular sections for individual hostess cakes.
Step 11: Fill the Cakes
Pipe the marshmallow buttercream into the center of each cake section, creating a generous cream layer.
Step 12: Melt Chocolate Coating
Use a double boiler to melt chocolate chips with vegetable oil. Stir constantly until the mixture is glossy and smooth.
Step 13: Enhance Chocolate Flavor
Add a splash of vanilla extract and a pinch of salt to give the chocolate coating some extra depth.
Step 14: Coat the Cakes
Carefully dip each filled cake section into the warm chocolate, making sure it’s completely and evenly covered.
Step 15: Let Chocolate Set
Place the coated cakes on a wire rack, letting excess chocolate drip off and the coating begin to set.
Step 16: Chill and Finish
Refrigerate the cakes for 15-20 minutes to help the chocolate shell firm up and create that perfect, glossy finish.
Tips For Getting That Classic Chocolate Hostess Look
Add A Twist To Classic Chocolate Hostess Style
What To Pair With Chocolate Hostess Cakes
Keep Chocolate Hostess Cakes Fresh And Moist
Chocolate Hostess FAQs To Know Before You Bake
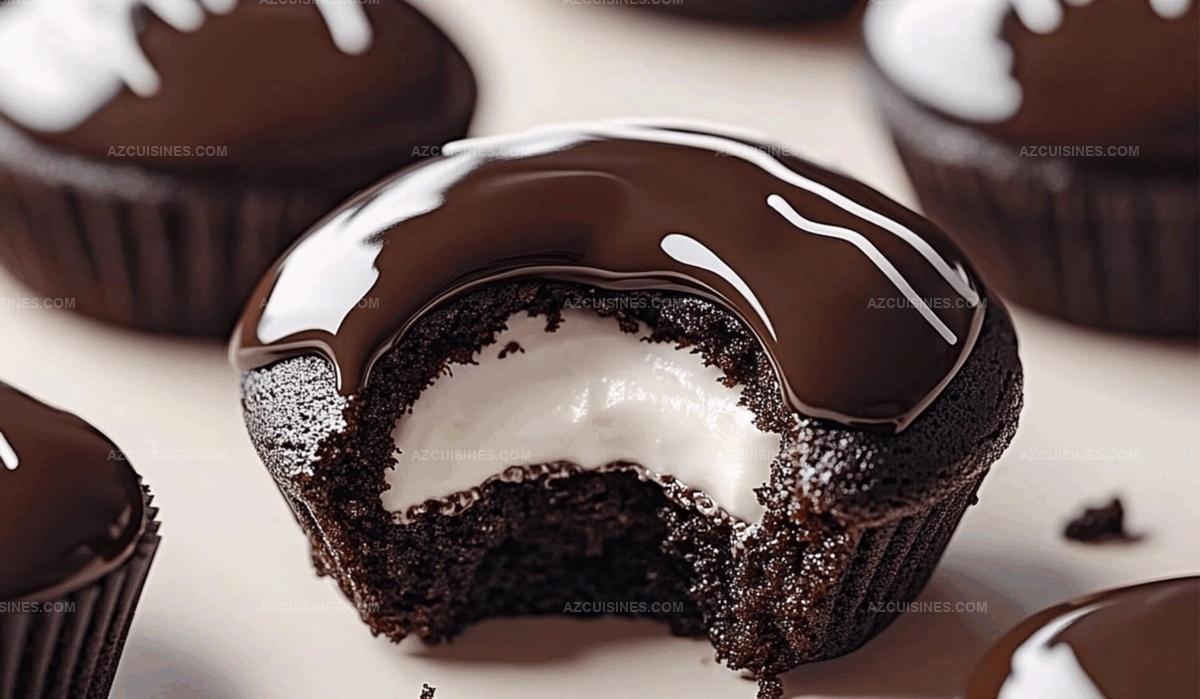
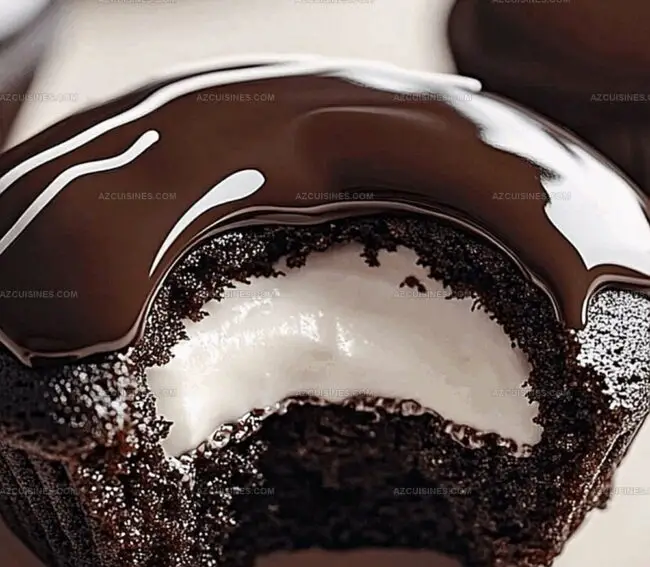
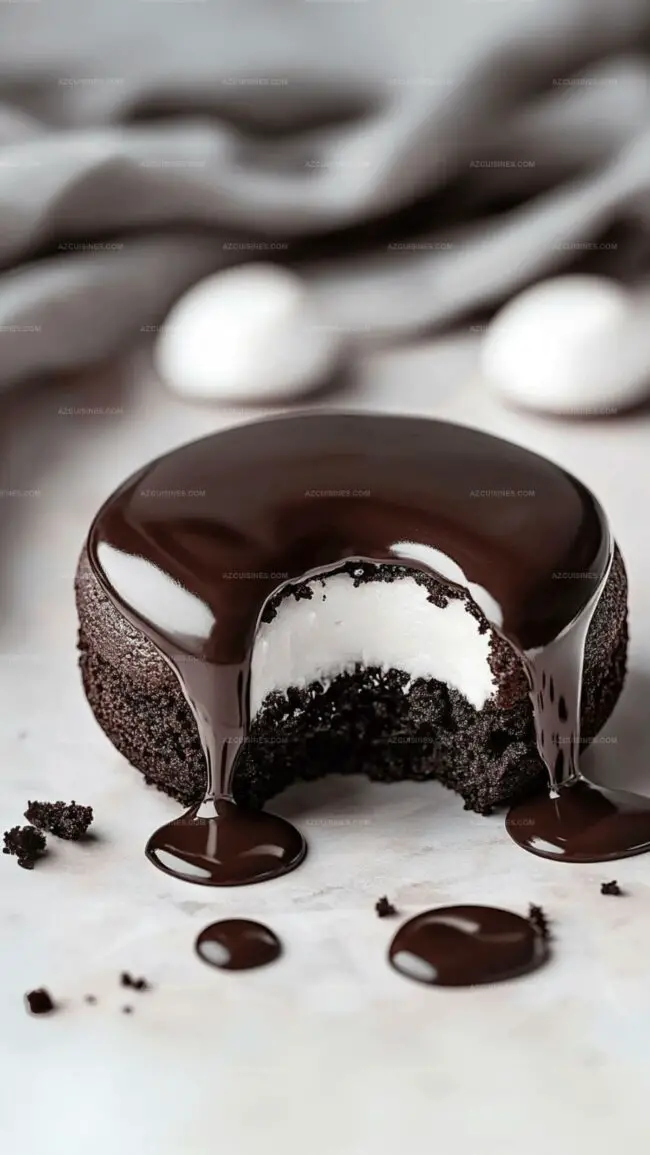
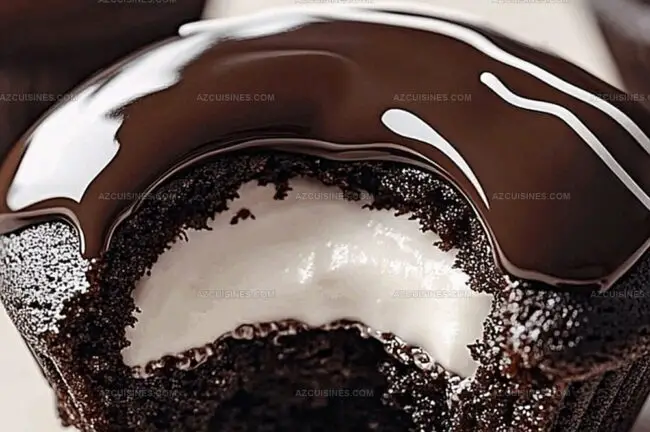
The cocoa powder and precise dry ingredient sifting create a rich, smooth chocolate texture that ensures an even, light cake consistency.
The buttercream should be fluffy and smooth, with marshmallow creme fully integrated, creating a glossy, spreadable mixture without any lumps.
Vegetable oil helps create a smooth, glossy chocolate coating that sets evenly and prevents the chocolate from becoming brittle or cracking.
Gently folding dry ingredients into wet ingredients prevents overmixing, maintaining an airy, tender cake structure that’s light and moist.
Print
Chocolate Hostess Recipe
- Total Time: 1 hour 45-60 minutes
- Yield: 12 1x
Description
Dive into pure indulgence with this nostalgic Chocolate Hostess Cake, a delightful homage to childhood memories. Creamy chocolate layers and sweet cream filling promise a delectable journey that will satisfy your deepest dessert cravings.
Ingredients
Cake Base:
- 2 cups all-purpose flour
- 1 1/2 cups granulated sugar
- 3/4 cup unsweetened cocoa powder
- 1 1/2 tsp baking soda
- 1/2 tsp salt
Filling and Cream:
- 1 cup marshmallow creme
- 1/2 cup unsalted butter, softened
- 1 cup powdered sugar
- 1 tsp vanilla extract
Chocolate Coating:
- 12 oz semi-sweet chocolate chips
- 1/4 cup vegetable oil
- 1 tsp vanilla extract
- 1/4 tsp salt
Instructions
- Preheat the oven to 350°F and line a rectangular baking pan with parchment paper, ensuring complete coverage for easy cake removal.
- Sift together flour, cocoa powder, baking soda, and salt in a large mixing bowl to eliminate any potential lumps and create a uniform dry mixture.
- In a separate bowl, whisk granulated sugar with wet ingredients until smooth and well-incorporated, creating a silky batter foundation.
- Gradually fold dry ingredients into the wet mixture, stirring gently to maintain a light and airy texture without overmixing.
- Pour the chocolate batter into the prepared pan, spreading evenly with a spatula to ensure consistent cake thickness.
- Bake for 25-30 minutes, or until a toothpick inserted into the center comes out clean, indicating perfect doneness.
- Allow the cake to cool completely on a wire rack for approximately 60 minutes, ensuring it reaches room temperature.
- Whip softened butter with powdered sugar and vanilla extract until fluffy, creating a smooth cream filling.
- Fold marshmallow creme into the buttercream mixture, blending thoroughly to create a luxurious, creamy filling.
- Once cooled, slice the cake into uniform rectangular sections for individual hostess cakes.
- Pipe the marshmallow buttercream filling onto cake sections, creating a generous central cream layer.
- Melt chocolate chips with vegetable oil using a double boiler, stirring continuously until glossy and smooth.
- Add vanilla extract and salt to the melted chocolate, enhancing the coating’s depth of flavor.
- Carefully dip each filled cake section into the warm chocolate coating, ensuring complete and even coverage.
- Place chocolate-coated cakes on a wire rack, allowing excess chocolate to drip and coating to set at room temperature.
- Refrigerate for 15-20 minutes to help the chocolate shell firm up and achieve a professional, glossy finish.
Notes
- Use room temperature ingredients to ensure smooth batter mixing and consistent texture.
- Sifting dry ingredients prevents lumps and creates a lighter, more even cake crumb.
- Check cake doneness early to avoid overbaking, which can lead to dry texture.
- Opt for high-quality cocoa powder and chocolate for richer, more intense flavor.
- Prep Time: 30 minutes
- Cook Time: 25-30 minutes
- Category: Desserts, Snacks
- Method: Baking
- Cuisine: American
Nutrition
- Serving Size: 12
- Calories: 303
- Sugar: 23 g
- Sodium: 115 mg
- Fat: 17 g
- Saturated Fat: 10 g
- Unsaturated Fat: 7 g
- Trans Fat: 0 g
- Carbohydrates: 36 g
- Fiber: 2 g
- Protein: 3 g
- Cholesterol: 20 mg
Truc Tran (Kris)
Senior Food Editor
Expertise
Home Cooking, Meal Planning, Recipe Development, Baking and Pastry, Food Editor, Cooking-video Maker, Vietnamese Food Evaluation Expert
Education
Truc Tran (Kris), an experienced food writer and editor, is great at exploring and describing global cuisines, from simple street food to fancy dining. In her writing, she skillfully mixes different flavors, cooking methods, and culinary traditions, showing the unique character of various cultures through their food and drinks. On azcuisines.com, Kris highlights her knowledge, especially in Asian cuisine and worldwide traditional dishes.