
Cozy Winter Chocolate Peppermint Bark Recipe for Festive Joy
Sweet memories of holiday gatherings always spark my love for chocolate peppermint bark.
My grandmother’s kitchen would fill with delightful aromas during winter celebrations.
Peppermint’s crisp essence perfectly complements rich chocolate layers in this classic treat.
Crafting this dessert connects us to cherished seasonal traditions.
Minimal ingredients and simple steps make this recipe accessible for bakers of all skill levels.
Kids and adults alike will adore the festive crunch and smooth chocolate blend.
Prepare to create a delectable masterpiece that promises to become your new favorite holiday indulgence.
Why Chocolate Peppermint Bark Is a Winter Win
What You’ll Need for Chocolate Peppermint Bark
Chocolate Base:White Chocolate Layer:Toppings and Finishing:How to Make Peppermint Bark in Minutes
Step 1: Prepare Baking Surface
Line a baking sheet with parchment paper, smoothing out any wrinkles to create a flat surface for your chocolate bark.
Step 2: Craft Dark Chocolate Base
Melt dark chocolate chips using a double boiler or microwave. Stir until the chocolate becomes completely smooth and glossy. Blend in vanilla extract during the melting process for added depth of flavor.
Step 3: Spread Chocolate Layer
Pour the melted dark chocolate onto the prepared parchment paper. Use a spatula to spread the chocolate evenly, creating a uniform layer about 1/4 inch thick.
Step 4: Chill Chocolate Base
Refrigerate the chocolate base for 15 minutes until it becomes firm and set.
Step 5: Prepare White Chocolate Topping
Melt white chocolate chips using the same method as the dark chocolate. Gently stir in peppermint extract until the mixture is fully integrated and silky smooth.
Step 6: Add White Chocolate Layer
Remove the chilled chocolate base from the refrigerator. Carefully pour the white chocolate layer over the dark chocolate, spreading gently to cover the entire surface.
Step 7: Decorate With Candy Canes
Immediately sprinkle crushed candy canes across the white chocolate layer, distributing them evenly for consistent coverage.
Step 8: Optional Flavor Enhancement
Optionally, dust a delicate pinch of sea salt over the candied surface to elevate the flavor complexity.
Step 9: Final Chilling
Return the bark to the refrigerator for 20 minutes until completely hardened.
Step 10: Break Into Pieces
Remove from the refrigerator and break the bark into irregular, rustic pieces using your hands or a sharp knife.
Step 11: Store and Preserve
Store the chocolate peppermint bark in an airtight container in the refrigerator for up to two weeks. Place parchment paper between layers to prevent sticking.
Tips for Snappy, Minty Chocolate Bark
Fun Bark Twists to Explore
What Tastes Best With Peppermint Bark
How to Store Peppermint Bark the Right Way
Peppermint Bark FAQs
Dark chocolate chips with high cocoa content (60-70%) create the most robust base, ensuring smooth melting and rich flavor profile.
Yes, chop chocolate bars into small, uniform pieces to ensure even melting and consistent texture throughout the bark.
Melt white chocolate slowly and gently, using low heat and stirring constantly to maintain smooth, glossy consistency without burning or clumping.
Use microwave in 30-second intervals, stirring between each interval, or create a makeshift double boiler by placing a heat-safe bowl over a pot of simmering water.
Print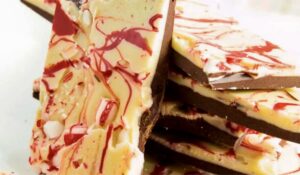
Chocolate Peppermint Bark Recipe
- Total Time: 50 minutes
- Yield: 12 1x
Description
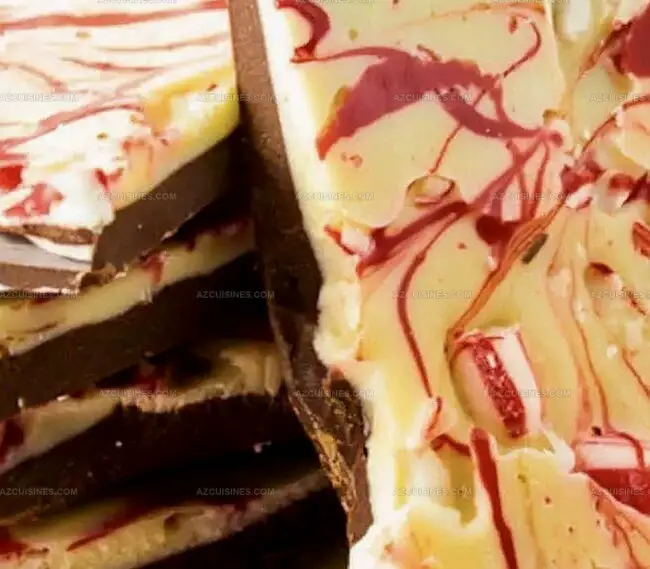
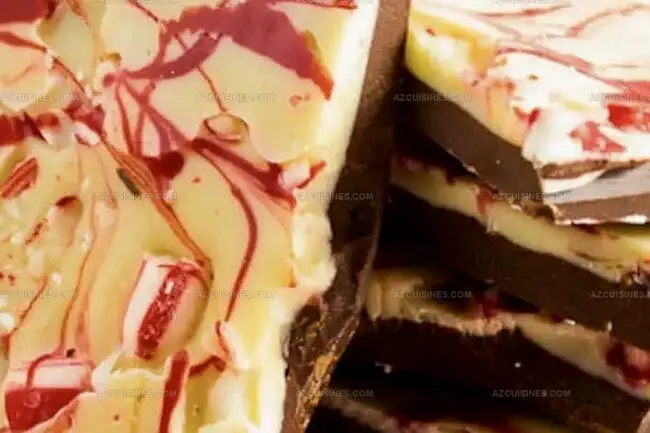
Festive holiday chocolate peppermint bark combines rich dark chocolate with cool mint for a classic seasonal treat. Crisp candy cane pieces and smooth chocolate layers create a delightful dessert you’ll crave all winter long.
Ingredients
Chocolate Base:
- 12 oz dark chocolate chips
- 1 tsp vanilla extract
Peppermint Layer:
- 12 oz white chocolate chips
- 1/2 tsp peppermint extract
Topping:
- 1/2 cup crushed candy canes
- 1 pinch sea salt (optional)
Preparation Ingredients:
- 1 sheet parchment paper
- 1 baking sheet
Instructions
- Line a baking sheet with parchment paper, ensuring smooth coverage and minimal wrinkles.
- Melt dark chocolate chips in a double boiler or microwave, stirring until completely smooth and glossy. Incorporate vanilla extract during melting process.
- Pour melted dark chocolate onto prepared parchment paper, spreading evenly with a spatula to create a uniform layer approximately 1/4 inch thick.
- Refrigerate chocolate base for 15 minutes at 40°F until firm and set.
- Melt white chocolate chips using same method as dark chocolate, gently stirring in peppermint extract until fully integrated and silky.
- Remove chilled chocolate base from refrigerator and carefully pour white chocolate layer over dark chocolate, spreading gently to cover entire surface.
- Immediately sprinkle crushed candy canes across the white chocolate layer, distributing evenly for consistent coverage.
- Optional: Dust a delicate pinch of sea salt over candied surface for enhanced flavor complexity.
- Return bark to refrigerator for 20 minutes at 35°F until completely hardened.
- Remove from refrigerator and break into irregular, rustic pieces using hands or a sharp knife.
- Store in an airtight container in the refrigerator for up to two weeks, separating layers with parchment paper to prevent sticking.
Notes
- Ensure parchment paper is completely flat to prevent uneven chocolate layers, creating a professional-looking bark.
- Melt chocolate slowly and carefully to avoid seizing or burning, which can ruin the smooth texture and glossy appearance.
- Use high-quality chocolate chips for the best flavor and smooth melting, preferably dark and white chocolates with at least 60% cocoa content.
- Crush candy canes just before sprinkling to maintain their vibrant color and prevent moisture from making them sticky.
- For a gluten-free version, double-check that all chocolate and candy canes are certified gluten-free.
- Experiment with alternative toppings like toasted nuts, dried fruit, or flavored extracts to create unique variations of the bark.
- Allow chocolate to come to room temperature before breaking to prevent cracking and ensure clean, rustic pieces.
- Prep Time: 15 minutes
- Cook Time: 35 minutes
- Category: Desserts, Snacks
- Method: Baking
- Cuisine: American
Nutrition
- Serving Size: 12
- Calories: 160
- Sugar: 14 g
- Sodium: 15 mg
- Fat: 9 g
- Saturated Fat: 5 g
- Unsaturated Fat: 4 g
- Trans Fat: 0 g
- Carbohydrates: 19 g
- Fiber: 1 g
- Protein: 2 g
- Cholesterol: 0 mg
Truc Tran (Kris)
Senior Food Editor
Expertise
Home Cooking, Meal Planning, Recipe Development, Baking and Pastry, Food Editor, Cooking-video Maker, Vietnamese Food Evaluation Expert
Education
Truc Tran (Kris), an experienced food writer and editor, is great at exploring and describing global cuisines, from simple street food to fancy dining. In her writing, she skillfully mixes different flavors, cooking methods, and culinary traditions, showing the unique character of various cultures through their food and drinks. On azcuisines.com, Kris highlights her knowledge, especially in Asian cuisine and worldwide traditional dishes.