Sparkly Sweet Success: The Foolproof Hard Candy Recipe
Sweet anticipation builds when crafting this delightful hard candy recipe that sparks childhood memories.
Colorful crystals of sugar promise delectable joy in every bite.
Homemade treats bring magical moments to kitchen adventures.
Delicate flavors dance across your palate with each carefully crafted piece.
Kitchen alchemy transforms simple ingredients into gleaming, transparent confections.
Playful experimentation lets you create rainbow-hued delights that charm and surprise.
Everyone will marvel at your sugary masterpiece, eager to sample these magical treats.
Why Hard Candy Is a Sweet Classic
Ingredients That Make Hard Candy Shine
Main Ingredients:Flavoring and Coloring:Preparation and Coating:Making Hard Candy Without the Fuss
Step 1: Prepare Workspace
Line a large baking sheet with a silicone mat or parchment paper. Create a dusting mixture using powdered sugar and cornstarch, generously coating the entire surface to prevent sticking.
Step 2: Create Candy Base
Grab a heavy-bottomed saucepan and combine these ingredients:Gently stir to blend the ingredients without splashing.
Step 3: Set Up Thermometer
Attach a candy thermometer to the side of the pan, making sure it doesn’t touch the bottom for an accurate temperature reading.
Step 4: Heat Sugar Mixture
Place the pan over medium-high heat. Allow the syrup to cook without stirring, watching it carefully as it approaches 300°F (hard crack stage). This process typically takes 10-12 minutes.
Step 5: Add Flavor and Color
Once the mixture reaches the correct temperature, immediately remove from heat. Quickly swirl in:Mix gently by swirling the pan to distribute evenly.
Step 6: Pour Candy Mixture
Carefully pour the hot syrup onto the prepared baking sheet. Let it spread naturally without touching or manipulating the surface.
Step 7: Initial Cooling
Allow the candy to cool for 3-5 minutes until it becomes slightly firm but still flexible.
Step 8: Shape and Stretch
Using gloved hands or buttered utensils, carefully fold and stretch the cooling candy. This helps distribute color and flavor evenly.
Step 9: Cut Candy
As the candy becomes opaque and starts to stiffen, use clean kitchen shears or a buttered knife to cut or break into desired shapes.
Step 10: Prevent Sticking
Roll each candy piece in the remaining powdered sugar and cornstarch mixture to prevent pieces from clinging together.
Step 11: Final Cooling and Storage
Let the candies cool completely at room temperature for about 30 minutes. Once hardened, transfer to an airtight container for storage.
Pro Tips for Candy That Snaps Just Right
Flavor Twists for Hard Candy Fans
What Goes Well With Hard Candy
How to Store Your Homemade Hard Candy
Hard Candy Recipe FAQs
Cream of tartar helps stabilize the sugar syrup, preventing crystallization and ensuring a smooth, clear hard candy texture.
Watch the candy thermometer closely and maintain a steady medium-high heat, avoiding stirring which can cause sugar crystals to form.
Always use heat-resistant gloves, work in a clean space, and be extremely careful with the hot syrup to prevent serious burns.
No, a candy thermometer is crucial to reach the precise 300°F hard crack stage for perfect candy consistency.
Print
Hard Candy Recipe
- Total Time: 57 minutes
- Yield: 2 1x
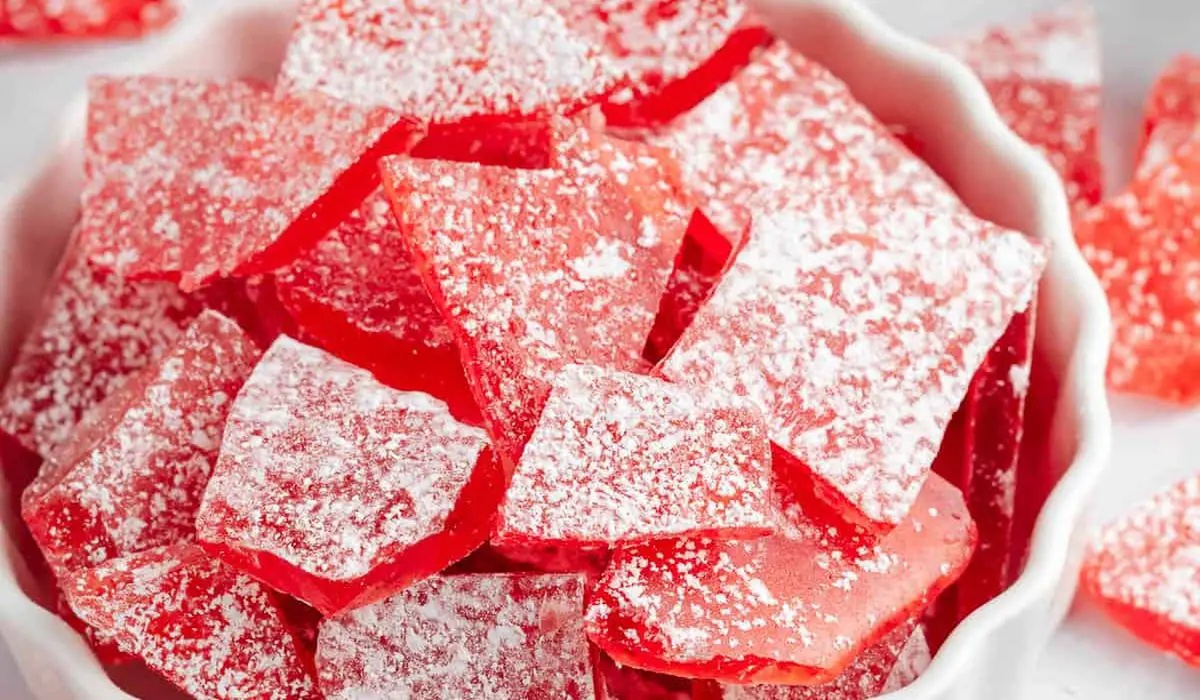
Description
Sweet and glossy hard candy delights taste buds with classic sugary perfection. Homemade confections glisten like jewels, promising crisp textures and pure sugary happiness you’ll savor with pure delight.
Ingredients
Candy Base:
- 2 cups granulated sugar
- 1/2 cup water
- 1/2 cup light corn syrup
- 1/4 tsp cream of tartar
Flavoring and Coloring:
- 1 tsp flavoring extract (such as peppermint, cherry, or lemon)
- 3–4 drops food coloring
Dusting and Coating:
- 1/2 cup powdered sugar
- 1/4 cup cornstarch
Instructions
- Prepare a large baking sheet by lining it with a silicone mat or parchment paper, then dust generously with a mixture of powdered sugar and cornstarch.
- In a heavy-bottomed saucepan, combine granulated sugar, water, corn syrup, and cream of tartar, stirring gently to integrate ingredients.
- Position a candy thermometer on the side of the pan, ensuring it does not touch the bottom.
- Heat the mixture over medium-high heat without stirring, allowing the syrup to reach 300°F (hard crack stage), which typically takes 10-12 minutes.
- Immediately remove from heat and quickly incorporate flavoring extract and food coloring by gently swirling the pan.
- Carefully and swiftly pour the molten syrup onto the prepared baking sheet, allowing it to spread naturally without manipulating.
- Let the candy cool undisturbed for 3-5 minutes until it becomes slightly firm but still pliable.
- Using gloved hands or buttered utensils, carefully fold and stretch the cooling candy to create an even distribution of color and flavor.
- Once the candy becomes opaque and begins to stiffen, cut or break into desired shapes using clean, sharp kitchen shears or a buttered knife.
- Roll individual pieces in the remaining powdered sugar and cornstarch mixture to prevent sticking.
- Allow candies to completely cool and harden at room temperature for approximately 30 minutes before storing in an airtight container.
Notes
- Use a heavy-bottomed saucepan to prevent scorching and ensure even heat distribution during candy making.
- Avoid stirring the sugar syrup while cooking to prevent crystallization, which can ruin the smooth texture of hard candy.
- Invest in a reliable candy thermometer for precise temperature control, crucial for achieving the perfect hard crack stage.
- Work quickly when adding flavors and pouring the syrup, as the mixture hardens rapidly once removed from heat.
- Protect your hands with heat-resistant gloves when handling the hot candy to prevent burns during shaping.
- Experiment with natural food colorings and extracts for unique flavor combinations and healthier alternatives.
- Store candies in a cool, dry place to maintain their crisp texture and prevent them from becoming sticky.
- Clean your cooking tools immediately with hot water to remove hardened sugar before it sets completely.
- Prep Time: 15 minutes
- Cook Time: 12 minutes
- Category: Snacks, Desserts
- Method: Boiling
- Cuisine: American
Nutrition
- Serving Size: 2
- Calories: 405
- Sugar: 86 g
- Sodium: 0 mg
- Fat: 0 g
- Saturated Fat: 0 g
- Unsaturated Fat: 0 g
- Trans Fat: 0 g
- Carbohydrates: 101 g
- Fiber: 0 g
- Protein: 0 g
- Cholesterol: 0 mg
Truc Tran (Kris)
Senior Food Editor
Expertise
Home Cooking, Meal Planning, Recipe Development, Baking and Pastry, Food Editor, Cooking-video Maker, Vietnamese Food Evaluation Expert
Education
Truc Tran (Kris), an experienced food writer and editor, is great at exploring and describing global cuisines, from simple street food to fancy dining. In her writing, she skillfully mixes different flavors, cooking methods, and culinary traditions, showing the unique character of various cultures through their food and drinks. On azcuisines.com, Kris highlights her knowledge, especially in Asian cuisine and worldwide traditional dishes.