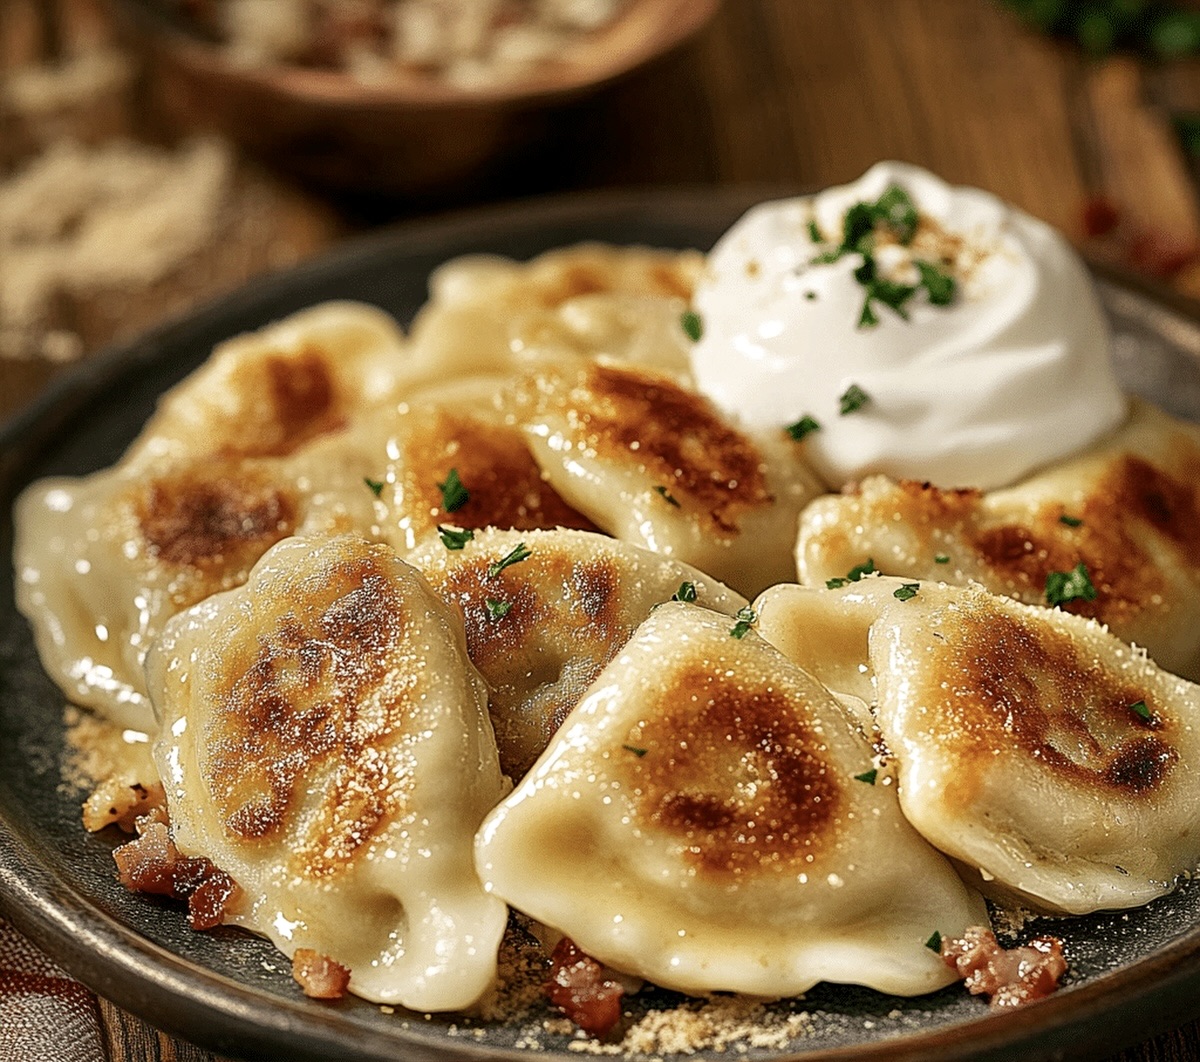
The Best Homemade Pierogi Recipe for Cozy Family Dinners
Crafting delectable homemade pierogi brings pure culinary joy to kitchen adventurers seeking comfort and tradition.
Polish dumplings pack incredible flavor into every carefully folded pocket of dough.
Soft, pillowy crescents stuffed with savory potato and cheese promise a delightful meal that connects you to generations of home cooking.
Generations of cooks have perfected these delicate parcels, passing down techniques that make each bite memorable.
Mastering pierogi requires patience and love, but the rewards come quickly when steam rises from your first golden batch.
Crisp edges, tender fillings, and a sprinkle of caramelized onions will make you feel like a true eastern European chef.
You can create magic in your kitchen with this authentic recipe that transforms simple ingredients into something extraordinary.
What Makes Homemade Pierogi A Classic Favorite
What Ingredients Are In Homemade Pierogi
For the Dough:For the Filling:For the Finishing and Serving:How To Prepare Homemade Pierogi Easily
Step 1: Create Soft Pierogi Dough
Mix flour and salt in a large mixing bowl. The flour will become the base for your delightful pierogi adventure.
Ingredients:Form a small well in the center of the flour mixture. Crack the egg into the well and gradually add water. Blend everything together until you have a smooth, elastic dough that feels springy when touched.
Step 2: Knead the Dough to Perfection
Transfer the dough to a lightly floured surface. Knead it thoroughly for 5-7 minutes until the texture becomes silky and uniform. Cover the dough and let it rest at room temperature for half an hour.
Step 3: Prepare Delicious Potato Cheese Filling
While the dough rests, create a mouthwatering filling by combining:Mix all ingredients until they blend smoothly and create a delectable filling.
Step 4: Roll Out Pierogi Wrappers
Spread the rested dough on a floured surface. Roll it out to about 1/8-inch thickness, ensuring an even and thin consistency.
Step 5: Cut Uniform Dough Circles
Use a round cookie cutter or glass to cut perfect circles from the rolled dough. These will become your pierogi wrappers.
Step 6: Fill and Shape Pierogi
Place a small amount of potato-cheese filling in the center of each dough circle. Be careful not to overfill.
Fold the dough over the filling, creating a half-moon shape. Seal the edges by pinching and crimping with your fingers.
Step 7: Boil Pierogi to Perfection
Bring a large pot of salted water to a gentle boil. Drop pierogi in batches and cook for 3-4 minutes until they float to the surface.
Remove pierogi with a slotted spoon and let them drain briefly.
Step 8: Create Crispy Golden Exterior
Melt butter in a skillet until it turns golden and fragrant. Gently pan-fry the boiled pierogi until they develop a crispy, light-brown exterior.
Step 9: Serve and Enjoy
Garnish with freshly chopped chives. Serve immediately with a dollop of sour cream for a classic, comforting meal that will warm hearts and satisfy hunger.
Helpful Tips For Homemade Pierogi
Ways To Switch Up Homemade Pierogi
Good Pairings For Homemade Pierogi
How To Store Homemade Pierogi The Right Way
Homemade Pierogi Frequently Asked Questions
Pierogi dough is surprisingly simple. With basic ingredients like flour, egg, and water, you can create a smooth, elastic dough by kneading for just 5-7 minutes.
Seal edges meticulously by pinching and crimping with your fingers. Ensure no air pockets remain and press edges firmly to create a tight seal.
Yes, you can prepare pierogi in advance. After forming, place them on a floured tray and refrigerate for up to 24 hours before cooking, or freeze for longer storage.
Print
Homemade Pierogi Recipe
- Total Time: 45-50 minutes
- Yield: 4 1x
Description
Polish pierogi deliver comfort straight from Eastern European kitchens, blending delicate dough with hearty potato and cheese fillings. Crispy pan-fried edges and rich flavors will transport you to a warm family gathering with each delightful bite.
Ingredients
Dough:
- 2 cups all-purpose flour
- 1/2 tsp salt
- 1 large egg
- 1/2 cup water
Filling:
- 2 cups mashed potatoes
- 1 cup shredded cheddar cheese
- 1/2 cup diced onions
- 1/4 tsp black pepper
Topping/Garnish:
- 1/4 cup butter
- 2 tbsp chopped fresh chives
- 1/4 cup sour cream (optional)
Instructions
- Craft the dough by combining flour and salt in a spacious mixing bowl, creating a soft, pillowy foundation for your pierogi.
- Create a central well in the flour mixture and crack the egg into it, gradually incorporating water to form a smooth, elastic dough that springs back when touched.
- Knead the dough on a lightly floured surface for 5-7 minutes until it becomes silky and uniform, then cover and let rest for 30 minutes at room temperature.
- While the dough relaxes, prepare the filling by blending mashed potatoes with shredded cheddar, sautéed diced onions, and a sprinkle of black pepper until thoroughly combined.
- Roll out the rested dough on a floured surface to approximately 1/8-inch thickness, ensuring an even, thin consistency.
- Use a round cookie cutter or glass to cut uniform circles from the rolled dough, creating the pierogi wrappers.
- Place a small dollop of potato-cheese filling in the center of each dough circle, being careful not to overfill.
- Fold the dough over the filling, forming a half-moon shape, and meticulously seal the edges by pinching and crimping with your fingers.
- Bring a large pot of salted water to a gentle boil, then carefully drop the pierogi in batches, cooking for 3-4 minutes until they float to the surface.
- Remove the pierogi with a slotted spoon and let them drain briefly.
- In a skillet, melt butter until it becomes golden and fragrant, then gently pan-fry the boiled pierogi until they develop a crispy, light-brown exterior.
- Garnish with freshly chopped chives and serve immediately with a dollop of sour cream for a classic, comforting presentation.
Notes
- Customize fillings by swapping potato-cheese for sauerkraut, ground meat, or sweet fruit variations to explore diverse flavor profiles.
- Prevent dough from drying by covering unused portions with a damp kitchen towel during preparation, ensuring consistent texture and workability.
- Freeze uncooked pierogi on a baking sheet before transferring to freezer bags, allowing quick meal preparation for busy weeknights or unexpected guests.
- Enhance texture by using cold ingredients and avoiding overworking the dough, which helps maintain a tender, delicate pierogi wrapper that melts in your mouth.
- Prep Time: 30 minutes
- Cook Time: 15-20 minutes
- Category: Lunch, Dinner, Appetizer, Snacks
- Method: Boiling
- Cuisine: Polish
Nutrition
- Serving Size: 4
- Calories: 380
- Sugar: 2 g
- Sodium: 420 mg
- Fat: 22 g
- Saturated Fat: 14 g
- Unsaturated Fat: 6 g
- Trans Fat: 0 g
- Carbohydrates: 36 g
- Fiber: 2 g
- Protein: 10 g
- Cholesterol: 70 mg


Truc Tran (Kris)
Senior Food Editor
Expertise
Home Cooking, Meal Planning, Recipe Development, Baking and Pastry, Food Editor, Cooking-video Maker, Vietnamese Food Evaluation Expert
Education
Truc Tran (Kris), an experienced food writer and editor, is great at exploring and describing global cuisines, from simple street food to fancy dining. In her writing, she skillfully mixes different flavors, cooking methods, and culinary traditions, showing the unique character of various cultures through their food and drinks. On azcuisines.com, Kris highlights her knowledge, especially in Asian cuisine and worldwide traditional dishes.