
Make Adorable Mini Cherry Cheesecakes: A Sweet Homemade Recipe
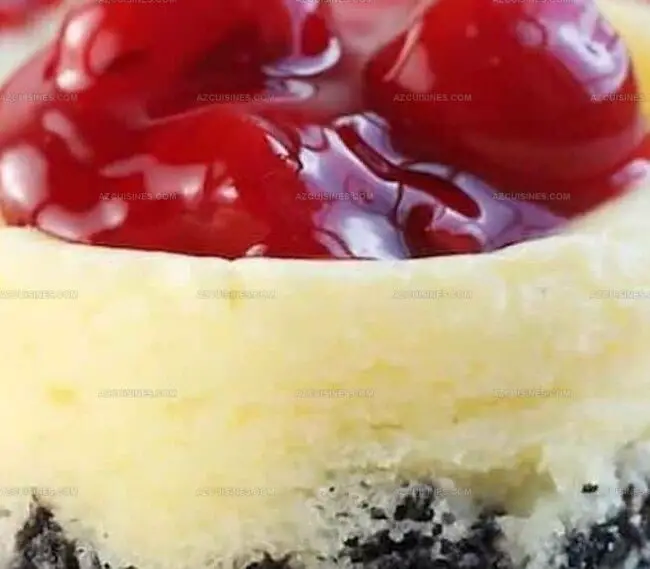
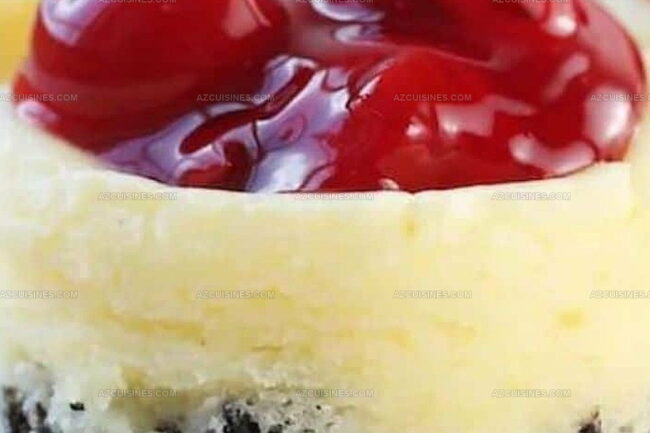
These mini cherry cheesecakes sparkle with creamy elegance and sweet charm.
Delicate graham cracker crusts provide a perfect crispy foundation for each tiny dessert.
Swirls of smooth cream cheese blend harmoniously with vibrant cherry topping.
Compact and adorable, these miniature treats promise pure indulgence in every single bite.
Rich flavors dance across your palate with surprising complexity.
Light yet decadent, these petite delights work wonderfully for intimate gatherings or personal dessert moments.
You’ll want to savor each delectable morsel and share the joy with someone special.
Why Mini Cherry Cheesecakes Are a Bite-Sized Joy
Cherry Cheesecake Minis: What’s Inside
Crust Ingredients:Cheesecake Filling Ingredients:Topping Ingredients:How to Make Mini Cherry Cheesecakes Easily
Step 1: Warm Up The Oven
Crank the oven to a cozy 325°F and grab your muffin tin. Line each cup with adorable cupcake liners, making sure they’re perfectly nestled.
Step 2: Create Crumbly Crust
Grab these ingredients:Mix everything together until the mixture looks like damp beach sand. It should clump when you press it.
Step 3: Press Down The Base
Firmly press the crumb mixture into the bottom of each cupcake liner. Make it compact and solid like a mini foundation.
Step 4: Whip Up Creamy Filling
In a big mixing bowl, beat cream cheese and sugar until they transform into a smooth, dreamy mixture. No lumps allowed!
Step 5: Add Silky Eggs
Drop eggs into the mixture one by one. Mix thoroughly after each addition to keep the filling super smooth and luxurious.
Step 6: Blend Flavor Enhancers
Gently fold in vanilla extract and sour cream. Stir until the filling looks perfectly uniform and velvety.
Step 7: Fill The Cups
Pour the cheesecake mixture over the graham cracker bases. Fill each liner about three-quarters full for perfect mini treats.
Step 8: Bake To Perfection
Slide the muffin tin into the oven. Bake for 18-20 minutes until centers look almost set with a gentle wiggle when shaken.
Step 9: Cool Down
Pull the cheesecakes out and let them chill completely at room temperature. Patience is key!
Step 10: Refrigerate And Set
Pop the tin in the refrigerator for at least 2 hours. This helps them firm up and develop deeper flavors.
Step 11: Decorate With Cherries
Top each mini cheesecake with:Step 12: Dust With Elegance
Sprinkle a light snowfall of powdered sugar over the cheesecakes for a fancy finish.
Step 13: Serve And Delight
Serve these miniature beauties chilled. Watch everyone’s eyes light up with the first bite!
Cheesecake Tips for Cherry-Loving Bakers
Flavor Ideas for Cherry Cheesecake Fans
What to Serve With Mini Cherry Cheesecakes
Store Mini Cherry Cheesecakes for Freshness
FAQs About Mini Cherry Cheesecake Bites
Use room temperature ingredients, avoid overmixing the batter, and bake in a water bath to create a moist environment that prevents surface cracking.
Absolutely! Try fresh strawberries, blueberries, or raspberries as delicious alternatives to cherries that complement the creamy cheesecake base.
No, a hand mixer works perfectly fine. The key is to mix ingredients until smooth and avoid incorporating too much air into the batter.
Look for slightly set centers with a gentle jiggle when you shake the pan. The edges should be just starting to pull away from the cupcake liners.
Print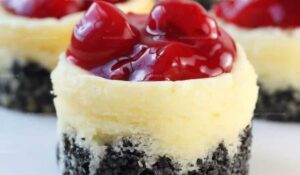
Mini Cherry Cheesecakes Recipe
- Total Time: 2 hours 40 minutes
- Yield: 12 1x
Description
Delightful mini cherry cheesecakes combine creamy indulgence with sweet fruity charm. Perfectly portioned and easy to prepare, these miniature desserts promise a delectable experience that will charm dessert enthusiasts.
Ingredients
cheesecake base:
- 1 cup graham cracker crumbs
- 4 tbsp unsalted butter, melted
- 2 tbsp granulated sugar
cheesecake filling:
- 16 oz cream cheese, softened
- 1/2 cup granulated sugar
- 2 large eggs
- 1 tsp vanilla extract
- 1/4 cup sour cream
topping:
- 1 cup fresh cherries, pitted and halved
- 2 tbsp cherry preserves
- 1 tbsp powdered sugar (for dusting)
Instructions
- Preheat the oven to 325°F and line a muffin tin with cupcake liners, ensuring each cavity is prepared.
- Combine graham cracker crumbs, melted butter, and sugar in a bowl, mixing until the texture resembles wet sand.
- Press the crumb mixture firmly into the bottom of each cupcake liner, creating a compact base.
- In a large mixing bowl, beat cream cheese and sugar until smooth and creamy, avoiding any lumps.
- Incorporate eggs one at a time, mixing thoroughly after each addition to maintain a silky consistency.
- Fold in vanilla extract and sour cream, gently blending until the filling is uniform and velvety.
- Carefully pour the cheesecake mixture over the graham cracker bases, filling each liner about 3/4 full.
- Bake for 18-20 minutes, or until the centers are almost set with a slight jiggle when gently shaken.
- Remove from the oven and allow cheesecakes to cool completely at room temperature.
- Refrigerate for at least 2 hours to firm up and enhance flavor.
- Before serving, top each mini cheesecake with halved fresh cherries and a dollop of cherry preserves.
- Dust lightly with powdered sugar for an elegant finishing touch.
- Serve chilled and enjoy these delightful individual desserts.
Notes
- Achieve a perfect graham cracker crust by pressing the mixture firmly and evenly into the cupcake liners, creating a solid base that won’t crumble.
- Prevent cheesecake cracks by avoiding overmixing and overbaking, ensuring a smooth, creamy texture that melts in your mouth.
- Customize the recipe by swapping cherries with other fruits like strawberries or blueberries for a seasonal twist that keeps the dessert exciting.
- Make the cheesecakes gluten-free by using almond flour or gluten-free graham crackers as a substitute for traditional graham cracker crumbs.
- Prep Time: 20 minutes
- Cook Time: 20 minutes
- Category: Desserts
- Method: Baking
- Cuisine: American
Nutrition
- Serving Size: 12
- Calories: 265
- Sugar: 19 g
- Sodium: 210 mg
- Fat: 16 g
- Saturated Fat: 10 g
- Unsaturated Fat: 5 g
- Trans Fat: 0 g
- Carbohydrates: 27 g
- Fiber: 1 g
- Protein: 4 g
- Cholesterol: 78 mg
Truc Tran (Kris)
Senior Food Editor
Expertise
Home Cooking, Meal Planning, Recipe Development, Baking and Pastry, Food Editor, Cooking-video Maker, Vietnamese Food Evaluation Expert
Education
Truc Tran (Kris), an experienced food writer and editor, is great at exploring and describing global cuisines, from simple street food to fancy dining. In her writing, she skillfully mixes different flavors, cooking methods, and culinary traditions, showing the unique character of various cultures through their food and drinks. On azcuisines.com, Kris highlights her knowledge, especially in Asian cuisine and worldwide traditional dishes.