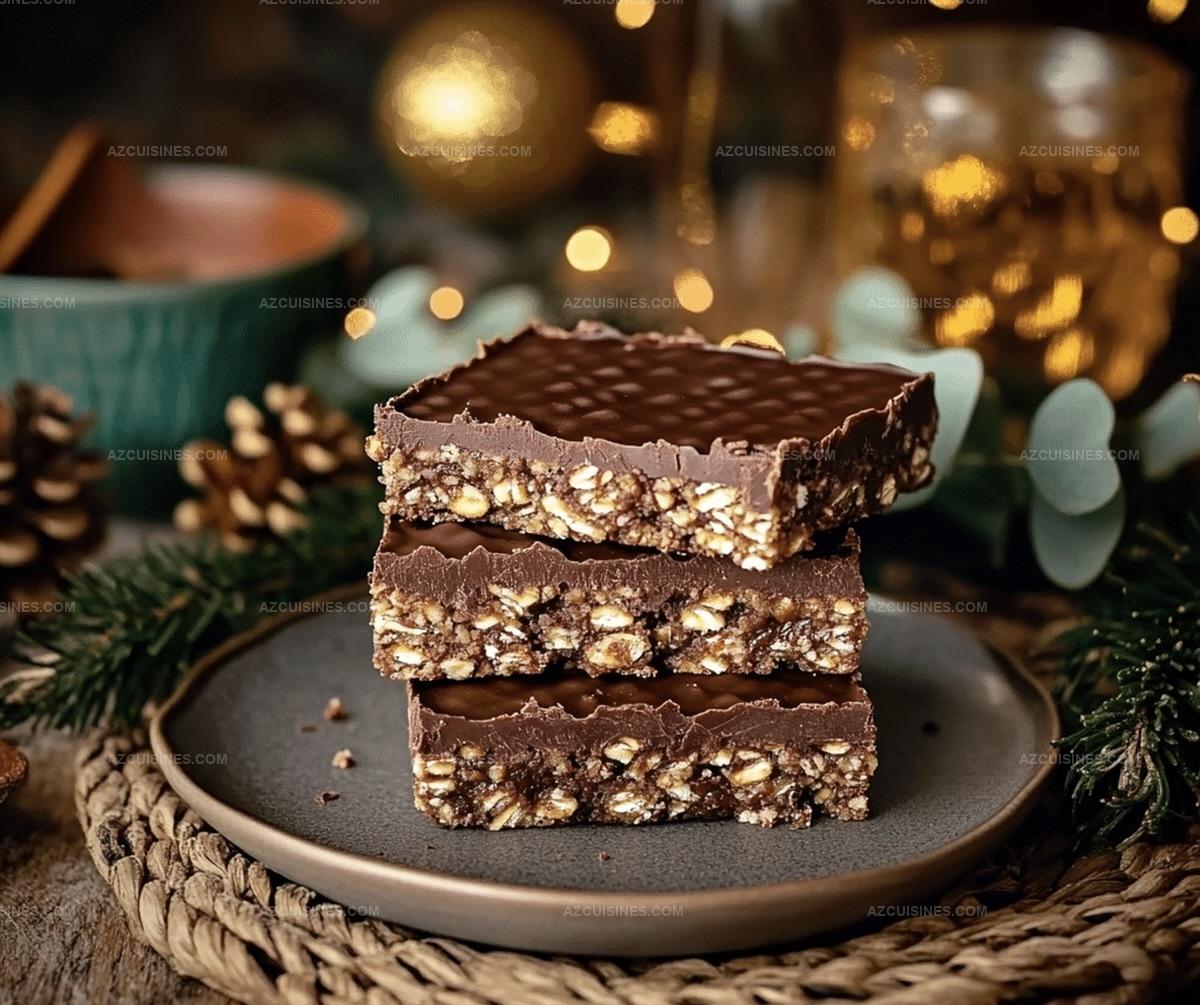
Irresistible No Bake Chocolate Oat Bars Recipe for Sweet Moments
Crafting delectable no bake chocolate oat bars brings pure culinary joy to your kitchen adventure.
Sweet ingredients dance together without requiring an oven’s heat.
Pantry staples become magic when mixed with precision and love.
Minimal effort yields maximum satisfaction in these delightful treats.
Rich chocolate melds perfectly with hearty oats, creating a mouthwatering combination.
Smooth textures and deep flavors promise a delightful experience for anyone seeking a quick dessert.
You’ll fall in love with this simple yet incredible recipe that comes together in minutes.
Grab a mixing bowl and let the deliciousness begin!
Why No Bake Chocolate Oat Bars Are A Quick Treat
What Goes In No Bake Chocolate Oat Bars
For the Base and Topping:For the Chocolate Layer:For Additional Flavor and Texture:Steps To Make No Bake Chocolate Oat Bars
Step 1: Line the Baking Pan
Grab a square baking pan and drape parchment paper inside, letting the edges hang over the sides. This trick will help you lift out the bars super easily later.
Step 2: Create Buttery Oat Base
Grab a saucepan and melt butter over gentle heat. Stir in:Mix until the mixture transforms into a silky smooth blend.
Step 3: Combine Oat Mixture
Pull the pan off the heat and fold in rolled oats. Blend everything until you get a consistent, delicious mixture.
Step 4: Press Initial Layer
Take two-thirds of the oat mixture and press it firmly into the prepared pan. Create a compact, even foundation for your bars.
Step 5: Craft Chocolate Layer
In another saucepan, combine:Melt these ingredients over low heat, stirring constantly until you achieve a glossy, velvety chocolate sauce.
Step 6: Pour Chocolate Layer
Carefully drizzle the molten chocolate over the oat base. Spread it evenly to cover every inch of the initial layer.
Step 7: Add Crumbly Topping
Sprinkle the remaining oat mixture over the chocolate, creating a rustic, textured surface.
Step 8: Chill and Set
Slide the pan into the refrigerator. Let the bars cool and set for 2-3 hours until the chocolate becomes completely firm.
Step 9: Slice and Serve
Use the parchment paper edges to lift the entire dessert from the pan. Slice into beautiful square bars.
Step 10: Store and Enjoy
Keep the bars in an airtight container in the refrigerator. They’ll stay fresh and delicious for up to one week.
Tips For Perfect No Bake Chocolate Oat Bars
Tasty Changes For No Bake Chocolate Oat Bars
Pairing Ideas For No Bake Chocolate Oat Bars
How To Store No Bake Chocolate Oat Bars
FAQ Guide For No Bake Chocolate Oat Bars
Most traditional oats contain gluten, so look for certified gluten-free oats to make this recipe safe for those with gluten sensitivities.
Yes, you can substitute honey with maple syrup or agave nectar, which will provide similar binding and sweetness to the oat base.
Always melt chocolate slowly over low heat and stir constantly to maintain a smooth, glossy texture without burning or separating.
Semi-sweet or dark chocolate chips work wonderfully, providing rich flavor without being overly sweet and complementing the oat base perfectly.
Print
No Bake Chocolate Oat Bars Recipe
- Total Time: 2-3 hours (for refrigeration)
- Yield: 8 1x
Description
Sweet, no-bake chocolate oat bars promise pure indulgence with minimal effort. Rich chocolate and hearty oats combine in a simple, delectable treat you’ll crave again and again.
Ingredients
Chocolate Layer:
- 1 cup chocolate chips
- 1/2 cup butter
- 1/4 cup milk
Base and Topping Layer:
- 2 cups rolled oats
- 1/2 cup brown sugar
- 1/2 cup unsalted butter
- 1/4 cup honey
- 1 tsp vanilla extract
Additional Ingredients:
- 1/4 tsp salt
- 2 tbsp cocoa powder
Instructions
- Prepare a square baking pan by lining it with parchment paper, ensuring overhang for easy removal.
- In a medium saucepan, melt butter over low heat, then incorporate brown sugar, honey, and vanilla extract, stirring until smooth and fully combined.
- Remove from heat and fold in rolled oats, mixing thoroughly to create a cohesive base mixture.
- Press two-thirds of the oat mixture firmly into the prepared pan, creating an even, compact bottom layer.
- For the chocolate layer, combine chocolate chips, butter, milk, cocoa powder, and salt in a separate saucepan.
- Melt the chocolate mixture over low heat, stirring constantly until glossy and completely smooth.
- Carefully pour the molten chocolate mixture over the oat base, spreading it evenly to cover the entire surface.
- Crumble the remaining oat mixture over the chocolate layer, creating a rustic, textured topping.
- Refrigerate the bars for 2-3 hours or until the chocolate sets completely and becomes firm.
- Using the parchment paper overhang, lift the entire dessert from the pan and slice into square bars.
- Store in an airtight container in the refrigerator for up to one week.
Notes
- Customize the oat base by swapping honey with maple syrup for a deeper, richer flavor profile.
- Use gluten-free rolled oats to make this recipe suitable for those with gluten sensitivities or celiac disease.
- For a dairy-free version, substitute butter with coconut oil and use dairy-free chocolate chips.
- Keep bars chilled to maintain their perfect texture and prevent chocolate from melting at room temperature.
- Prep Time: 15 minutes
- Cook Time: 20 minutes
- Category: Breakfast, Snacks, Desserts
- Method: None
- Cuisine: American
Nutrition
- Serving Size: 8
- Calories: 365
- Sugar: 17 g
- Sodium: 125 mg
- Fat: 20 g
- Saturated Fat: 10 g
- Unsaturated Fat: 10 g
- Trans Fat: 0 g
- Carbohydrates: 40 g
- Fiber: 3 g
- Protein: 4 g
- Cholesterol: 30 mg
Truc Tran (Kris)
Senior Food Editor
Expertise
Home Cooking, Meal Planning, Recipe Development, Baking and Pastry, Food Editor, Cooking-video Maker, Vietnamese Food Evaluation Expert
Education
Truc Tran (Kris), an experienced food writer and editor, is great at exploring and describing global cuisines, from simple street food to fancy dining. In her writing, she skillfully mixes different flavors, cooking methods, and culinary traditions, showing the unique character of various cultures through their food and drinks. On azcuisines.com, Kris highlights her knowledge, especially in Asian cuisine and worldwide traditional dishes.