The Ultimate No-Bake Chocolate Dream Cake Recipe for Sweet Bliss
Sweet dreams come alive with this no-bake chocolate dream cake that transforms simple ingredients into a decadent dessert.
Creamy layers melt together effortlessly without touching an oven.
Chocolate lovers will instantly fall for this rich, smooth confection that requires minimal kitchen skills.
Every bite promises pure indulgence with minimal effort.
Cool and silky textures blend harmoniously in each heavenly slice.
Rich chocolate notes dance across your palate, creating pure magic.
You cannot resist diving into this delightful treat that feels like pure comfort in dessert form.
Why No-Bake Chocolate Dream Cake Is a Dessert Must
What Goes Into No-Bake Chocolate Dream Cake
Base Ingredients:Binding and Setting Agents:Topping Ingredients:How to Build the Perfect Chocolate Dream Cake
Step 1: Activate Gelatin Magic
Sprinkle gelatin into warm water and stir until completely dissolved. Let the mixture sit for a few minutes to ensure smooth incorporation into the cake later.
Step 2: Crush Chocolate Wafer Wonderland
Use a rolling pin or food processor to transform wafers into fine, crumbly pieces. The smaller the crumbs, the more uniform your cake texture will be.
Step 3: Whip Meringue Clouds
Place egg whites in a spotlessly clean bowl. Whip with an electric mixer, starting slow and gradually increasing speed.
When soft peaks form, slowly add powdered sugar. Continue whipping until glossy, stiff peaks develop.
Step 4: Create Chocolate Symphony
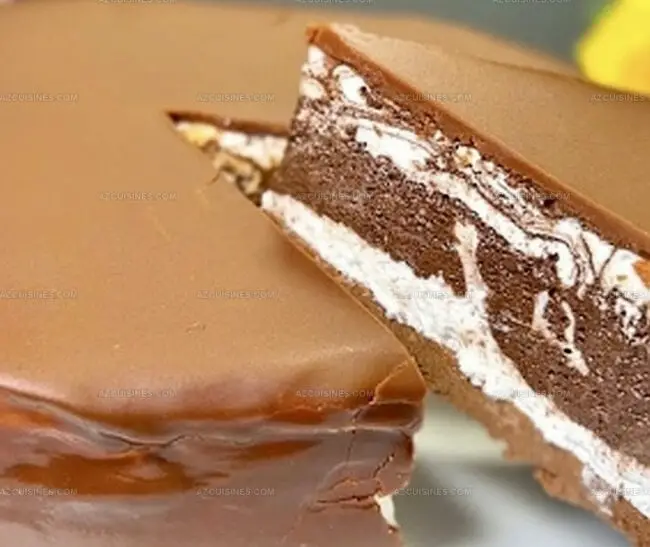
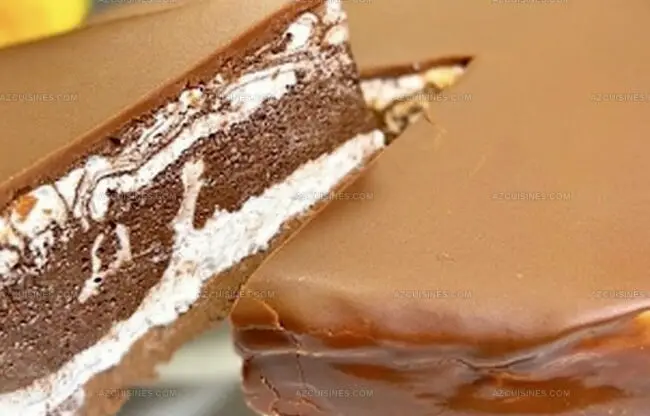
Gently fold cocoa powder into meringue using a spatula. Add crushed wafers and dissolved gelatin, maintaining the fluffy meringue texture.
Mix carefully to preserve air bubbles.
Step 5: Shape Cake Perfection
Transfer mixture into a round cake mold.
Use a spatula to smooth the top, creating an even surface.
Step 6: Craft Chocolate Glaze
Melt chocolate and butter together in a double boiler or microwave.
Stir until silky smooth and fully combined.
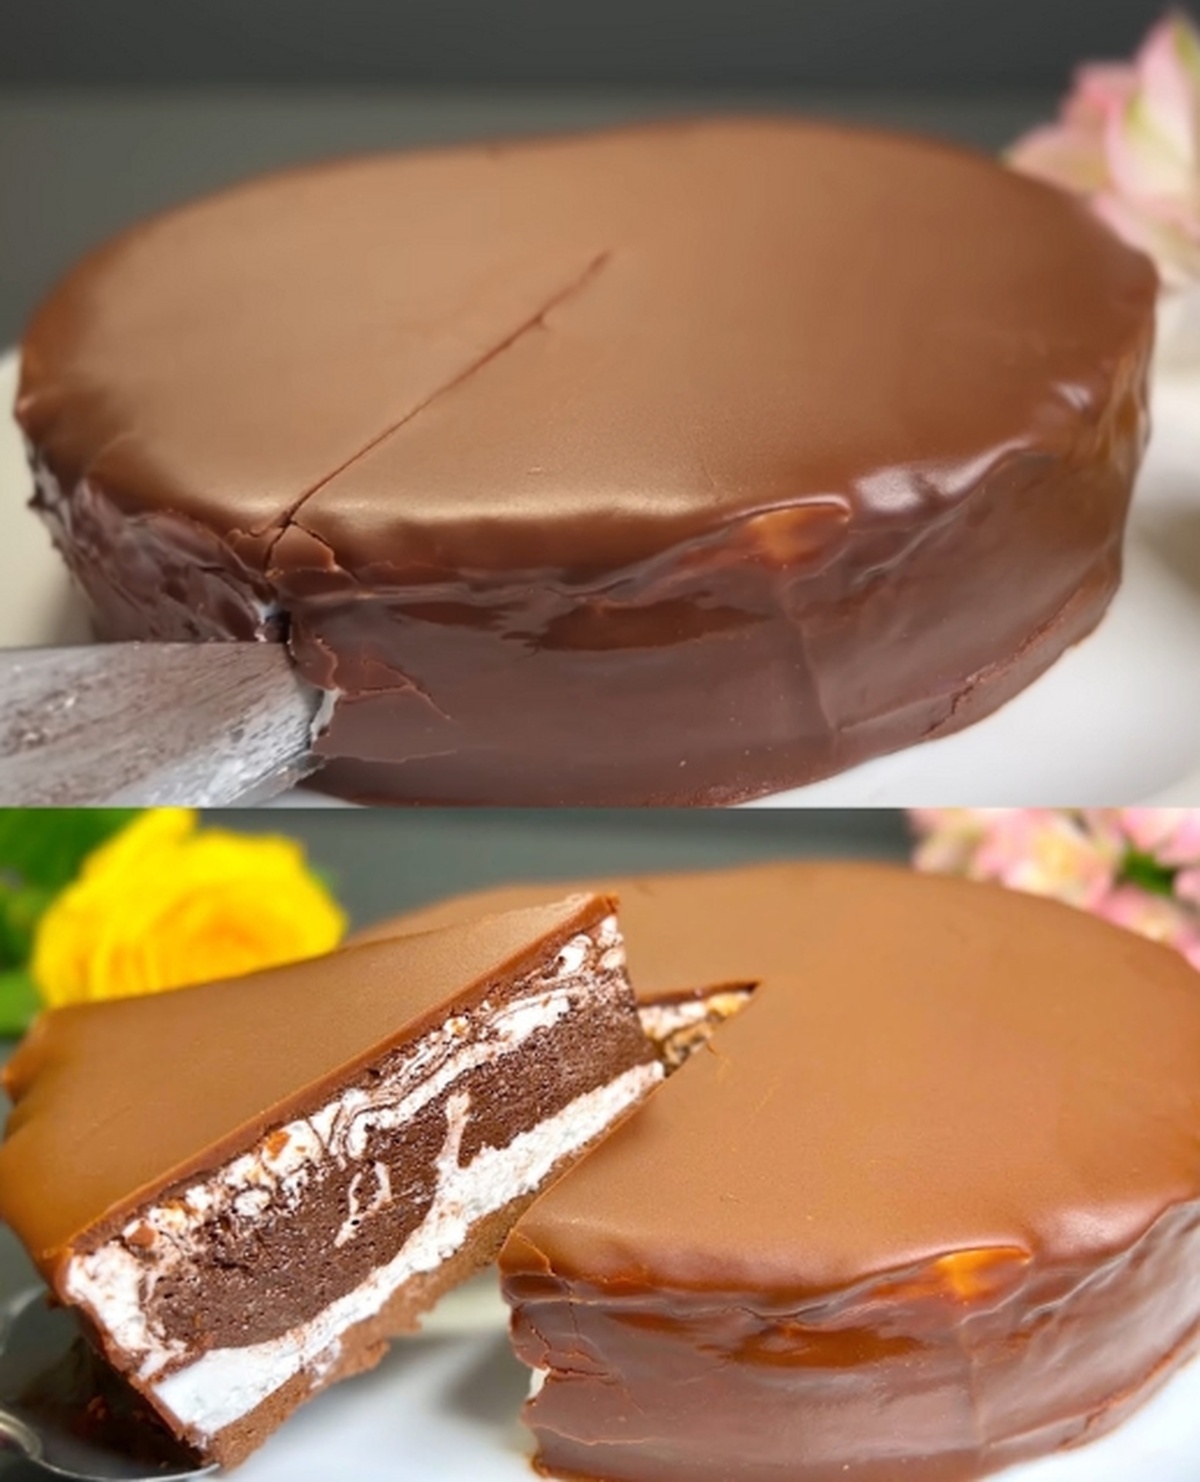
Step 7: Drizzle Chocolate Elegance
Pour melted chocolate glaze over the cake, ensuring complete and even coverage.
Step 8: Chill and Set
Refrigerate cake for minimum two hours. The cake will firm up and develop rich, decadent texture.
Step 9: Serve Delightful Treat
Remove cake from mold and slice into beautiful portions. Enjoy chilled for maximum flavor and texture.
Tips to Get the Dreamy Texture Just Right
Flavor Variations for Chocolate Dream Cake
What to Serve with Chocolate Dream Cake
Storage Tips for No-Bake Chocolate Dream Cake
FAQs About Chocolate Dream Cake
If using agar-agar instead of gelatin, the recipe becomes vegetarian-friendly. Traditional gelatin is animal-derived, so choosing agar-agar makes it a vegetarian dessert option.
Yes, you can use alternatives like powdered stevia or monk fruit sweetener. Adjust the quantity to match the sweetness level of powdered sugar, typically using about 1/3 less of the alternative sweetener.
When the egg whites form stiff, glossy peaks that hold their shape when the whisk is lifted. The peaks should stand straight up without falling over, indicating proper meringue consistency.
Dark or semi-sweet chocolate is recommended.
Print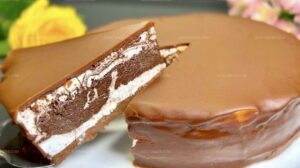
No-Bake Chocolate Dream Cake Recipe
- Total Time: 2 hours 15 minutes
- Yield: 8 1x
Description
Indulgent chocolate dream cake promises pure bliss without turning on the oven. Creamy layers of rich chocolate and silky textures will sweep you into dessert paradise, making each cool bite a delightful escape from ordinary sweets.
Ingredients
Main Ingredients:
- 200 grams (7 ounces) chocolate wafers
- 5 egg whites
- 300 grams (10.5 ounces) powdered sugar
- 20 grams (0.7 ounces) cocoa powder
- 100 grams (3.5 ounces) chocolate (for topping)
Stabilizing Ingredients:
- 10 grams (0.35 ounces) gelatin or 15 grams (0.53 ounces) agar-agar
- 100 milliliters (3.4 fluid ounces) water
Binding Ingredients:
- 80 grams (2.8 ounces) butter
Instructions
- Dissolve gelatin or agar-agar in lukewarm water according to package directions, ensuring complete integration without lumps.
- Pulverize chocolate wafers into fine, uniform crumbs using a food processor or rolling pin.
- Sanitize mixing bowl and whisk attachment, then whip egg whites until they form soft, billowy peaks with a glossy appearance.
- Gradually incorporate powdered sugar into egg whites, continuing to beat until mixture becomes thick, glossy, and forms rigid, pointed peaks.
- Delicately fold cocoa powder and crushed chocolate wafers into meringue using a spatula, maintaining the mixture’s airy texture.
- Integrate the prepared gelatin or agar-agar into the meringue mixture, stirring gently to distribute evenly without deflating the mixture.
- Transfer the combined mixture into an 18-centimeter round mold, smoothing the surface with a spatula to create an even layer.
- Create chocolate topping by melting chocolate and butter together in a double boiler, stirring until achieving a glossy, smooth consistency.
- Drizzle the molten chocolate mixture over the cake’s surface, using a spatula to spread it uniformly and create an elegant finish.
- Refrigerate the cake for 2 hours at 40°F, allowing it to set completely and develop a firm, elegant texture.
- Carefully unmold the chilled cake and slice into elegant portions before serving.
Notes
- For a lighter texture, whip egg whites to stiff peaks using room temperature eggs, ensuring maximum volume and stability.
- Swap regular chocolate wafers with gluten-free alternatives to make the dessert suitable for those with gluten sensitivities.
- Use vegetarian gelatin substitutes like agar-agar or carrageenan to create a plant-based version of this dreamy chocolate cake.
- To enhance flavor complexity, experiment with different chocolate varieties like dark, milk, or white chocolate in the topping and base layer.
- Prep Time: 15 minutes
- Cook Time: 0 minutes
- Category: Desserts
- Method: Chilling
- Cuisine: American
Nutrition
- Serving Size: 8
- Calories: 302
- Sugar: 37g
- Sodium: 39mg
- Fat: 18g
- Saturated Fat: 11g
- Unsaturated Fat: 7g
- Trans Fat: 0g
- Carbohydrates: 32g
- Fiber: 1g
- Protein: 4g
- Cholesterol: 0mg
Truc Tran (Kris)
Senior Food Editor
Expertise
Home Cooking, Meal Planning, Recipe Development, Baking and Pastry, Food Editor, Cooking-video Maker, Vietnamese Food Evaluation Expert
Education
Truc Tran (Kris), an experienced food writer and editor, is great at exploring and describing global cuisines, from simple street food to fancy dining. In her writing, she skillfully mixes different flavors, cooking methods, and culinary traditions, showing the unique character of various cultures through their food and drinks. On azcuisines.com, Kris highlights her knowledge, especially in Asian cuisine and worldwide traditional dishes.