
Dreamy No-Bake Chocolate Pink Cheesecake Recipe for Sweet Lovers
Creamy no-bake chocolate pink cheesecake brings sweet magic to your dessert table with minimal effort.
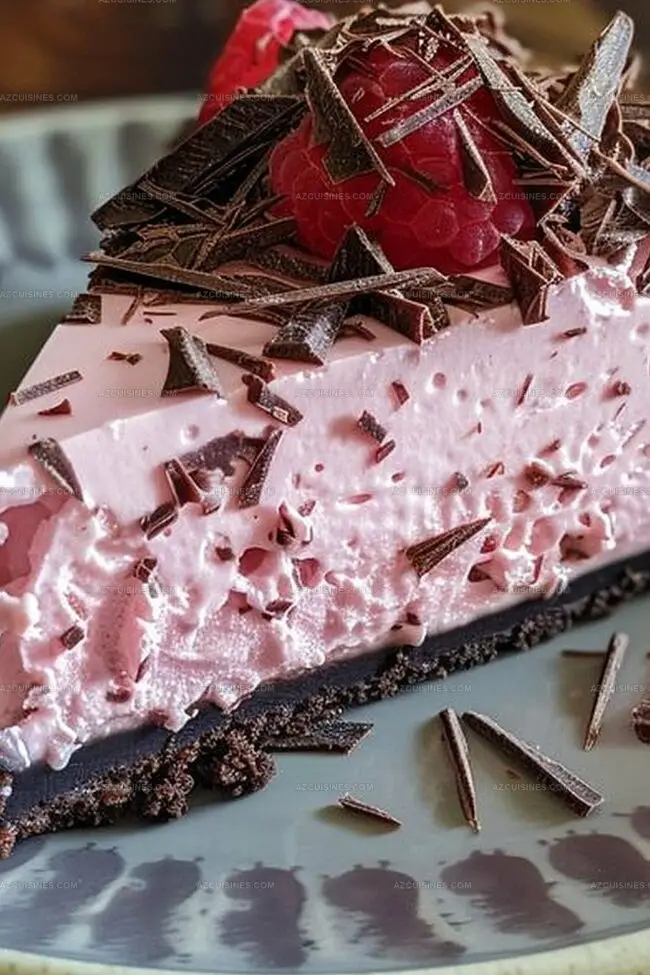
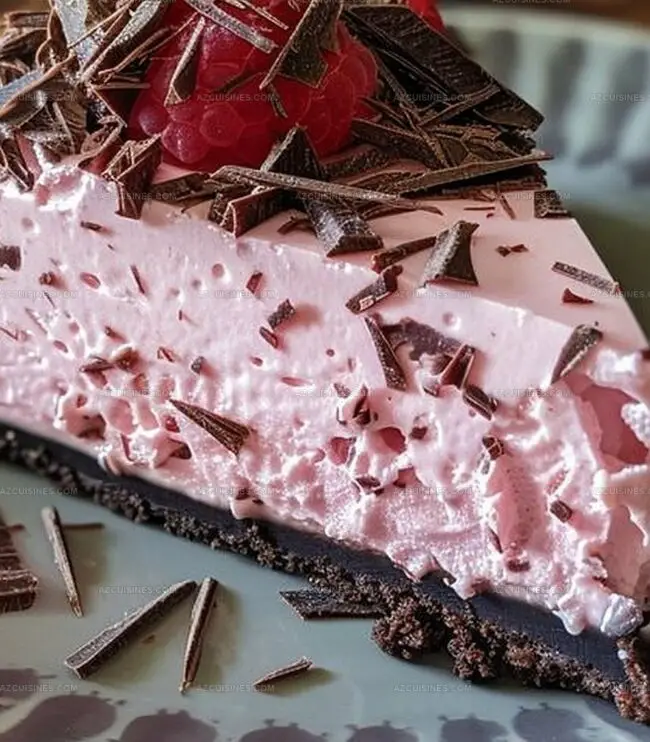
Silky layers of decadent chocolate and delicate pink hues create a stunning visual treat.
Summer gatherings deserve something spectacular that looks complex but requires simple ingredients.
Our recipe combines rich cocoa with soft pink cream cheese for an elegant twist.
Cool and smooth textures melt perfectly on your palate without turning on the oven.
Each slice promises a delightful blend of chocolate intensity and gentle berry-like undertones.
Impress everyone with this effortless showstopping dessert that looks like you spent hours in the kitchen.
Why Reeses No-Bake Pink Chocolate Cheesecake Is So Popular
Ingredients for Reeses No-Bake Pink Chocolate Cheesecake
Crust Base:Cheesecake Filling:Decorative and Color Elements:Instructions for Reeses No-Bake Pink Chocolate Cheesecake
Step 1: Create Crumbly Crust Base
Grab chocolate cookie crumbs and melted butter. Mix them thoroughly to form a solid base. Press the mixture firmly and evenly into the bottom of a 9-inch springform pan. Slide the pan into the refrigerator to keep the crust cool and firm while preparing other components.
Step 2: Whip Cream Cheese Smooth
Place softened cream cheese in a large mixing bowl. Beat the cream cheese using an electric mixer until it transforms into a silky, velvety texture with no lumps.
Step 3: Enhance Cream Cheese Flavor
Gradually incorporate powdered sugar and vanilla extract into the cream cheese. Continue beating until all ingredients blend seamlessly and create a rich, sweet mixture.
Step 4: Whip Heavy Cream
In a separate chilled bowl, vigorously whip heavy cream until it develops sturdy, standing peaks. The cream should hold its shape when the whisk is lifted.
Step 5: Combine Cream Mixtures
Gently fold the whipped cream into the cream cheese mixture. Use a delicate folding technique to maintain the airiness and create a smooth, consistent texture.
Step 6: Divide Cheesecake Base
Split the cheesecake mixture into two equal portions in separate bowls.
Step 7: Create Pink Layer
Melt pink candy melts and blend them into one portion of the cheesecake mixture. Add pink food coloring for a more vibrant pink shade if desired.
Step 8: Layer Cheesecake Mixture
Spoon alternating dollops of chocolate and pink cheesecake mixtures onto the prepared crust. Create a playful, artistic pattern across the surface.
Step 9: Swirl Decorative Pattern
Take a knife or spatula and gently drag it through the layers. Create beautiful, swirling marbled patterns that blend the chocolate and pink colors.
Step 10: Chill and Set
Transfer the cheesecake to the refrigerator. Allow it to set and firm up for a minimum of 4 hours or overnight for best results.
Step 11: Garnish and Serve
Before serving, sprinkle fresh raspberries and delicate chocolate shavings on top. Slice and enjoy the decadent, creamy dessert.
Pro Tips for Reeses No-Bake Pink Chocolate Cheesecake
Variation Ideas for Reeses No-Bake Pink Chocolate Cheesecake
Pairing Suggestions for Reeses No-Bake Pink Chocolate Cheesecake
Storage Tips for Reeses No-Bake Pink Chocolate Cheesecake
FAQs About Reeses No-Bake Pink Chocolate Cheesecake
Chocolate sandwich cookies like Oreos are perfect because they provide a rich chocolate base and create a sturdy, delicious crust that complements the cheesecake’s flavor.
Yes, white chocolate works well as an alternative. You can add food coloring to achieve the desired pink shade or use white chocolate for a different color variation.
Ensure all ingredients are at room temperature before mixing, avoid overmixing the cream cheese, and let the cheesecake set slowly in the refrigerator to minimize cracking.
Print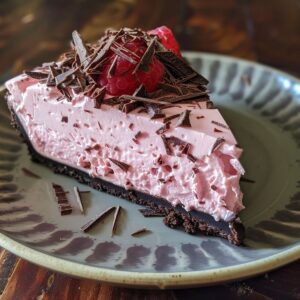
No-Bake Chocolate Pink Cheesecake Recipe
- Total Time: 4 hours 20 minutes
- Yield: 8 1x
Description
Silky no-bake chocolate pink cheesecake delights dessert enthusiasts with its dreamy blend of rich chocolate and playful pink hues. Creamy layers promise an indulgent escape into sweet bliss you won’t want to miss.
Ingredients
Main Ingredients:
- 24 ounces (680 grams) cream cheese, softened
- 1 cup powdered sugar
- 1 cup heavy cream, chilled
- 1 1/2 cups chocolate cookie crumbs
- 1/2 cup pink candy melts, melted and cooled
Supporting Ingredients:
- 1/3 cup unsalted butter, melted
- 1 teaspoon vanilla extract
- Pink food coloring (optional)
Garnish:
- Fresh raspberries
- Chocolate shavings
Instructions
- Crush chocolate cookies into fine crumbs and blend thoroughly with melted butter, creating a uniform base mixture.
- Press the crumb mixture firmly into the bottom of a 9-inch springform pan, ensuring an even, compact layer.
- Refrigerate the crust for 15 minutes to solidify while preparing the filling.
- Beat cream cheese in a large bowl until completely smooth and free of lumps.
- Incorporate powdered sugar and vanilla extract, mixing until the texture becomes light and fluffy.
- Whip heavy cream in a separate bowl until it forms sturdy, defined peaks.
- Carefully fold the whipped cream into the cream cheese mixture, maintaining a delicate, airy consistency.
- Separate the cheesecake mixture into two equal portions.
- Melt pink candy melts and blend into one portion of the cheesecake mixture, adding additional pink food coloring if a more vibrant hue is desired.
- Pour alternating spoonfuls of chocolate and pink mixtures onto the chilled crust, creating a playful marbled pattern.
- Gently swirl the mixtures using a knife, creating intricate, interconnected designs.
- Refrigerate the cheesecake for 4-6 hours, or until completely set and firm.
- Decorate with fresh raspberries and delicate chocolate shavings just before serving.
Notes
- Experiment with different cookie types for the crust, like Oreos or graham crackers, to customize the base flavor and texture.
- Ensure cream cheese is at room temperature to achieve a smooth, lump-free filling that blends perfectly.
- For a lighter version, substitute half the cream cheese with Greek yogurt to reduce calories while maintaining creamy consistency.
- Swap pink candy melts with natural fruit purees like strawberry or raspberry for a more authentic and healthier color and flavor profile.
- Prep Time: 20 minutes
- Cook Time: 0 minutes
- Category: Desserts
- Method: Chilling
- Cuisine: American
Nutrition
- Serving Size: 8
- Calories: 429 kcal
- Sugar: 33 g
- Sodium: 160 mg
- Fat: 34 g
- Saturated Fat: 20 g
- Unsaturated Fat: 10 g
- Trans Fat: 0.5 g
- Carbohydrates: 29 g
- Fiber: 1 g
- Protein: 6 g
- Cholesterol: 90 mg
Truc Tran (Kris)
Senior Food Editor
Expertise
Home Cooking, Meal Planning, Recipe Development, Baking and Pastry, Food Editor, Cooking-video Maker, Vietnamese Food Evaluation Expert
Education
Truc Tran (Kris), an experienced food writer and editor, is great at exploring and describing global cuisines, from simple street food to fancy dining. In her writing, she skillfully mixes different flavors, cooking methods, and culinary traditions, showing the unique character of various cultures through their food and drinks. On azcuisines.com, Kris highlights her knowledge, especially in Asian cuisine and worldwide traditional dishes.