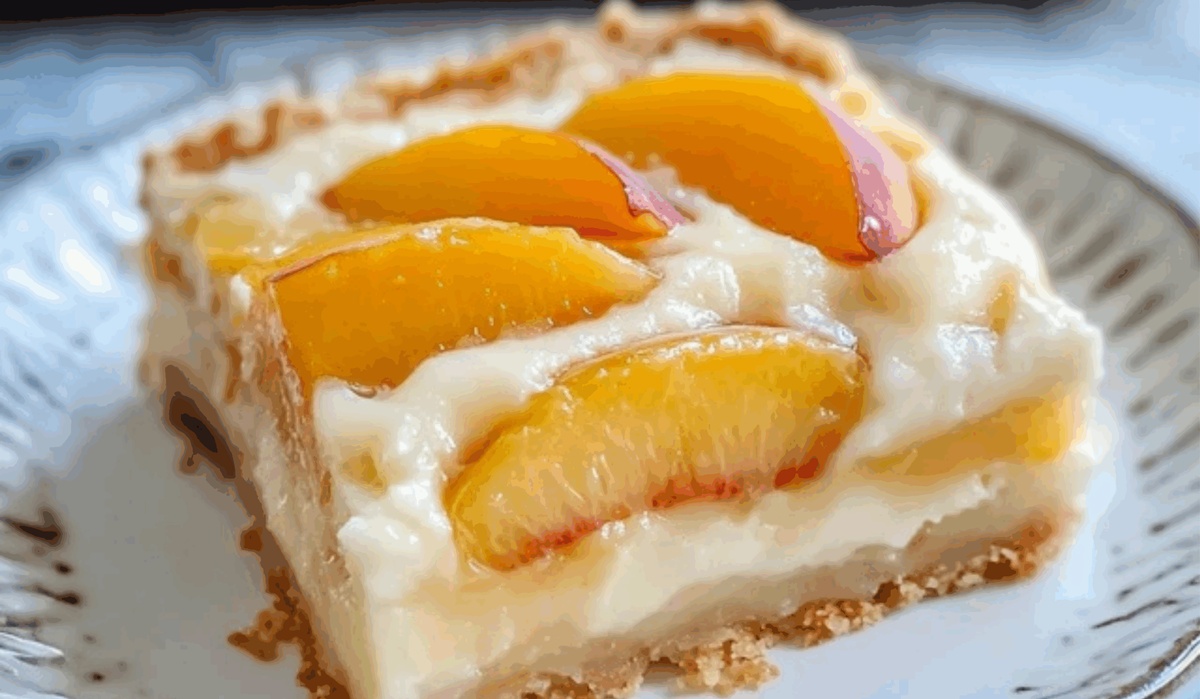
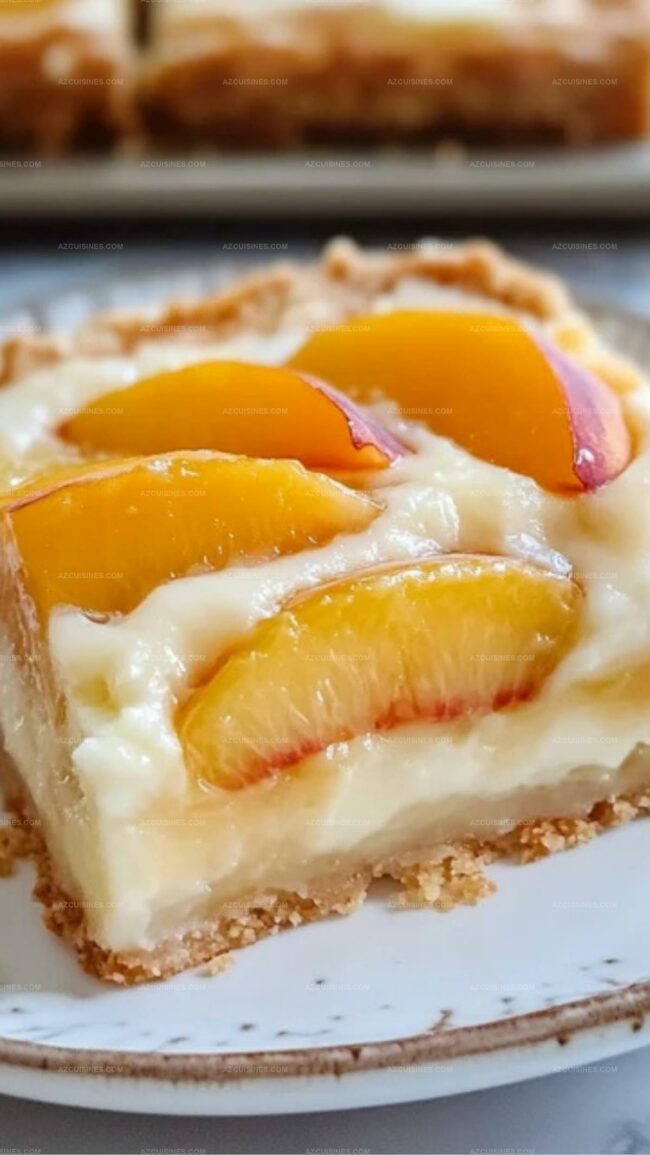
The Juiciest Peaches and Cream Bars Recipe You’ll Ever Make
Delectable peaches and cream bars blend summer’s sweetest memories into a delightful dessert.
Sweet orchard fruits nestle between creamy layers that melt on your tongue.
Soft, buttery textures invite pure indulgence with each tender bite.
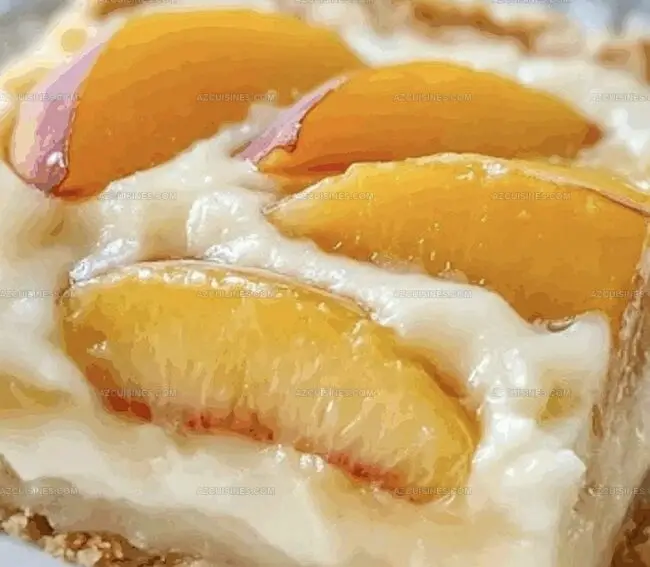
Delicate peach slices dance through rich, velvety cream cheese filling.
Sunlight seems to sparkle within these magical squares of pure comfort.
Fresh ingredients transform simple moments into extraordinary culinary experiences.
You’ll want to savor every single crumb of this irresistible treat.
Why These Peaches and Cream Bars Are Worth Making
Ingredients List for Peaches and Cream Bars
Crust Base:Fruit Layer:Cream Filling:Step-by-Step Guide to Peaches and Cream Bars
Step 1: Prepare the Baking Station
Set your oven to warm up at 350°F. Grab a 9×13-inch pan and line it with parchment paper, letting the edges hang over for easy bar removal later.
Step 2: Mix the Magical Crust
Combine in a mixing bowl:Blend everything until it looks like sandy crumbs that stick together when pressed.
Step 3: Create the Crust Base
Take about two-thirds of your crumbly mixture and press it firmly into the pan. Make sure it’s packed down evenly to create a solid foundation for your bars.
Step 4: Lay Down the Peachy Layer
Slice fresh peaches into thin, elegant segments. Arrange them in a beautiful single layer across the crust, covering the entire surface.
Step 5: Spread the Peachy Goodness
Drizzle and spread peach preserves over the peach slices. Ensure every slice gets a loving coating of sweet preserve.
Step 6: Whip Up the Creamy Dream
In a bowl, whisk together:Blend until the mixture becomes silky smooth and dreamy.
Step 7: Pour the Cream Layer
Carefully pour the cream mixture over the peach layer. Use a spatula to spread it evenly, creating a luxurious blanket over the fruit.
Step 8: Add the Crumbly Topping
Sprinkle the remaining crust mixture across the top, creating a rustic, textured surface that will turn golden and crisp.
Step 9: Bake to Perfection
Slide the pan into the oven and bake for 40-45 minutes. Look for golden edges and a center that’s set but still has a slight wiggle.
Step 10: Cool Down
Remove from the oven and let the bars cool completely at room temperature for about an hour.
Step 11: Chill and Set
Pop the pan in the refrigerator for 2 hours. This helps the bars firm up and makes cutting easier.
Step 12: Serve and Enjoy
Lift the bars out using the parchment paper overhang. Slice into squares and serve chilled. Prepare for delighted smiles and happy taste buds!
Tips to Get That Perfect Creamy Texture
Flavor Combos for Peaches and Cream Bars
What to Pair with Peaches and Cream Bars
Storing Peaches and Cream Bars with Ease

Common Peaches and Cream Bar Questions
Peaches provide a sweet, juicy flavor that perfectly complements the creamy filling. Their natural sweetness and soft texture make them ideal for these bars.
Fresh peaches are recommended for the best texture and flavor. Frozen peaches can be too watery and might make the crust soggy, potentially affecting the overall quality of the bars.
Look for golden brown edges and a center that’s set but still slightly jiggly. The cream layer should not be completely firm when you remove it from the oven, as it will continue to set during cooling.
Parchment paper is crucial for easy removal and clean cutting of the bars.
Print
Peaches and Cream Bars Recipe
- Total Time: 3 hours and 5-10 minutes
- Yield: 12 1x
Description
Luscious Peaches and Cream Bars bring summer’s sweetest moments to life with layers of buttery crust and silky cream cheese filling. Fresh peaches dance between creamy textures, promising delightful bites that transport you straight to sunny orchard memories.
Ingredients
Fruit Base:
- 4 peaches, fresh, ripe
- 1/2 cup peach preserves
Crust and Topping:
- 2 cups all-purpose flour
- 1 cup unsalted butter
- 1/2 cup granulated sugar
- 1/4 cup brown sugar
Cream Layer:
- 8 oz cream cheese, softened
- 1/3 cup heavy cream
- 1/4 cup powdered sugar
- 1 large egg
- 1 tsp vanilla extract
- 1/4 tsp salt
Instructions
- Preheat the oven to 350°F and line a 9×13-inch baking pan with parchment paper, allowing excess to hang over the sides for easy removal.
- Create the crust by combining flour, granulated sugar, brown sugar, and softened butter in a mixing bowl, blending until a crumbly texture forms.
- Press approximately two-thirds of the crust mixture firmly into the prepared pan, creating an even, compact base layer.
- Slice fresh peaches into thin, uniform segments, arranging them in a single layer across the crust.
- Gently spread peach preserves over the peach slices, ensuring complete and even coverage.
- Prepare the cream layer by whisking cream cheese, heavy cream, powdered sugar, egg, vanilla extract, and salt until smooth and creamy.
- Pour the cream mixture evenly over the peach layer, using a spatula to distribute it carefully.
- Sprinkle the remaining crust mixture across the top of the cream layer, creating a rustic, crumbly topping.
- Bake for 40-45 minutes, or until the edges turn golden brown and the center appears set but slightly jiggly.
- Remove from the oven and allow to cool completely at room temperature for approximately 1 hour.
- Refrigerate for an additional 2 hours to ensure firm, clean slicing.
- Lift the bars out using the parchment paper overhang, cut into squares, and serve chilled.
Notes
- Choose ripe, fragrant peaches for the most intense flavor and sweetness in your bars.
- Swap fresh peaches with frozen or canned if seasonal fresh peaches are unavailable, but drain excess liquid thoroughly.
- Experiment with gluten-free flour blend to make this recipe celiac-friendly and maintain the delicate crust texture.
- Reduce sugar content by using natural sweeteners like honey or maple syrup for a healthier alternative without compromising taste.
- Prep Time: 20 minutes
- Cook Time: 40-45 minutes
- Category: Desserts, Snacks
- Method: Baking
- Cuisine: American
Nutrition
- Serving Size: 12
- Calories: 320
- Sugar: 14 g
- Sodium: 150 mg
- Fat: 18 g
- Saturated Fat: 11 g
- Unsaturated Fat: 5 g
- Trans Fat: 0 g
- Carbohydrates: 36 g
- Fiber: 1 g
- Protein: 3 g
- Cholesterol: 50 mg
Truc Tran (Kris)
Senior Food Editor
Expertise
Home Cooking, Meal Planning, Recipe Development, Baking and Pastry, Food Editor, Cooking-video Maker, Vietnamese Food Evaluation Expert
Education
Truc Tran (Kris), an experienced food writer and editor, is great at exploring and describing global cuisines, from simple street food to fancy dining. In her writing, she skillfully mixes different flavors, cooking methods, and culinary traditions, showing the unique character of various cultures through their food and drinks. On azcuisines.com, Kris highlights her knowledge, especially in Asian cuisine and worldwide traditional dishes.