
The Ultimate Peanut Butter Brownie in a Mug Recipe for Sweet Bliss
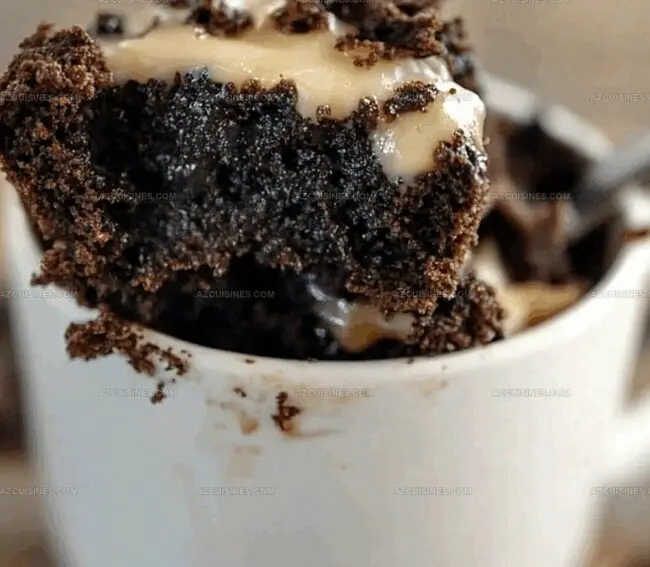
Whipping up a decadent peanut butter brownie in a mug satisfies those sudden chocolate cravings in minutes.
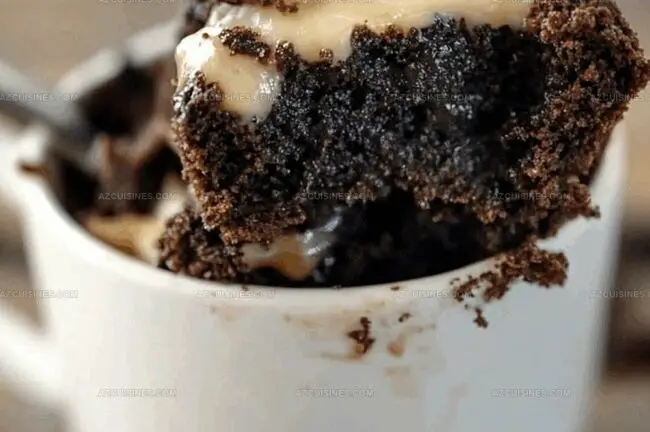
Microwave magic turns simple ingredients into a rich, gooey dessert you can savor solo.
Comfort comes quickly with this single-serving treat that demands minimal effort.
Pantry staples create an indulgent experience right in your favorite mug.
Chocolate and peanut butter dance together, promising intense flavor in every warm bite.
Mixing takes less than five minutes, making this recipe perfect for spontaneous sweet moments.
Let your spoon dive deep and enjoy pure dessert bliss.
Why Peanut Butter Brownie In A Mug Is A Must
Everything In A Peanut Butter Brownie In A Mug
Dry Ingredients:Wet Ingredients:Flavor and Topping Ingredients:How To Make A Peanut Butter Brownie In A Mug Fast
Step 1: Combine Dry Ingredients
Grab a microwave-safe mug and toss in flour, cocoa powder, sugar, and baking powder. Whisk these together until they look perfectly blended and no clumpy spots remain.
Step 2: Add Wet Ingredients
Create a tiny crater in the center of your dry mix. Pour in milk, vegetable oil, egg, and vanilla extract. Let these liquid friends mingle with the dry ingredients.
Step 3: Mix Into Smooth Batter
Grab a fork and go to town mixing everything. Stir and blend until the mixture transforms into a silky, lump-free batter that looks totally irresistible.
Step 4: Swirl Peanut Butter Magic
Drizzle peanut butter across the top of your batter. Use a knife or spoon to create beautiful, mesmerizing swirls that will make your mouth water.
Step 5: Sprinkle Delicious Toppings
Scatter these delightful extras on top of your batter:Spread them out evenly for maximum flavor in every bite.
Step 6: Microwave to Perfection
Zap your mug in the microwave on high power. Cook for 60-90 seconds, keeping a close eye to prevent any burnt disaster. You’ll know it’s ready when the brownie puffs up slightly and looks set in the center.
Step 7: Let It Rest
Give your brownie a moment to chill out for 1-2 minutes after microwaving. This helps it set and develop an even more incredible texture.
Step 8: Serve and Enjoy
Dive into your warm, gooey creation right away. Feel free to add a bonus dollop of peanut butter or sprinkle some extra chocolate chips on top for maximum deliciousness.
Tips To Make Peanut Butter Brownie In A Mug Better
Fun Ideas For Peanut Butter Brownie In A Mug
Tasty Pairings With Peanut Butter Brownie In A Mug
Store Peanut Butter Brownie In A Mug Without Fuss
Common Questions On Peanut Butter Brownie In A Mug
Yes, you can substitute dairy milk with almond milk, soy milk, or oat milk without significantly changing the recipe’s texture or taste.
Absolutely! Replace the all-purpose flour with a gluten-free flour blend or almond flour to create a gluten-free version of the mug brownie.
The brownie is done when it rises slightly, appears set in the center, and looks slightly moist but not wet. Overcooking can make it dry and tough.
Yes, you can mix the dry ingredients beforehand and store them in an airtight container. When ready to cook, simply add the wet ingredients and microwave.
Print
Peanut Butter Brownie in a Mug Recipe
- Total Time: 12 minutes
- Yield: 1 1x
Description
Midnight cravings meet their match with this Peanut Butter Brownie in a Mug, a quick chocolate-peanut indulgence ready in minutes. Creamy peanut butter swirls through rich chocolate, creating a single-serve dessert that satisfies without complicated kitchen work.
Ingredients
Dry Ingredients:
- 4 tbsp all-purpose flour
- 3 tbsp cocoa powder
- 3 tbsp granulated sugar
- 1/4 tsp baking powder
Wet Ingredients:
- 3 tbsp milk
- 2 tbsp vegetable oil
- 1 large egg
- 1 tsp vanilla extract
Peanut Butter Components:
- 2 tbsp peanut butter
- 1 tbsp peanut butter chips
- 1 tsp chocolate chips (optional)
Instructions
- Gather all dry ingredients in a microwave-safe mug, whisking flour, cocoa powder, sugar, and baking powder until uniformly combined.
- Create a small well in the center of the dry mixture, then pour in milk, vegetable oil, egg, and vanilla extract.
- Vigorously mix all ingredients with a fork until the batter becomes smooth and free of lumps, ensuring complete incorporation.
- Drizzle peanut butter across the surface of the batter, using a knife or spoon to create delicate swirls throughout the mixture.
- Sprinkle peanut butter chips and optional chocolate chips on top of the batter, distributing them evenly.
- Microwave the mug on high power for 60-90 seconds, watching carefully to prevent overcooking. The brownie is done when it rises slightly and appears set in the center.
- Allow the mug brownie to rest for 1-2 minutes after microwaving, as it will continue to set and develop a richer texture.
- Serve warm, optionally garnishing with an extra dollop of peanut butter or a sprinkle of chocolate chips for added indulgence.
Notes
- Swirl peanut butter delicately to create beautiful marbled patterns, ensuring even distribution without overmixing the batter.
- Check microwave power carefully since wattages vary, start with 60 seconds and add incremental time to prevent dry or rubbery texture.
- Substitute dairy milk with almond, oat, or coconut milk for lactose-free versions, maintaining the same liquid measurement ratio.
- Replace egg with mashed banana or applesauce for vegan alternative, which adds moisture and helps bind ingredients similarly.
- Prep Time: 10 minutes
- Cook Time: 1-2 minutes
- Category: Desserts, Snacks
- Method: Microwaving
- Cuisine: American
Nutrition
- Serving Size: 1
- Calories: 420
- Sugar: 20 g
- Sodium: 250 mg
- Fat: 23 g
- Saturated Fat: 4 g
- Unsaturated Fat: 19 g
- Trans Fat: 0 g
- Carbohydrates: 41 g
- Fiber: 2 g
- Protein: 10 g
- Cholesterol: 70 mg
Truc Tran (Kris)
Senior Food Editor
Expertise
Home Cooking, Meal Planning, Recipe Development, Baking and Pastry, Food Editor, Cooking-video Maker, Vietnamese Food Evaluation Expert
Education
Truc Tran (Kris), an experienced food writer and editor, is great at exploring and describing global cuisines, from simple street food to fancy dining. In her writing, she skillfully mixes different flavors, cooking methods, and culinary traditions, showing the unique character of various cultures through their food and drinks. On azcuisines.com, Kris highlights her knowledge, especially in Asian cuisine and worldwide traditional dishes.