
Spooky-Fun Peanut Butter Spider Cookies Recipe for Halloween
Sweet and spooky peanut butter spider cookies weave magic into Halloween dessert traditions.
Creepy crawly treats bring playful giggles to any festive gathering.
Kids absolutely adore these whimsical eight-legged confections that look almost too cute to eat.
Chocolate legs and candy eyes transform simple cookies into delightful edible creatures.
Baking becomes an adventure when you craft these deliciously scary desserts.
Crafting these adorable arachnid-inspired sweets promises memorable moments of shared laughter and creativity.
Jump into this delightful recipe and watch your kitchen come alive with Halloween spirit!
Why Peanut Butter Spider Cookies Are Spooky And Sweet
Peanut Butter Spider Cookies Ingredient Guide
Base Ingredients:Dry Ingredients:Decoration Ingredients:How To Make Peanut Butter Spider Cookies With Fun
Step 1: Prepare Baking Setup
Preheat the oven to 350°F. Line baking sheets with parchment paper for easy cookie removal and clean-up.
Step 2: Create Cookie Base
In a large mixing bowl, blend together:Beat until the mixture becomes light and fluffy with a creamy texture.
Step 3: Add Moisture Ingredients
Incorporate egg and vanilla extract into the sugar mixture. Mix thoroughly until fully combined and smooth.
Step 4: Combine Dry Ingredients
In a separate bowl, sift together:Ensure no lumps remain in the dry mixture.
Step 5: Form Cookie Dough
Gradually fold dry ingredients into wet mixture. Mix until a consistent, soft cookie dough forms.
Step 6: Shape Cookie Balls
Scoop rounded tablespoon-sized dough balls onto prepared baking sheets. Space cookies 2 inches apart to allow spreading.
Step 7: Bake Cookies
Place in preheated oven and bake for 10-12 minutes. Look for lightly golden brown edges as a sign of doneness.
Step 8: Cool Completely
Remove cookies from oven and transfer to a wire rack. Allow complete cooling before decorating.
Step 9: Melt Chocolate
Separately melt white and dark chocolate wafers in microwave-safe bowls. Stir every 30 seconds to prevent burning.
Step 10: Prepare Piping Bags
Transfer melted chocolates to separate piping bags with small round tips for precise decorating.
Step 11: Warm Peanut Butter
Slightly warm peanut butter to create a more spreadable consistency for easy application.
Step 12: Add Peanut Butter Base
Use an offset spatula to spread a thin layer of peanut butter on each cooled cookie.
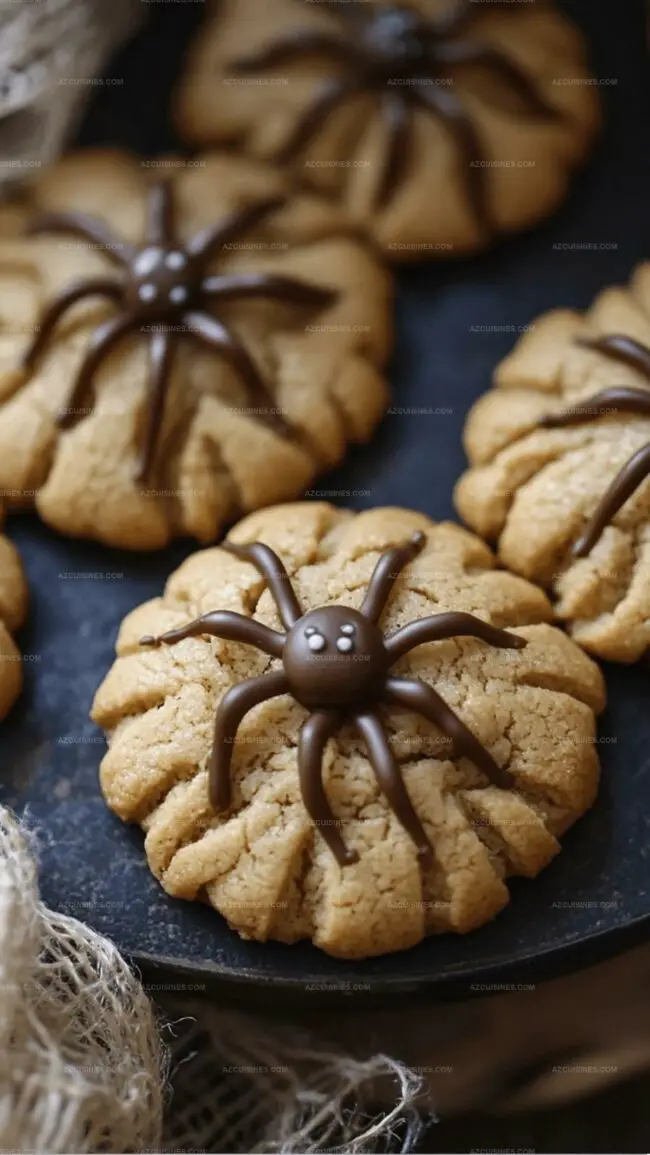
Step 13: Create Spider Eyes
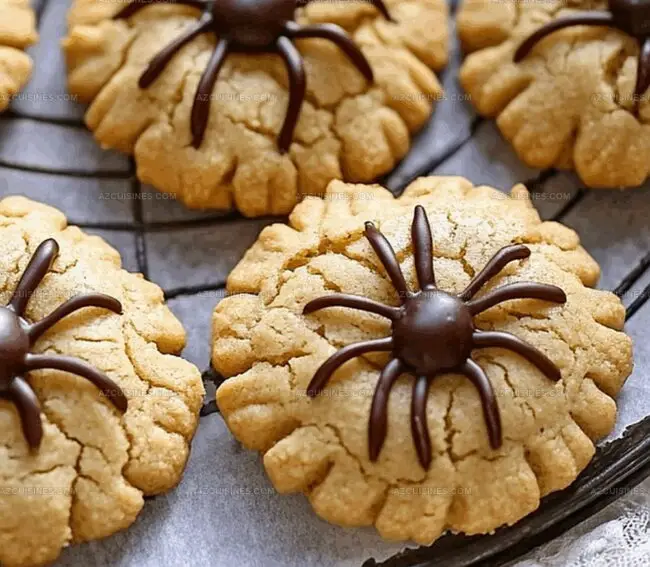
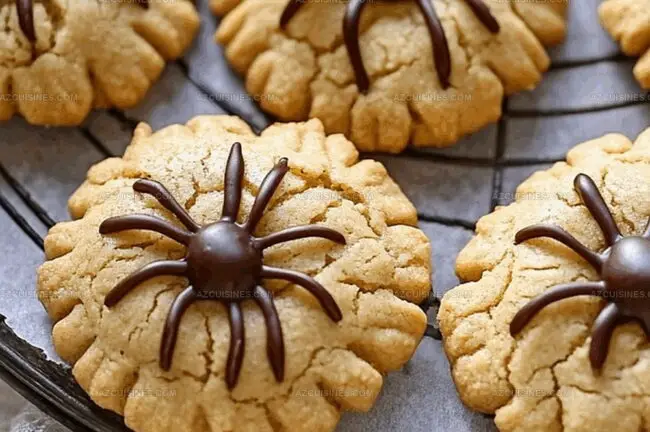
Place chocolate candies in the center of each cookie to represent spider eyes.
Step 14: Pipe Chocolate Legs
Use dark chocolate to pipe spider legs radiating from the peanut butter body.
Step 15: Add Web Details
Use a toothpick to draw delicate white chocolate web designs around the spider.
Step 16: Set Decorations
Refrigerate cookies for 10 minutes to help chocolate decorations set firmly.
Step 17: Serve Spooky Treats
Present your creepy-crawly Halloween spider cookies and watch guests get delightfully spooked!
Tips For Cute And Tasty Peanut Butter Spider Cookies
Creative Twists On Peanut Butter Spider Cookies
Pairing Ideas For Peanut Butter Spider Cookies
How To Store Peanut Butter Spider Cookies The Smart Way
All The Answers About Peanut Butter Spider Cookies
Not at all! The decorating process is simple and fun. You just need a steady hand and basic piping skills. The chocolate legs and web details can be easily created with small round piping tips.
Dark and white chocolate wafers are perfect. They melt smoothly and provide excellent control for creating precise spider legs and web designs. Make sure to melt them carefully in short microwave intervals.
Absolutely! Kids can help with mixing dough, scooping cookie balls, and adding chocolate candy eyes. Adult supervision is recommended for oven tasks and melting chocolate. It’s a great family baking activity.
Use a piping bag with a small round tip and move slowly.
Print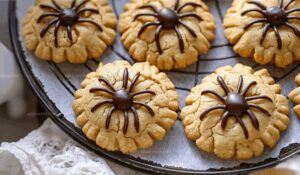
Peanut Butter Spider Cookies Recipe
- Total Time: 42 minutes
- Yield: 24 1x
Description
Spooky Halloween “Peanut Butter Spider Cookies” invite playful baking adventures with creepy chocolate legs and googly candy eyes. Crafty dessert makers can delight guests with this whimsical sweet treat perfect for seasonal celebrations.
Ingredients
Cookies Base:
- 2 cups all-purpose flour
- 1/2 cup creamy peanut butter
- 1/2 cup unsalted butter
- 1/3 cup granulated sugar
- 1/3 cup brown sugar
- 1 large egg
- 1 tsp vanilla extract
- 1/2 tsp baking soda
- 1/4 tsp salt
Decoration Ingredients:
- 1/2 cup creamy peanut butter (for spider body)
- 1/4 cup chocolate melting wafers
- 1/4 cup white chocolate melting wafers
- 24 chocolate candies (for spider eyes)
Piping and Assembly:
- 1 piping bag
- 1 small round piping tip
- 1 offset spatula
- 1 toothpick (for creating web details)
Instructions
- Preheat the oven to 350°F and line baking sheets with parchment paper.
- Cream together softened butter, peanut butter, granulated sugar, and brown sugar until light and fluffy.
- Mix in the egg and vanilla extract until fully incorporated.
- Sift together flour, baking soda, and salt in a separate bowl.
- Gradually fold dry ingredients into the wet mixture, creating a smooth cookie dough.
- Scoop rounded tablespoon-sized balls onto prepared baking sheets, spacing them 2 inches apart.
- Bake for 10-12 minutes until edges are lightly golden brown.
- Remove from oven and allow cookies to cool completely on a wire rack.
- Melt chocolate wafers separately in microwave-safe bowls, stirring every 30 seconds until smooth.
- Transfer melted white and dark chocolate to separate piping bags fitted with small round tips.
- Warm peanut butter slightly to create a more spreadable consistency.
- Use an offset spatula to spread a small amount of peanut butter on each cooled cookie.
- Place chocolate candies as spider eyes in the center of each cookie.
- Pipe dark chocolate legs radiating from the peanut butter body to create spider shapes.
- Use a toothpick to draw delicate white chocolate web details around the spider design.
- Refrigerate cookies for 10 minutes to set the chocolate decorations.
- Serve and enjoy your spooky halloween treats.
Notes
- Add extra crunch by mixing chopped peanuts into the cookie dough for a nutty texture boost.
- Swap traditional peanut butter with almond or sunflower seed butter to create allergy-friendly alternatives.
- Use gluten-free flour blend to make these cookies suitable for those with wheat sensitivities.
- Create mini spiders by reducing cookie ball size and adjusting baking time slightly shorter for perfectly proportioned treats.
- Prep Time: 20 minutes
- Cook Time: 12 minutes
- Category: Desserts, Snacks
- Method: Baking
- Cuisine: American
Nutrition
- Serving Size: 24
- Calories: 191
- Sugar: 8 g
- Sodium: 99 mg
- Fat: 10 g
- Saturated Fat: 3 g
- Unsaturated Fat: 7 g
- Trans Fat: 0 g
- Carbohydrates: 23 g
- Fiber: 1 g
- Protein: 4 g
- Cholesterol: 14 mg
Truc Tran (Kris)
Senior Food Editor
Expertise
Home Cooking, Meal Planning, Recipe Development, Baking and Pastry, Food Editor, Cooking-video Maker, Vietnamese Food Evaluation Expert
Education
Truc Tran (Kris), an experienced food writer and editor, is great at exploring and describing global cuisines, from simple street food to fancy dining. In her writing, she skillfully mixes different flavors, cooking methods, and culinary traditions, showing the unique character of various cultures through their food and drinks. On azcuisines.com, Kris highlights her knowledge, especially in Asian cuisine and worldwide traditional dishes.