
Dreamy Raspberry Cheesecake Bars Recipe for Sweet Moments
Sweet afternoons call for delectable raspberry cheesecake bars that melt in your mouth with creamy perfection.
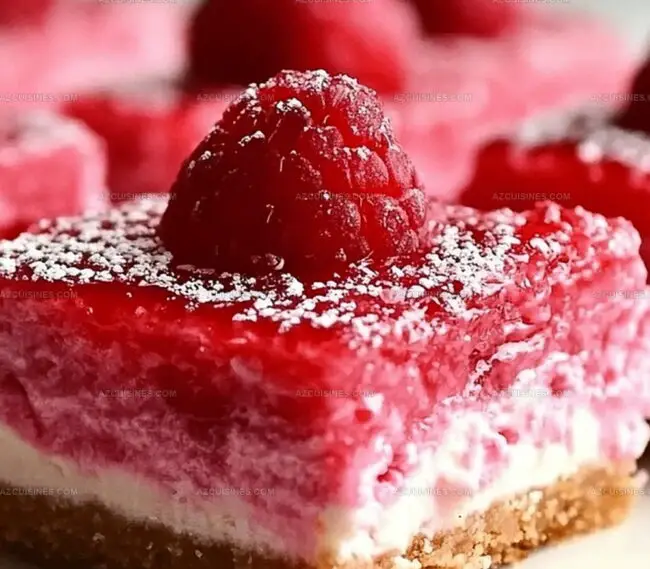
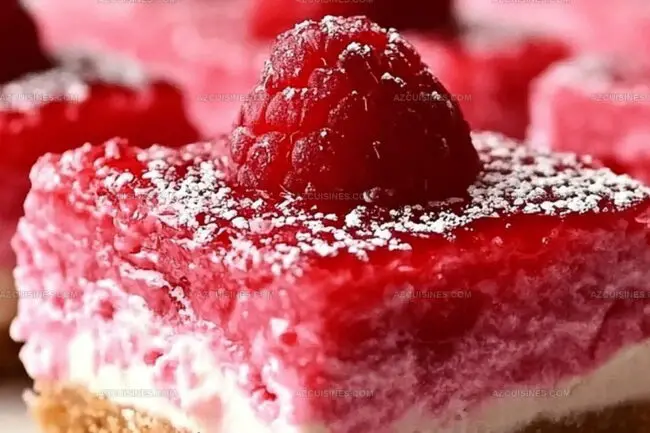
Layers of smooth cream cheese blend seamlessly with vibrant berry swirls.
Crisp graham cracker crusts provide a delightful crunch beneath the silky filling.
Seasonal raspberries add bursts of tangy brightness to each delicate slice.
Simple ingredients come together in a dessert that looks impressive yet requires minimal effort.
Rich textures and balanced flavors make these bars a crowd-pleasing treat for any gathering.
You’ll want to savor every single bite of this irresistible dessert.
Sweet Reasons To Love Raspberry Cheesecake Bars
Inside Raspberry Cheesecake Bars: What You Need
Crust Base:Cheesecake Filling:Raspberry Topping:Raspberry Cheesecake Bars That Are Easy To Make
Step 1: Prep the Oven and Pan
Heat the oven to 350°F. Line a 9×9-inch baking pan with parchment paper, letting the edges hang over for easy bar removal.
Step 2: Create the Crunchy Crust
Mix graham cracker crumbs, melted butter, and sugar in a bowl until the mixture looks like damp sand. Press the crumb blend firmly into the pan bottom, creating a solid foundation for your cheesecake bars.
Step 3: Whip the Creamy Filling
In a large bowl, beat cream cheese until ultra-smooth. Gradually add sugar, mixing until completely blended. Incorporate eggs one by one, ensuring each is fully mixed. Stir in vanilla extract until the mixture becomes silky and uniform.
Step 4: Build the Cheesecake Layer
Pour the cream cheese mixture over the graham cracker crust, spreading evenly to cover the entire surface with a luxurious layer.
Step 5: Craft the Raspberry Swirl
In a small saucepan, combine:Gently heat and stir until the mixture becomes slightly thickened and glossy.
Step 6: Create Marbled Magic
Drizzle the raspberry mixture over the cheesecake layer. Use a knife to create beautiful swirling patterns for a stunning marbled effect.
Step 7: Bake to Perfection
Slide the pan into the oven and bake for 35-40 minutes. Look for set edges and a center that’s slightly jiggly but not liquid.
Step 8: Cool and Chill
Remove from the oven and let cool completely at room temperature. Refrigerate for at least 3 hours to allow the bars to set perfectly.
Step 9: Serve and Enjoy
Lift the bars out using the parchment paper overhang. Slice into squares and serve chilled for a delightful dessert experience.
Simple Hacks For Raspberry Cheesecake Bars
Fun Ways To Remix Raspberry Cheesecake Bars
What Pairs Great With Raspberry Cheesecake Bars
Raspberry Cheesecake Bars Storage Made Easy
Need-To-Know Raspberry Cheesecake Bars Answers
Yes, frozen raspberries work perfectly. Just thaw and drain them before using to prevent excess moisture in the raspberry sauce.
Avoid overmixing the cream cheese mixture and bake at a consistent temperature. Also, letting the cheesecake cool gradually helps prevent surface cracks.
Absolutely! Replace graham cracker crumbs with gluten-free graham crackers or almond flour to create a gluten-free crust that’s equally delicious.
Look for set edges and a center that’s slightly jiggly but not liquid.
Print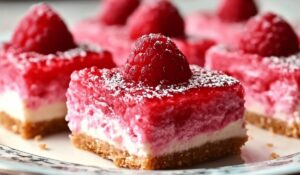
Raspberry Cheesecake Bars Recipe
- Total Time: 3 hours 55-60 minutes
- Yield: 12 1x
Description
Sinful raspberry cheesecake bars deliver a dreamy dessert experience with creamy cheesecake and tangy berry swirls. Delicate graham cracker crust and luscious raspberry layers promise pure indulgence for sweet-toothed guests you’ll surely impress.
Ingredients
Cheese Base:
- 16 oz cream cheese
- 1/2 cup granulated sugar
- 2 large eggs
- 1 tsp vanilla extract
Crust:
- 1.5 cups graham cracker crumbs
- 1/3 cup unsalted butter
- 3 tbsp granulated sugar
Raspberry Topping:
- 2 cups fresh raspberries
- 1/4 cup raspberry jam
- 2 tbsp lemon juice
- 3 tbsp granulated sugar
Instructions
- Preheat the oven to 350°F and line a 9×9-inch baking pan with parchment paper, allowing excess to hang over the sides for easy removal.
- Combine graham cracker crumbs, melted butter, and sugar in a mixing bowl, stirring until the mixture resembles coarse, moistened sand.
- Press the crumb mixture firmly and evenly into the bottom of the prepared pan, creating a compact, level crust.
- In a separate large bowl, beat cream cheese until smooth and creamy, then gradually incorporate sugar, mixing until fully integrated.
- Add eggs one at a time, blending thoroughly after each addition, then mix in vanilla extract until the cheese mixture is uniform and silky.
- Pour the cream cheese mixture over the prepared graham cracker crust, spreading it evenly to cover the entire surface.
- In a small saucepan, combine raspberries, jam, lemon juice, and sugar, gently heating and stirring until the mixture becomes slightly thickened and glossy.
- Carefully drizzle the raspberry mixture over the cheesecake layer, using a knife to create swirling patterns for a marbled effect.
- Bake for 35-40 minutes, or until the edges are set and the center is slightly jiggly but not liquid.
- Remove from the oven and allow to cool completely at room temperature, then refrigerate for at least 3 hours before cutting into bars.
- Lift the bars out using the parchment paper overhang, slice into squares, and serve chilled.
Notes
- Ensure cream cheese is at room temperature for smoother, lump-free mixing and a silkier cheesecake texture.
- Use full-fat cream cheese for richest flavor and most luxurious mouthfeel in the bars.
- Gently tap the pan after pouring the cheesecake mixture to release any air bubbles, preventing cracks during baking.
- For gluten-free version, swap graham cracker crumbs with almond flour or gluten-free cookie crumbs, maintaining the same measurements.
- Prep Time: 20 minutes
- Cook Time: 35-40 minutes
- Category: Desserts
- Method: Baking
- Cuisine: American
Nutrition
- Serving Size: 12
- Calories: 287
- Sugar: 18 g
- Sodium: 150 mg
- Fat: 17 g
- Saturated Fat: 10 g
- Unsaturated Fat: 5 g
- Trans Fat: 0 g
- Carbohydrates: 31 g
- Fiber: 2 g
- Protein: 4 g
- Cholesterol: 63 mg
Truc Tran (Kris)
Senior Food Editor
Expertise
Home Cooking, Meal Planning, Recipe Development, Baking and Pastry, Food Editor, Cooking-video Maker, Vietnamese Food Evaluation Expert
Education
Truc Tran (Kris), an experienced food writer and editor, is great at exploring and describing global cuisines, from simple street food to fancy dining. In her writing, she skillfully mixes different flavors, cooking methods, and culinary traditions, showing the unique character of various cultures through their food and drinks. On azcuisines.com, Kris highlights her knowledge, especially in Asian cuisine and worldwide traditional dishes.