
The Creamiest Red Velvet Thumbprint Cookies With Cream Cheese Recipe
Sweet treats have a special way of weaving red velvet thumbprint magic into our dessert memories.
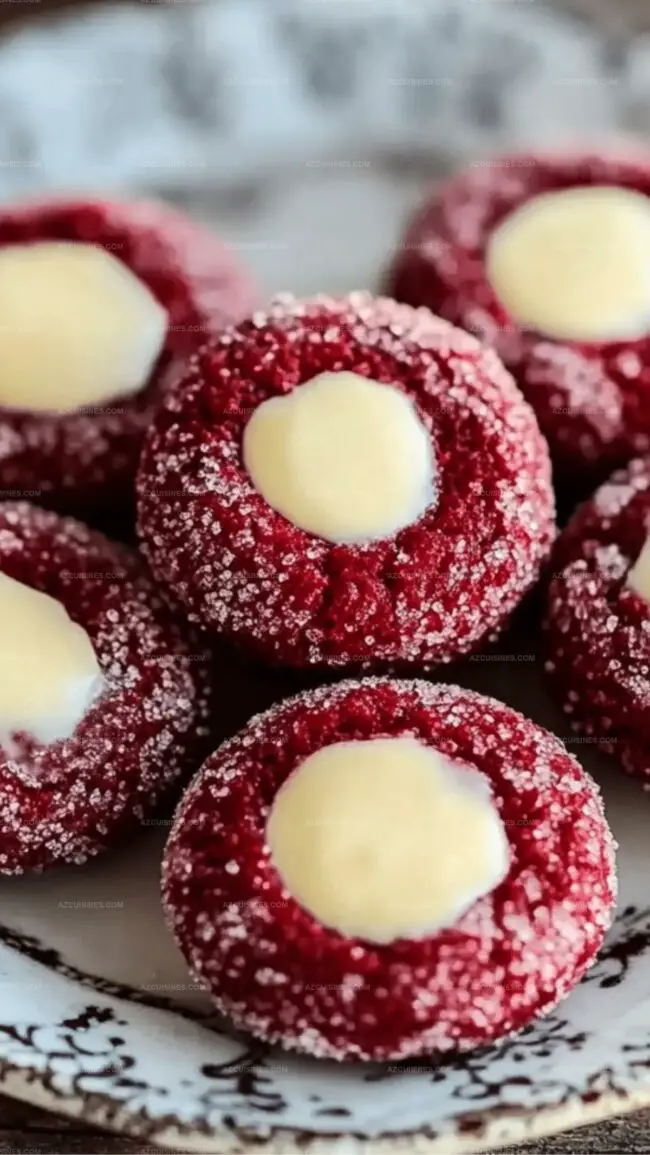
Soft, pillowy cookies beckon with their vibrant crimson hue and delicate cream cheese centers.
Chocolate lovers will appreciate the subtle cocoa undertones dancing through each tender bite.
These delightful morsels promise a perfect balance between rich flavor and delicate texture.
Crumbly yet moist, they melt effortlessly on your tongue with a luxurious smoothness.
Every single cookie becomes a miniature canvas of culinary artistry.
Bake these little gems and watch everyone’s eyes light up with pure delight.
What Makes Red Velvet Thumbprint Cookies So Special

Everything You Need for Red Velvet Thumbprints
Main Ingredients:Coloring and Flavoring:Filling and Topping:Baking Red Velvet Thumbprint Cookies Just Right
Step 1: Prepare Baking Setup
Grab a baking sheet and line it with parchment paper. Warm up the oven to a toasty 350°F.
Step 2: Mix Dry Ingredients
In a medium bowl, whisk together:Blend these ingredients until they’re completely combined and look like a uniform powder.
Step 3: Create Butter Base
In a large mixing bowl, cream butter with granulated sugar. Beat them together until the mixture becomes light, fluffy, and looks like a cloud-like texture. This should take about 3 minutes of continuous mixing.
Step 4: Add Color and Flavor
Pour into the butter mixture:Mix everything until the batter becomes smooth and develops a vibrant red color.
Step 5: Combine Wet and Dry Mixtures
Slowly fold the dry ingredients into the wet mixture. Stir gently until a consistent dough forms.
Step 6: Shape Cookie Balls
Scoop out tablespoon-sized portions of dough. Roll each portion into smooth, round balls. Place them 2 inches apart on the prepared baking sheet.
Step 7: Create Thumbprint Indentations
Use the back of a measuring spoon or your thumb to make a gentle indent in the center of each cookie.
Step 8: Bake Cookies
Place the baking sheet in the oven. Bake for 10-12 minutes until the cookie edges look set and they have slight cracks on top.
Step 9: Cool Cookies
Remove the baking sheet from the oven. Let the cookies rest and cool on the sheet for 5 minutes.
Step 10: Prepare Cream Cheese Filling
In a bowl, beat together:Mix until the filling becomes creamy and smooth.
Step 11: Fill Cookie Centers
Transfer the cream cheese filling into a piping bag or use a small spoon. Carefully fill the thumbprint indentations with the creamy mixture.
Step 12: Set and Finish
Refrigerate the cookies for 15 minutes to help the filling set. Before serving, dust the cookies with an extra sprinkle of powdered sugar.
Pro Tips for Thumbprint Cookie Perfection
Ways to Customize Red Velvet Thumbprints
What Pairs Well with Red Velvet Thumbprints
Storage Tips for Red Velvet Thumbprint Cookies

Frequently Asked Questions About Red Velvet Thumbprints
These cookies are surprisingly easy to make, even for beginner bakers. The recipe requires basic baking skills and simple ingredients you likely already have in your kitchen.
The vibrant red color comes from red food coloring added directly to the cookie dough. This creates the classic red velvet appearance that makes these cookies visually appealing.
Yes, you can prepare the cookie dough in advance and refrigerate it for up to 2 days before baking. The cream cheese filling can also be made earlier and stored in the refrigerator.
Use the back of a measuring spoon or your thumb to gently create a shallow well in the center of each cookie before baking.
Print
Red Velvet Thumbprint Cookies With Cream Cheese Recipe
- Total Time: 47 minutes
- Yield: 24 1x
Description
Red velvet thumbprint cookies bring classic Southern charm to holiday desserts, blending rich cocoa and velvety texture. Creamy cream cheese filling nestled in crimson cookie centers offers sweet indulgence you’ll crave with every delightful bite.
Ingredients
Cookies:
- 2 cups all-purpose flour
- 1/4 cup unsweetened cocoa powder
- 1/2 tsp baking powder
- 1/4 tsp salt
- 1/2 cup unsalted butter
- 3/4 cup granulated sugar
- 1 large egg
- 2 tbsp red food coloring
- 1 tsp vanilla extract
Cream Cheese Filling:
- 4 oz cream cheese
- 1/4 cup powdered sugar
- 1 tsp vanilla extract
Decoration:
- 2 tbsp powdered sugar (for dusting)
Instructions
- Preheat the oven to 350°F and line a baking sheet with parchment paper.
- Whisk together flour, cocoa powder, baking powder, and salt in a medium bowl until thoroughly combined.
- Cream butter and granulated sugar in a large mixing bowl until light and fluffy, approximately 3 minutes.
- Incorporate egg, red food coloring, and vanilla extract into the butter mixture, blending until smooth and vibrant red.
- Gradually fold dry ingredients into the wet mixture, mixing until a uniform dough forms.
- Scoop tablespoon-sized portions of dough and roll into smooth balls, placing them 2 inches apart on the prepared baking sheet.
- Create a gentle indentation in the center of each cookie using the back of a measuring spoon or your thumb.
- Bake for 10-12 minutes until edges are set and cookies appear slightly cracked.
- Remove from oven and allow cookies to cool on the baking sheet for 5 minutes.
- While cookies cool, beat cream cheese, powdered sugar, and vanilla extract until creamy and smooth.
- Transfer cream cheese filling into a piping bag or small spoon.
- Carefully fill the thumbprint indentations with cream cheese mixture.
- Refrigerate cookies for 15 minutes to set the filling.
- Dust with additional powdered sugar before serving.
Notes
- Experiment with natural food coloring alternatives like beetroot powder for a chemical-free red hue that maintains vibrant color.
- Ensure butter is room temperature for smoother mixing and better cookie texture, preventing dense or tough results.
- Chill dough for 30 minutes before shaping to prevent spreading and create more defined thumbprint shapes during baking.
- Adjust cream cheese filling consistency by adding more powdered sugar for firmer texture or a splash of milk for softer spread.
- Prep Time: 20 minutes
- Cook Time: 12 minutes
- Category: Desserts, Snacks
- Method: Baking
- Cuisine: American
Nutrition
- Serving Size: 24
- Calories: 150
- Sugar: 9 g
- Sodium: 90 mg
- Fat: 7 g
- Saturated Fat: 4 g
- Unsaturated Fat: 3 g
- Trans Fat: 0 g
- Carbohydrates: 20 g
- Fiber: 0.5 g
- Protein: 2 g
- Cholesterol: 25 mg
Truc Tran (Kris)
Senior Food Editor
Expertise
Home Cooking, Meal Planning, Recipe Development, Baking and Pastry, Food Editor, Cooking-video Maker, Vietnamese Food Evaluation Expert
Education
Truc Tran (Kris), an experienced food writer and editor, is great at exploring and describing global cuisines, from simple street food to fancy dining. In her writing, she skillfully mixes different flavors, cooking methods, and culinary traditions, showing the unique character of various cultures through their food and drinks. On azcuisines.com, Kris highlights her knowledge, especially in Asian cuisine and worldwide traditional dishes.