
Irresistible Homemade Snickers Ice Cream Bars Recipe
Crafting homemade snickers ice cream bars can unlock a world of delightful frozen dessert magic.
Sweet memories of childhood treats dance through my kitchen whenever I whip up this nostalgic creation.
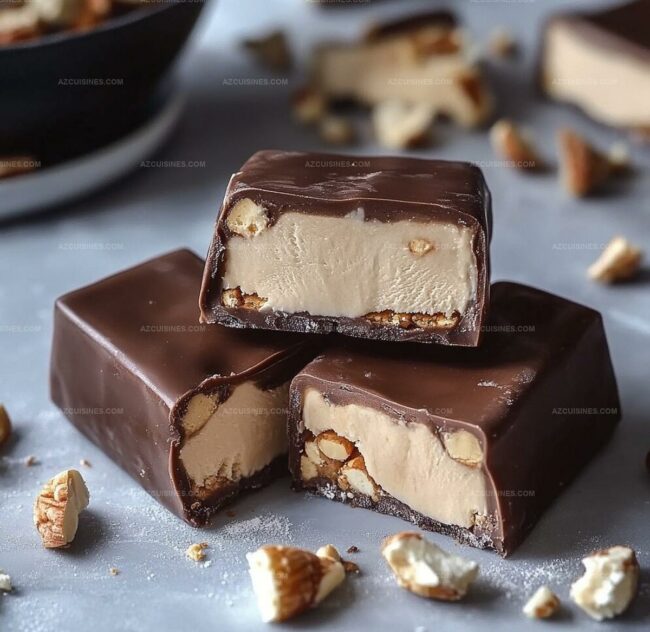
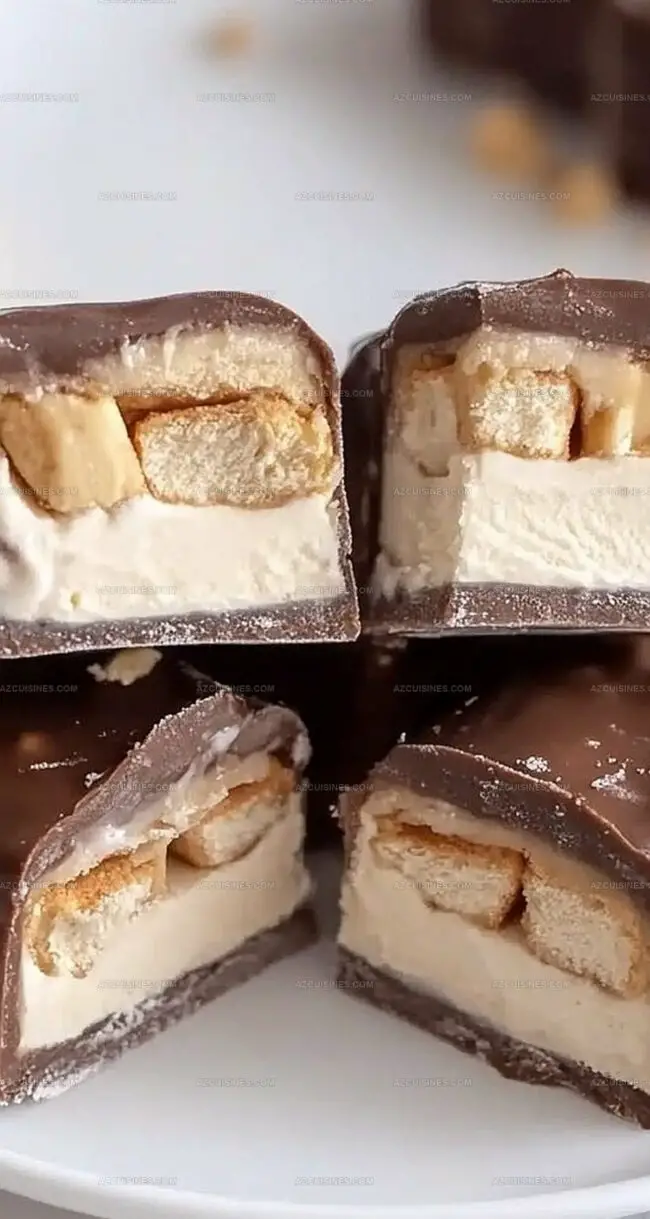
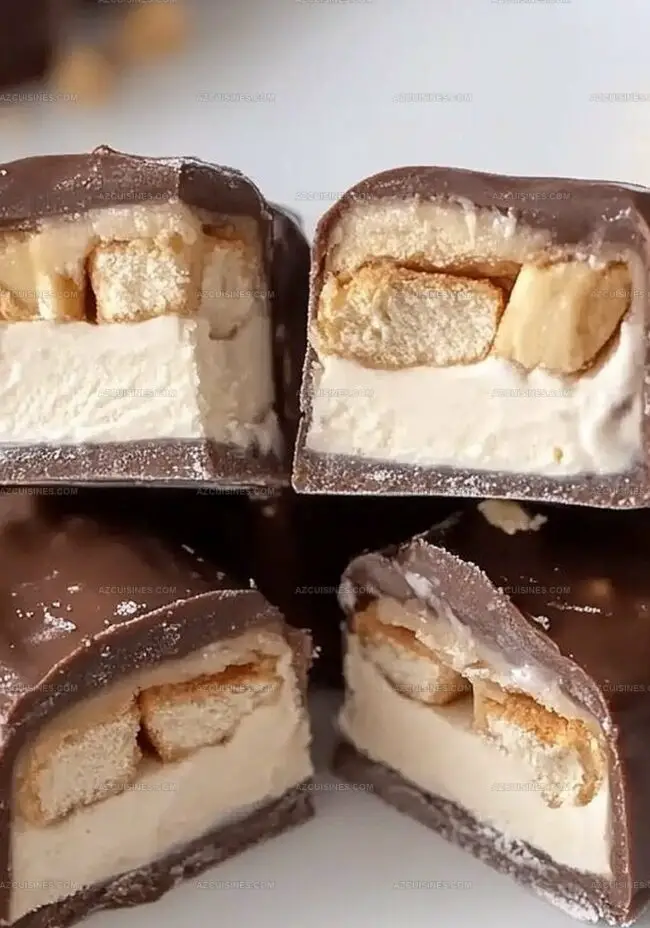
Layers of creamy chocolate, gooey caramel, and crunchy peanuts merge into one irresistible frozen delight.
Each bite promises a symphony of textures that will make you weak in the knees.
Cool summer afternoons find their perfect companion in these decadent bars.
Rich chocolate coating and silky ice cream create a masterpiece that feels like pure indulgence.
You are about to embark on a delicious journey that transforms simple ingredients into an extraordinary dessert experience.
Reasons You’ll Love Snickers Ice Cream Bars
What Goes into a Snickers Ice Cream Bar
Ice Cream Base:Peanut Butter Caramel:Chocolate Coating:Toppings:How to Make These Frozen Treats Easily

Step 1: Whip Up the Creamy Ice Cream Base
In a high-speed blender, combine all ingredients for the ice cream layer. Blend until ultra-smooth and velvety.
Pour the luscious mixture into a parchment-lined 8×5 loaf pan, ensuring the surface is even. Slide the pan into the freezer and let it set for several hours until completely firm.
Step 2: Create Gooey Peanut Butter Caramel Layer
Grab a mixing bowl and blend the peanut butter caramel ingredients until silky and well-incorporated. Once the ice cream layer has frozen solid, generously spread the caramel over the top.
Sprinkle a handful of crunchy peanuts across the surface and gently press them into the caramel for extra texture. Return the pan to the freezer for another few hours to solidify.
Step 3: Craft Decadent Chocolate-Coated Bars
Remove the frozen layers from the freezer. Slice the block into 8 equal-sized bars using a sharp knife.
In a microwave-safe bowl, melt chocolate with coconut oil, stirring until glossy and smooth. Carefully dip each bar into the melted chocolate, ensuring complete coverage.
Place the chocolate-drenched bars back in the freezer to harden the coating.
Step 4: Serve and Enjoy
When ready to indulge, let the bars sit at room temperature for a few minutes to soften slightly.
This allows for a creamier, more luxurious bite. Store any remaining bars in an airtight container in the freezer for future enjoyment.
Frozen Dessert Tips You Shouldn’t Skip
Ways to Switch Up Snickers Ice Cream Bars
Tasty Pairings for Snickers Ice Cream Bars
Keep Your Ice Cream Bars Smooth and Sweet
Snickers Ice Cream Bar FAQs for Dessert Lovers
Yes, the recipe uses plant-based ingredients like dairy-free ice cream and coconut oil to create a vegan version of the classic Snickers bar.
This recipe is moderately easy, requiring basic blending and layering skills with no complex cooking techniques needed.
You can swap dairy-free ice cream flavors and use alternative nut butters like almond butter instead of peanut butter to customize the bars.
You’ll need a high-speed blender, 8×5 loaf pan, parchment paper, and basic mixing tools like spatulas and bowls.
Print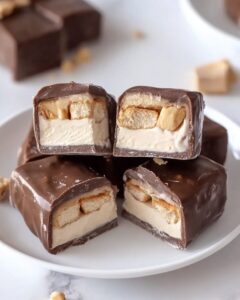
Snickers Ice Cream Bars Recipe
- Total Time: Several hours (approximately 6-8 hours including freezing)
- Yield: 8 1x
Description
Sweet summer memories melt into these homemade Snickers Ice Cream Bars, blending classic candy bar flavors with creamy frozen delight. Cool chocolate, caramel, and nougat layers create an irresistible treat you’ll crave all season long.
Ingredients
Main Ingredients:
- 7 ounces (200 ml) full-fat canned coconut milk
- 3/4 cup (180 ml) natural peanut butter
- 6–9 ounces (170–255 g) dark or semi-sweet chocolate
- 1/2 cup (75 g) peanuts
Sweeteners and Flavors:
- 2 tablespoons honey or maple syrup
- 1 teaspoon vanilla extract
Seasoning and Binding:
- 1/2 teaspoon salt
- 1–2 teaspoons coconut oil
Instructions
- Prepare the blender and combine the designated ice cream layer components, processing until achieving a velvety consistency. Carefully transfer the mixture into a parchment-lined 8×5 loaf pan, ensuring even distribution. Place in the freezer for approximately 3-4 hours until completely solidified.
- Create the peanut butter caramel by thoroughly whisking the ingredients until obtaining a silky, uniform texture. Gently spread the caramel across the frozen initial layer, ensuring complete coverage. Sprinkle chopped peanuts evenly over the caramel surface, delicately pressing them to secure attachment. Return to the freezer for an additional 2-3 hours.
- Remove the frozen layered dessert from the pan using parchment paper edges. Slice into 8 uniform rectangular portions using a sharp knife warmed under hot water to ensure clean cuts.
- Prepare the chocolate coating by melting chocolate with coconut oil in a double boiler or microwave, stirring until achieving a glossy, smooth consistency. Carefully dip each frozen bar into the melted chocolate, ensuring complete coverage. Place coated bars on a parchment-lined tray.
- Return the chocolate-covered bars to the freezer for 15-20 minutes to allow the chocolate shell to harden completely. Transfer to an airtight container for storage.
- When ready to serve, remove bars from the freezer and allow to soften at room temperature for 2-3 minutes to enhance creaminess. Enjoy immediately for optimal texture and flavor.
Notes
- Blend ingredients thoroughly to prevent icy chunks and ensure a smooth, creamy texture.
- Use room temperature ingredients for easier mixing and better blending consistency.
- Opt for natural peanut butter to reduce added sugars and enhance the authentic nutty flavor.
- Freeze bars on a flat surface to maintain an even coating and prevent uneven chocolate coverage.
- Prep Time: 20 minutes
- Cook Time: 0 minutes
- Category: Desserts, Snacks
- Method: Blending
- Cuisine: American
Nutrition
- Serving Size: 8
- Calories: 270
- Sugar: 10 g
- Sodium: 150 mg
- Fat: 18 g
- Saturated Fat: 9 g
- Unsaturated Fat: 9 g
- Trans Fat: 0 g
- Carbohydrates: 22 g
- Fiber: 3 g
- Protein: 6 g
- Cholesterol: 0 mg
Truc Tran (Kris)
Senior Food Editor
Expertise
Home Cooking, Meal Planning, Recipe Development, Baking and Pastry, Food Editor, Cooking-video Maker, Vietnamese Food Evaluation Expert
Education
Truc Tran (Kris), an experienced food writer and editor, is great at exploring and describing global cuisines, from simple street food to fancy dining. In her writing, she skillfully mixes different flavors, cooking methods, and culinary traditions, showing the unique character of various cultures through their food and drinks. On azcuisines.com, Kris highlights her knowledge, especially in Asian cuisine and worldwide traditional dishes.