
Homemade Traditional Japanese Fried Rice Recipe: A Flavorful Delight
Rice lovers often crave authentic japanese fried rice that transports taste buds straight to tokyo’s bustling streets.
Skilled home cooks can recreate this delectable dish with simple ingredients and minimal effort.
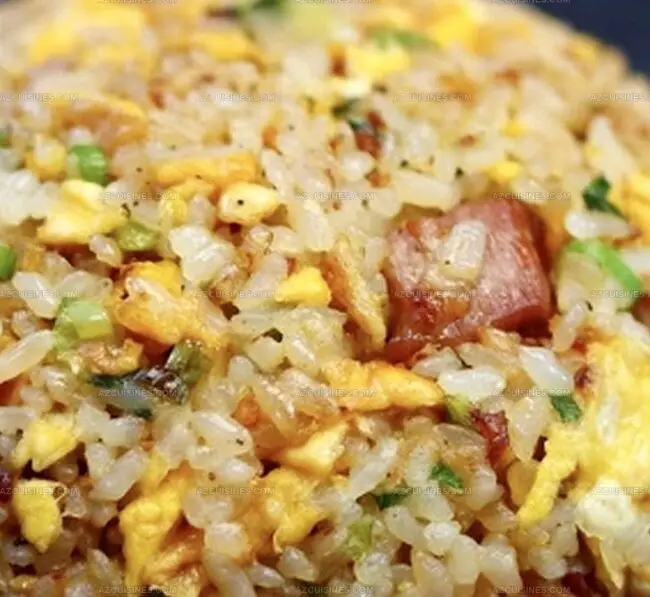
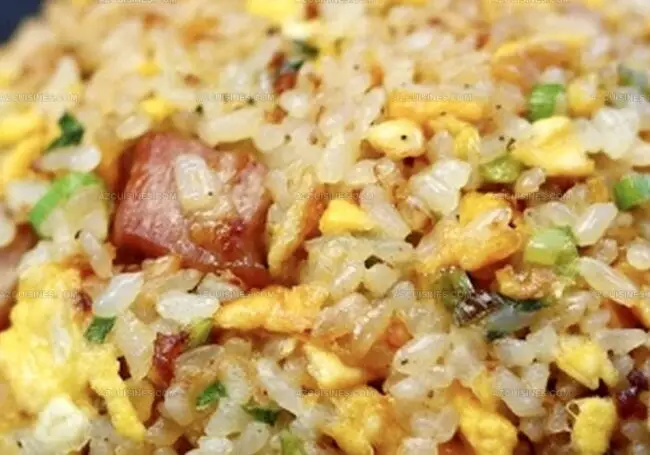
Crispy grains dance with vibrant vegetables and proteins, creating a symphony of flavors.
Fragrant sesame oil adds depth and complexity to each carefully crafted bite.
Multiple generations have cherished this classic comfort food across japan’s culinary landscape.
Familiar yet exciting, the recipe promises a delightful culinary adventure you won’t soon forget.
Dive into this delicious journey and unlock the secrets of perfect japanese fried rice.
Why Traditional Japanese Fried Rice Is Full Of Flavor
What You’ll Need For Traditional Japanese Fried Rice
Main Ingredients:Aromatics and Seasonings:Liquid Seasonings:Stir Up Traditional Japanese Fried Rice With These Steps
Step 1: Craft Kombu Seasoning
Blend kombu and salt thoroughly. Transfer to a sealed container and let the flavors meld for a week before using.
Step 2: Prepare Perfect Rice
Wash rice until water becomes transparent. Place rice, water, and vegetable oil in a rice cooker or pot.
Follow rice cooker instructions or boil, then simmer on low heat covered for 20 minutes. Cool completely and refrigerate.
Step 3: Ready Your Ingredients
Season pork belly with:Prepare additional ingredients:Step 4: Create Delicious Fried Rice
Warm a wok or large skillet on medium heat. Sear pork belly until golden and crispy.
Add green onions, garlic, and ginger. Sauté until aromatic.
Create space in pan and scramble eggs until softly set. Introduce cold rice, breaking apart any clumps.
Mix thoroughly. Season with:Stir continuously until heated evenly.
Step 5: Plate and Garnish
Transfer to serving dish. Sprinkle additional green onions on top if desired.
Go-To Tips For Traditional Japanese Fried Rice
Flavor Swaps For Traditional Japanese Fried Rice
Pairing Picks For Traditional Japanese Fried Rice
Best Way To Store Traditional Japanese Fried Rice
Traditional Japanese Fried Rice FAQs You’ll Love
Kombu salt adds a unique umami flavor to dishes, infusing the salt with the rich, oceanic taste of dried kelp, creating a more complex and depth of seasoning compared to plain salt.
Yes, you can substitute pork belly with chicken, beef, or even tofu for a vegetarian version. Just ensure the meat is cut into small pieces and cooked until crispy.
Cold rice has less moisture and firmer texture, which prevents the rice from becoming mushy when stir-frying. It helps achieve the perfect separated and slightly crispy rice grains in the final dish.
Print
Traditional Japanese Fried Rice Recipe
- Total Time: 40 minutes
- Yield: 3-4 1x
Description
Sizzling woks and umami flavors dance together in this authentic Japanese fried rice, blending centuries-old culinary traditions with modern kitchen magic. Crisp vegetables, tender proteins, and perfectly seasoned rice invite you to savor a delicious journey through Japan’s beloved comfort cuisine.
Ingredients
Protein:
- 100g pork belly
- 2 eggs
Aromatics and Seasonings:
- 50g green onion/scallion, chopped
- 15g garlic, peeled and minced
- 10g ginger, peeled and minced
- 1/2 tablespoon (7.5 milliliters) sake
- 1/2 tablespoon (7.5 milliliters) soy sauce
- 1/3 teaspoon (2 grams) kombu salt
- 1/4 teaspoon (1 gram) kombu salt (for pork belly)
- Black pepper to taste
- Black pepper (for pork belly)
Base Ingredient:
- 240 grams (8.5 ounces) cold rice
Kombu Salt (Optional):
- 50 grams salt
- 4 grams kombu (dried kelp)
Rice Cooking Ingredients:
- 500 grams rice (measured before washing)
- 550 milliliters (18.6 fluid ounces) water
- 1 tablespoon (15 milliliters) vegetable oil
Instructions
- Craft kombu salt by thoroughly blending salt with finely ground kombu, then store in an airtight container for minimum one week to develop robust flavor profile.
- Meticulously rinse rice until water becomes transparent. Combine rice, water, and vegetable oil in rice cooker or pot. Cook following precise instructions, typically 20 minutes on low heat. Cool completely, then refrigerate until chilled.
- Prepare ingredients methodically: Season pork belly with kombu salt and freshly cracked black pepper. Finely chop green onions, mince garlic and ginger, and whisk eggs until uniformly blended.
- Ignite wok or large skillet over medium-high heat. Sear pork belly until golden and crisp, developing deep caramelized edges. Introduce aromatics – green onions, garlic, and ginger – and sauté until fragrant, approximately 2 minutes.
- Maneuver pork mixture to pan’s periphery. Pour beaten eggs into vacant space, scrambling gently until just set but not fully cooked.
- Incorporate cold rice, breaking apart any stubborn clusters. Integrate all components thoroughly, allowing rice to absorb surrounding flavors and achieve slight toasting.
- Season comprehensively with kombu salt, black pepper, sake, and soy sauce. Continuously stir and toss, ensuring even heat distribution and flavor melding.
- Plate immediately, garnishing with additional sliced green onions for fresh, vibrant finish. Serve piping hot to maximize textural complexity and aromatic intensity.
Notes
- Elevate flavor intensity by using day-old refrigerated rice, which prevents clumping and ensures perfect texture during stir-frying.
- Customize protein options by substituting pork belly with tofu, chicken, or shrimp for dietary preferences or vegetarian adaptations.
- Manage heat control carefully when stir-frying to prevent burning ingredients and maintain authentic wok-style caramelization.
- Enhance umami depth by experimenting with additional seasonings like mirin, bonito flakes, or sesame oil for complex flavor profiles.
- Prep Time: 20 minutes
- Cook Time: 20 minutes
- Category: Lunch, Dinner, Snacks
- Method: Frying
- Cuisine: Japanese
Nutrition
- Serving Size: 45720
- Calories: 232
- Sugar: 1g
- Sodium: 823mg
- Fat: 11g
- Saturated Fat: 3g
- Unsaturated Fat: 5g
- Trans Fat: 0g
- Carbohydrates: 27g
- Fiber: 1g
- Protein: 9g
- Cholesterol: 186mg
Truc Tran (Kris)
Senior Food Editor
Expertise
Home Cooking, Meal Planning, Recipe Development, Baking and Pastry, Food Editor, Cooking-video Maker, Vietnamese Food Evaluation Expert
Education
Truc Tran (Kris), an experienced food writer and editor, is great at exploring and describing global cuisines, from simple street food to fancy dining. In her writing, she skillfully mixes different flavors, cooking methods, and culinary traditions, showing the unique character of various cultures through their food and drinks. On azcuisines.com, Kris highlights her knowledge, especially in Asian cuisine and worldwide traditional dishes.