The Best Homemade Chocolate-Covered Ice Cream Bars Recipe Ever
Crafting delectable homemade chocolate-covered ice cream bars might seem like a complex culinary adventure.
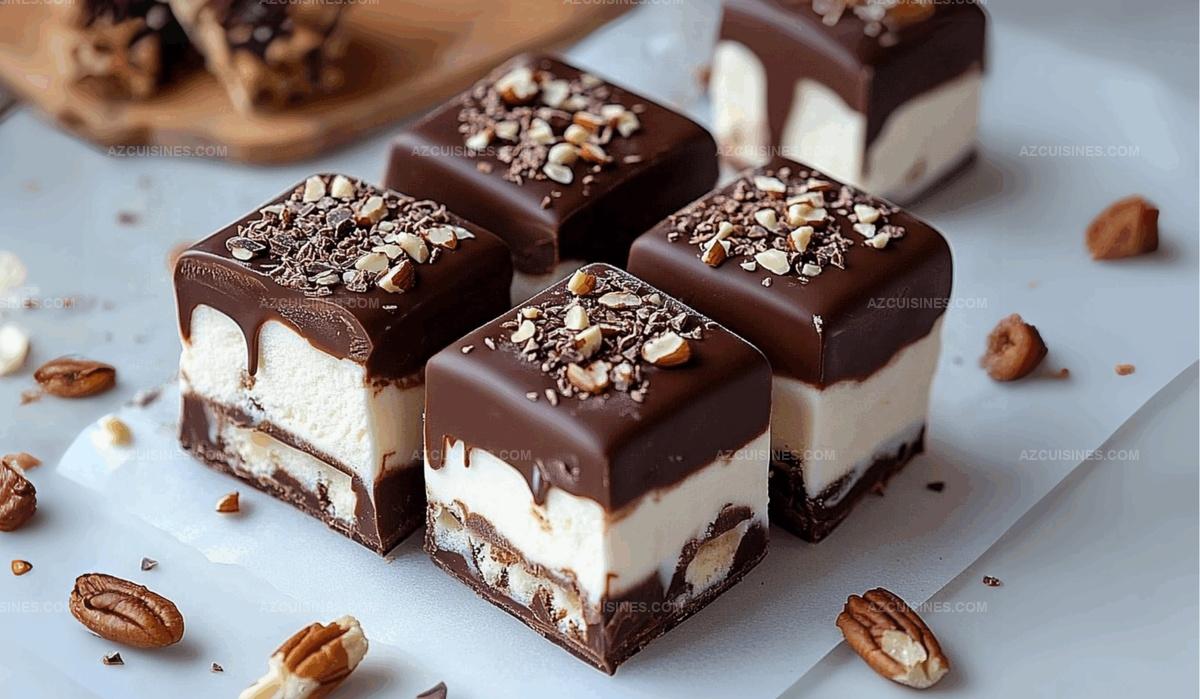
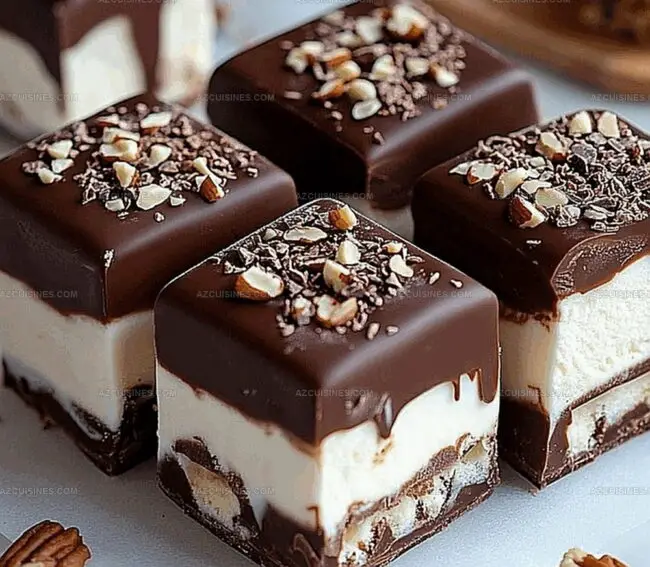
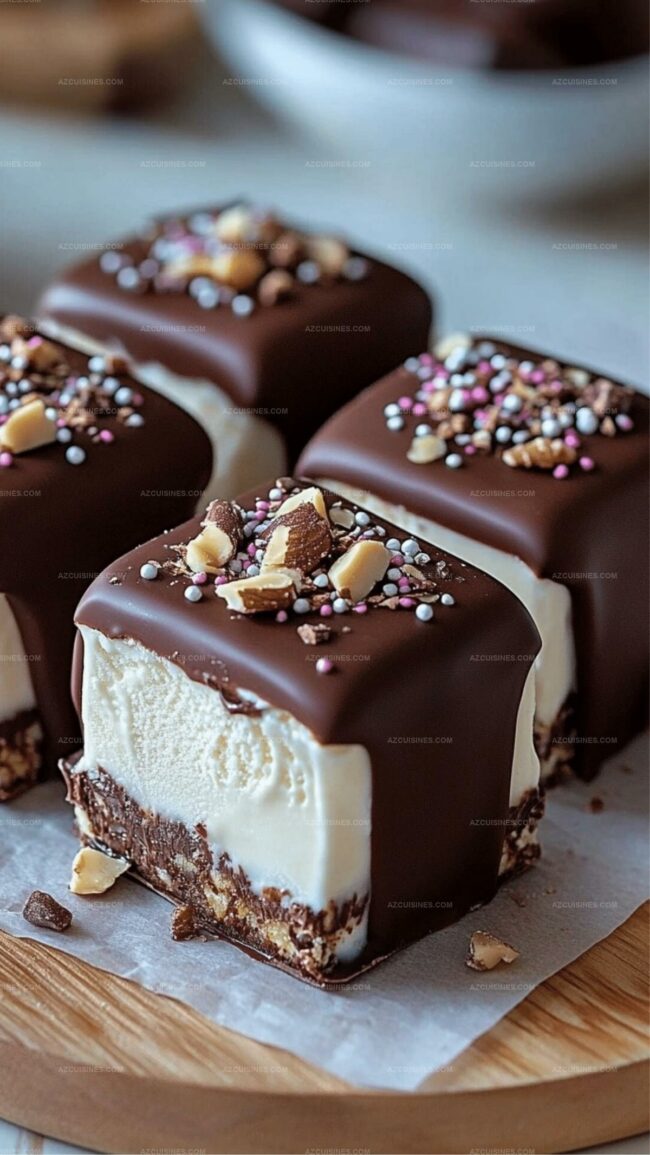
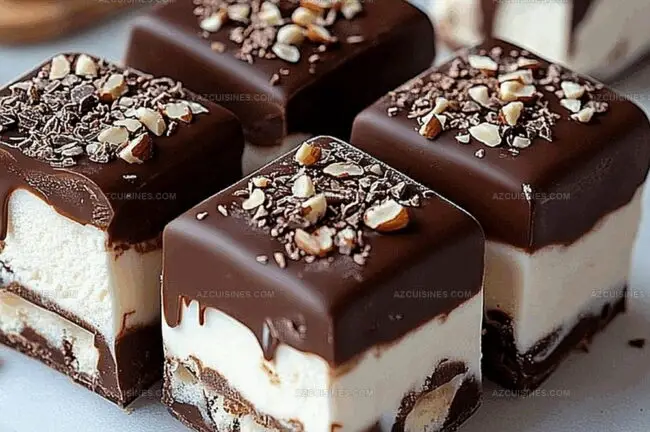
Smooth vanilla ice cream nestled between two crisp cookies creates a dreamy base.
Chilled treats sparkle with rich chocolate coating that crackles delightfully when you bite through.
Creamy layers meld together in a symphony of sweet textures.
Summer afternoons call for something special and cool.
Kids and adults alike will swoon over these decadent frozen delights.
Your kitchen becomes a gourmet dessert workshop with this simple yet impressive recipe.
Why You’ll Crave Homemade Chocolate-Covered Ice Cream Bars
Everything In Homemade Chocolate-Covered Ice Cream Bars
Ice Cream Base:Chocolate Coating:Optional Toppings:Additional Ingredients:How To Make Homemade Chocolate-Covered Ice Cream Bars
Step 1: Prepare the Freezing Canvas
Line a 9×9-inch baking pan with parchment paper, letting extra paper hang over the sides for easy lifting later.
Step 2: Soften the Ice Cream Base
Allow vanilla ice cream to sit at room temperature, becoming soft and spreadable without fully melting.
Step 3: Create a Smooth Ice Cream Layer
Spread the softened ice cream evenly across the pan, forming a perfectly flat surface about 1-inch thick.
Step 4: Deep Freeze the Ice Cream Slab
Place the pan in the freezer for 2 hours until the ice cream becomes completely solid and firm.
Step 5: Shape Your Frozen Treats
Lift the frozen slab out using parchment paper edges and slice into neat rectangular bars with a sharp knife.
Step 6: Chill the Bars
Return the cut bars to the freezer while preparing the chocolate coating.
Step 7: Set Up the Chocolate Melting Station
Create a double boiler by positioning a heat-safe bowl over a pot of gently simmering water, ensuring the bowl doesn’t touch the water.
Step 8: Craft the Chocolate Coating
Melt ingredients in the double boiler:Stir continuously until the mixture becomes smooth and glossy.
Step 9: Cool the Chocolate Mixture
Remove from heat and let the chocolate rest for 3-4 minutes, allowing it to slightly thicken.
Step 10: Dunk and Coat
Quickly dip each frozen bar into the melted chocolate, using a fork to ensure complete coverage.
Step 11: Add Optional Crunch
Sprinkle with:Step 12: Final Freeze
Place coated bars on a parchment-lined baking sheet and freeze for 15-20 minutes until chocolate hardens completely.
Step 13: Store Your Decadent Treats
Keep the chocolate-covered ice cream bars in an airtight container in the freezer for up to one week.
Pro Tips For Homemade Chocolate-Covered Ice Cream Bars
Cool Ways To Change Homemade Chocolate-Covered Ice Cream Bars
Sweet Pairings With Homemade Chocolate-Covered Ice Cream Bars
Keep Homemade Chocolate-Covered Ice Cream Bars Frozen Right
FAQs On Homemade Chocolate-Covered Ice Cream Bars
Yes, you can substitute vanilla with any flavor you prefer like chocolate, strawberry, or mint chocolate chip. Just ensure the ice cream is high-quality and creamy.
Dark chocolate provides the best flavor and texture, but milk or semi-sweet chocolate can also work well. Choose a high-quality chocolate with at least 60% cocoa content for best results.
Keep the ice cream bars completely frozen and work quickly when dipping. Have your chocolate coating ready and work in a cool environment. Work with just 2-3 bars at a time, keeping the rest in the freezer.
Absolutely! You can prepare these bars up to a week in advance.
Print
Homemade Chocolate-Covered Ice Cream Bars Recipe
- Total Time: 2 hours 15-20 minutes
- Yield: 8 1x
Description
Indulgent chocolate-covered ice cream bars bring classic dessert nostalgia with creamy vanilla ice cream enrobed in rich chocolate shell. Cool summer treats like these promise pure bliss when sliced and served chilled for maximum deliciousness.
Ingredients
Main Ingredients:
- 4 cups vanilla ice cream
- 2 cups dark chocolate, chopped
- 1/2 cup heavy cream
Stabilizing/Coating Ingredients:
- 2 tbsp coconut oil
- 1/4 cup unsalted butter
Optional Mix-Ins/Toppings:
- 1/3 cup chopped nuts (almonds or peanuts)
- 2 tbsp chocolate sprinkles
Instructions
- Line a 9×9-inch baking pan with parchment paper, ensuring excess paper hangs over the edges for easy removal.
- Soften vanilla ice cream at room temperature for 5-10 minutes until easily spreadable but not melting completely.
- Spread the softened ice cream evenly into the prepared pan, creating a smooth, uniform layer approximately 1-inch thick.
- Freeze the ice cream layer for 2 hours or until completely solid and firm to the touch.
- Remove the frozen ice cream slab from the pan using the parchment paper overhang and cut into rectangular bars using a sharp knife.
- Return the cut bars to the freezer while preparing the chocolate coating.
- Create a double boiler by placing a heat-safe bowl over a pot of simmering water, ensuring the bottom of the bowl doesn’t touch the water.
- Melt dark chocolate, heavy cream, coconut oil, and butter in the double boiler, stirring continuously until smooth and glossy.
- Remove chocolate mixture from heat and let cool for 3-4 minutes to reach a slightly thickened consistency.
- Quickly dip each frozen ice cream bar into the melted chocolate, using a fork to ensure complete coverage.
- Optional: Immediately sprinkle chopped nuts or chocolate sprinkles over the chocolate-coated bars.
- Place the coated bars on a parchment-lined baking sheet and freeze for an additional 15-20 minutes until chocolate sets completely.
- Store the chocolate-covered ice cream bars in an airtight container in the freezer for up to one week.
Notes
- Achieve the perfect ice cream consistency by letting it soften just enough to spread smoothly without melting completely.
- Use a sharp, clean knife dipped in hot water for precise, clean cuts when slicing the frozen ice cream slab into bars.
- Create a flawless chocolate coating by maintaining the right temperature – too hot will melt the ice cream, too cool will create a thick, uneven layer.
- Experiment with alternative coatings like white chocolate, salted caramel, or crushed cookie crumbs for unique flavor variations.
- Prep Time: 15-20 minutes
- Cook Time: 2 hours
- Category: Desserts, Snacks
- Method: Freezing
- Cuisine: American
Nutrition
- Serving Size: 8
- Calories: 350
- Sugar: 25 g
- Sodium: 90 mg
- Fat: 24 g
- Saturated Fat: 14 g
- Unsaturated Fat: 8 g
- Trans Fat: 0 g
- Carbohydrates: 30 g
- Fiber: 1 g
- Protein: 4 g
- Cholesterol: 40 mg
Truc Tran (Kris)
Senior Food Editor
Expertise
Home Cooking, Meal Planning, Recipe Development, Baking and Pastry, Food Editor, Cooking-video Maker, Vietnamese Food Evaluation Expert
Education
Truc Tran (Kris), an experienced food writer and editor, is great at exploring and describing global cuisines, from simple street food to fancy dining. In her writing, she skillfully mixes different flavors, cooking methods, and culinary traditions, showing the unique character of various cultures through their food and drinks. On azcuisines.com, Kris highlights her knowledge, especially in Asian cuisine and worldwide traditional dishes.